Advanced Graph Editing
In this document, we will explore some advanced graph editing features available in Joint that can enhance your workflow and improve productivity when working with complex graphs.
Jump to Node
You can press the 'space' key on the graph editor to immediately center the view on the selected node(s).
Sub Graph System
Joint Editor supports Sub Graphs.
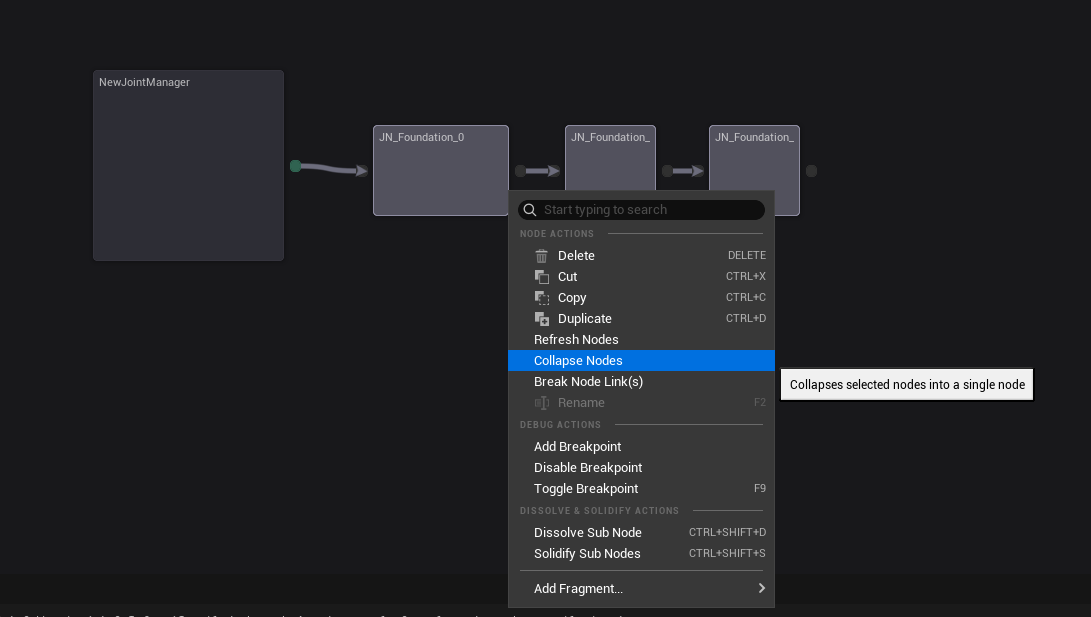
You can create a sub graph by selecting multiple nodes and right-clicking to open the context menu, then selecting Collapse Nodes - this will create a new composite node that contains new sub graph with the selected nodes.
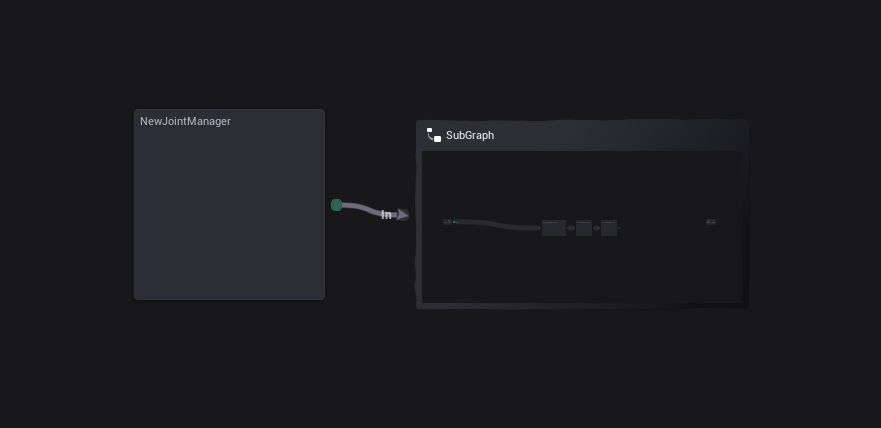
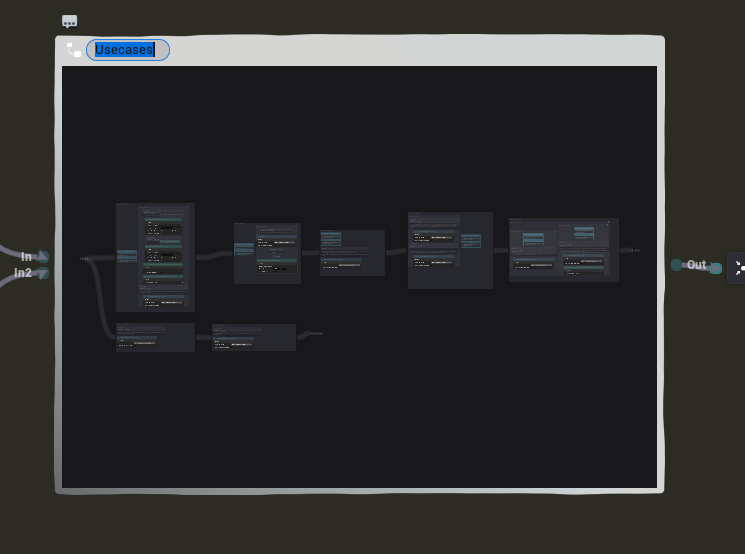
Composite nodes provide a previewer that shows the sub graph, and you can even edit the sub graph on this previewer!
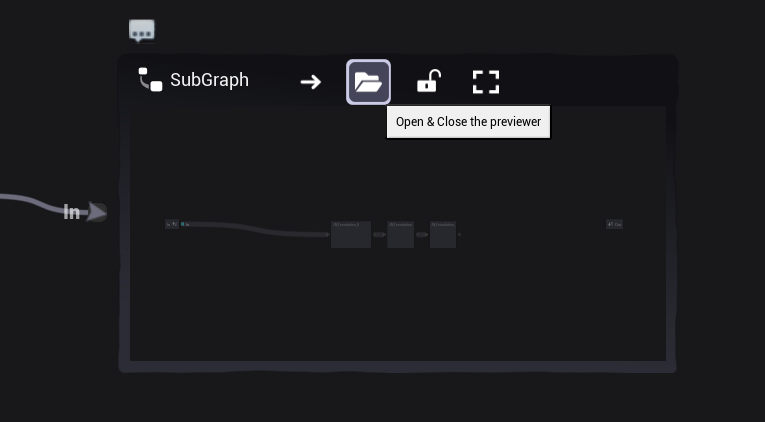
If you put your mouse cursor above the node's top bar, you can see a little button drawer is showing up. You can press the Edit Graph button to open the sub graph editor, close and open the previewer, lock the previewer to prevent it from updating, and make the previewer center on the sub graph.
This is how the composite node looks like when the previewer is closed.
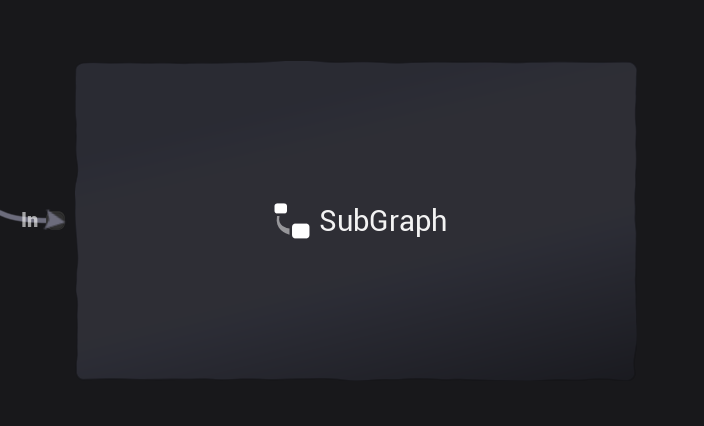
closing the previewer will save some performance, especially when the sub graph is complex.
You can rename your graph by pressing F2 when your composite node is selected, or by right-clicking the node and selecting Rename Node.
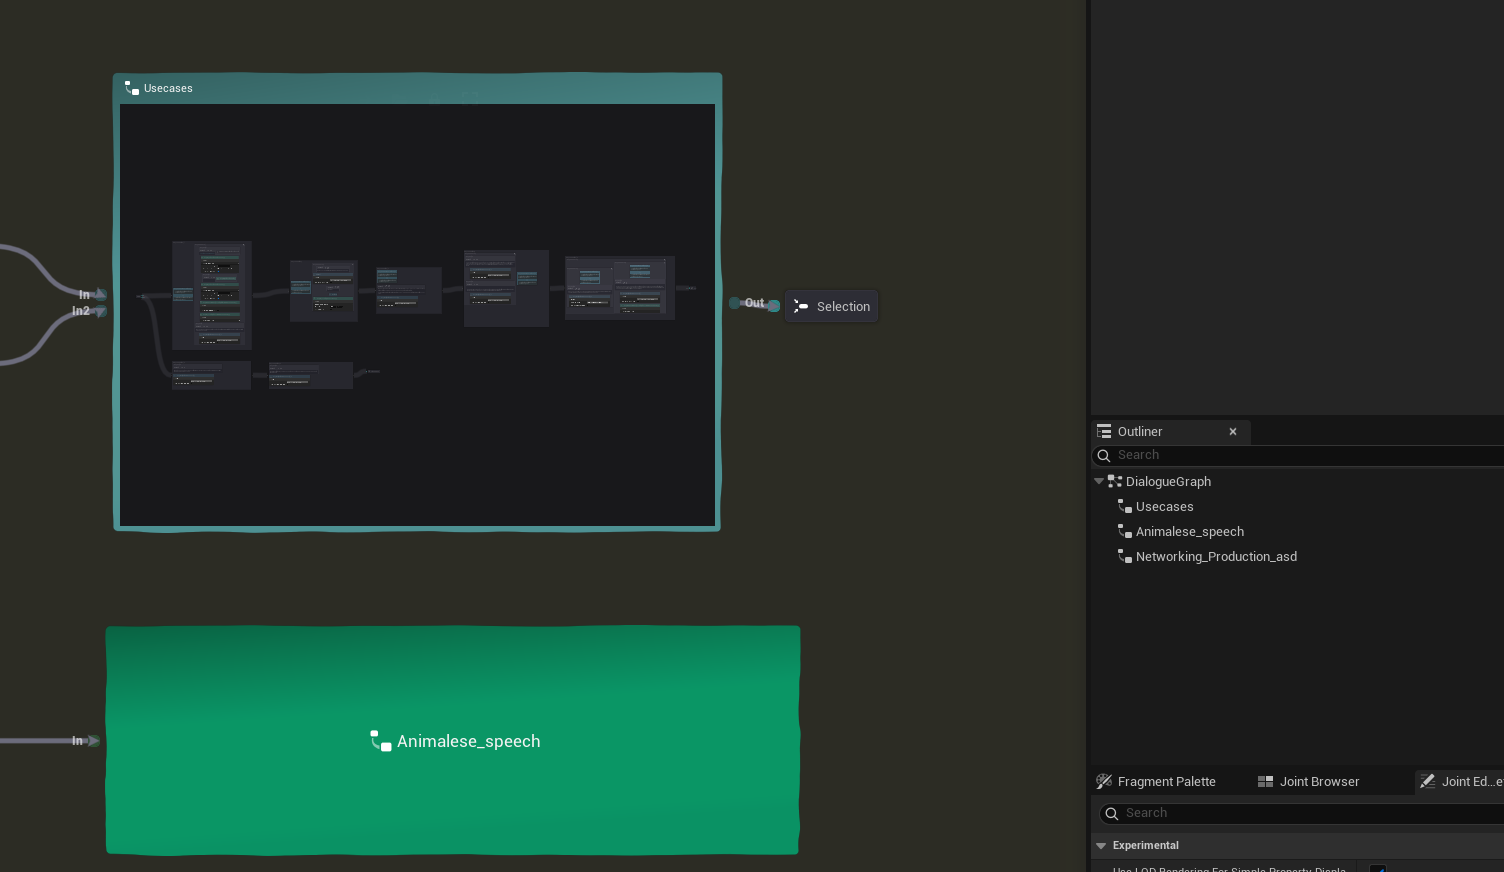
You can access the sub graph from the outliner tab of the editor as well - double-clicking the name of the graph in the outliner will open the graph panel for the graph.
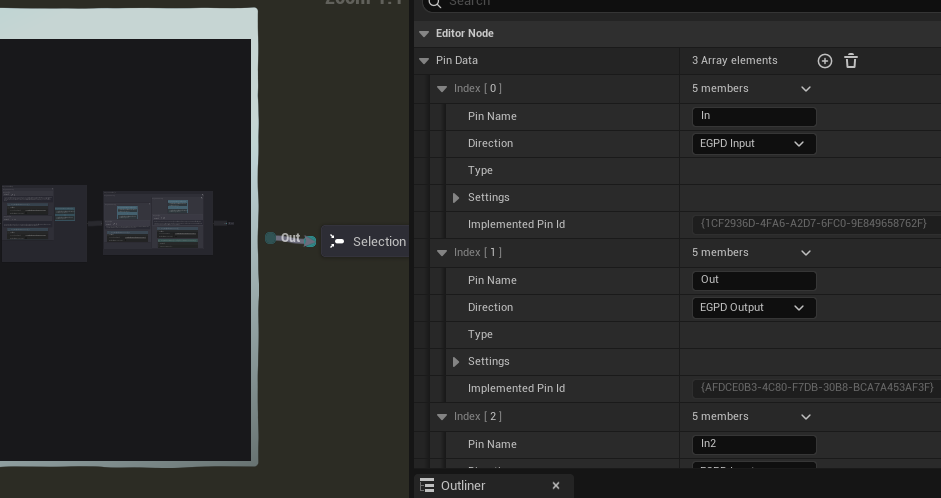
You can drag pins between nodes and the composite node (or its tunnel node in the sub graph), and the corresponding input/output pins will be created automatically in both directions.
Or you can manually create input/output pins by modifying the composite node (or its tunnel node in the sub graph)'s Pin Data property in the details panel as well.
- You can change its color with Node Color property on the detail panel as well.
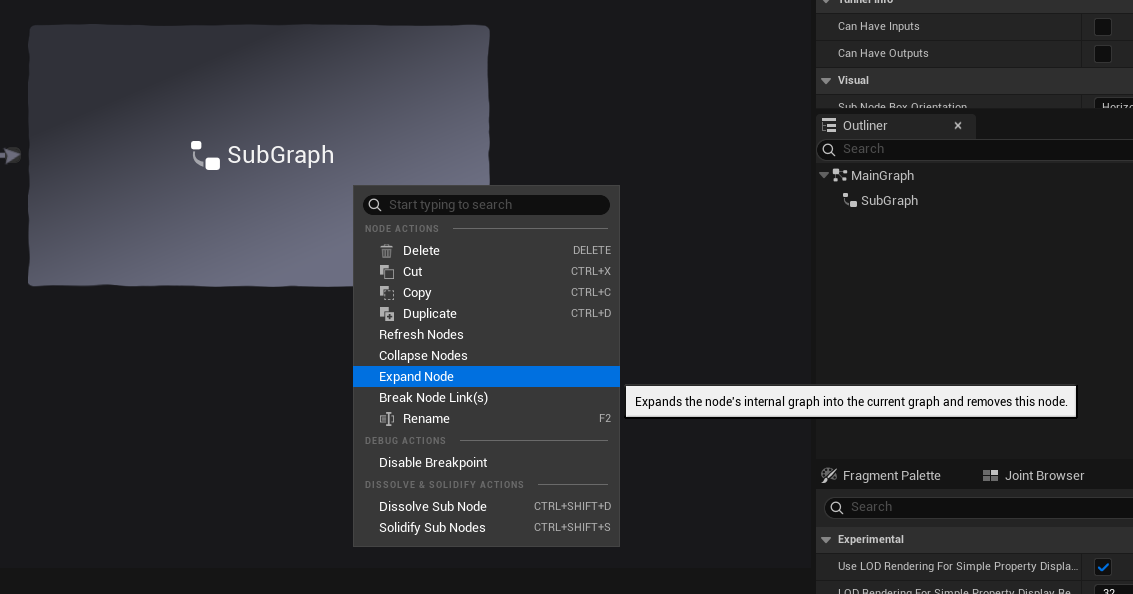
You can also expand the sub graph by right-clicking the node and selecting Expand Node.
This will replace the composite node with its internal nodes, and all the connections will be restored as well.
Dissolving & Solidifying Nodes
Node Dissolving is a feature that allows you to collapse the node's body into the parent node - allowing you to save some space in the graph and make it looks less cluttered.
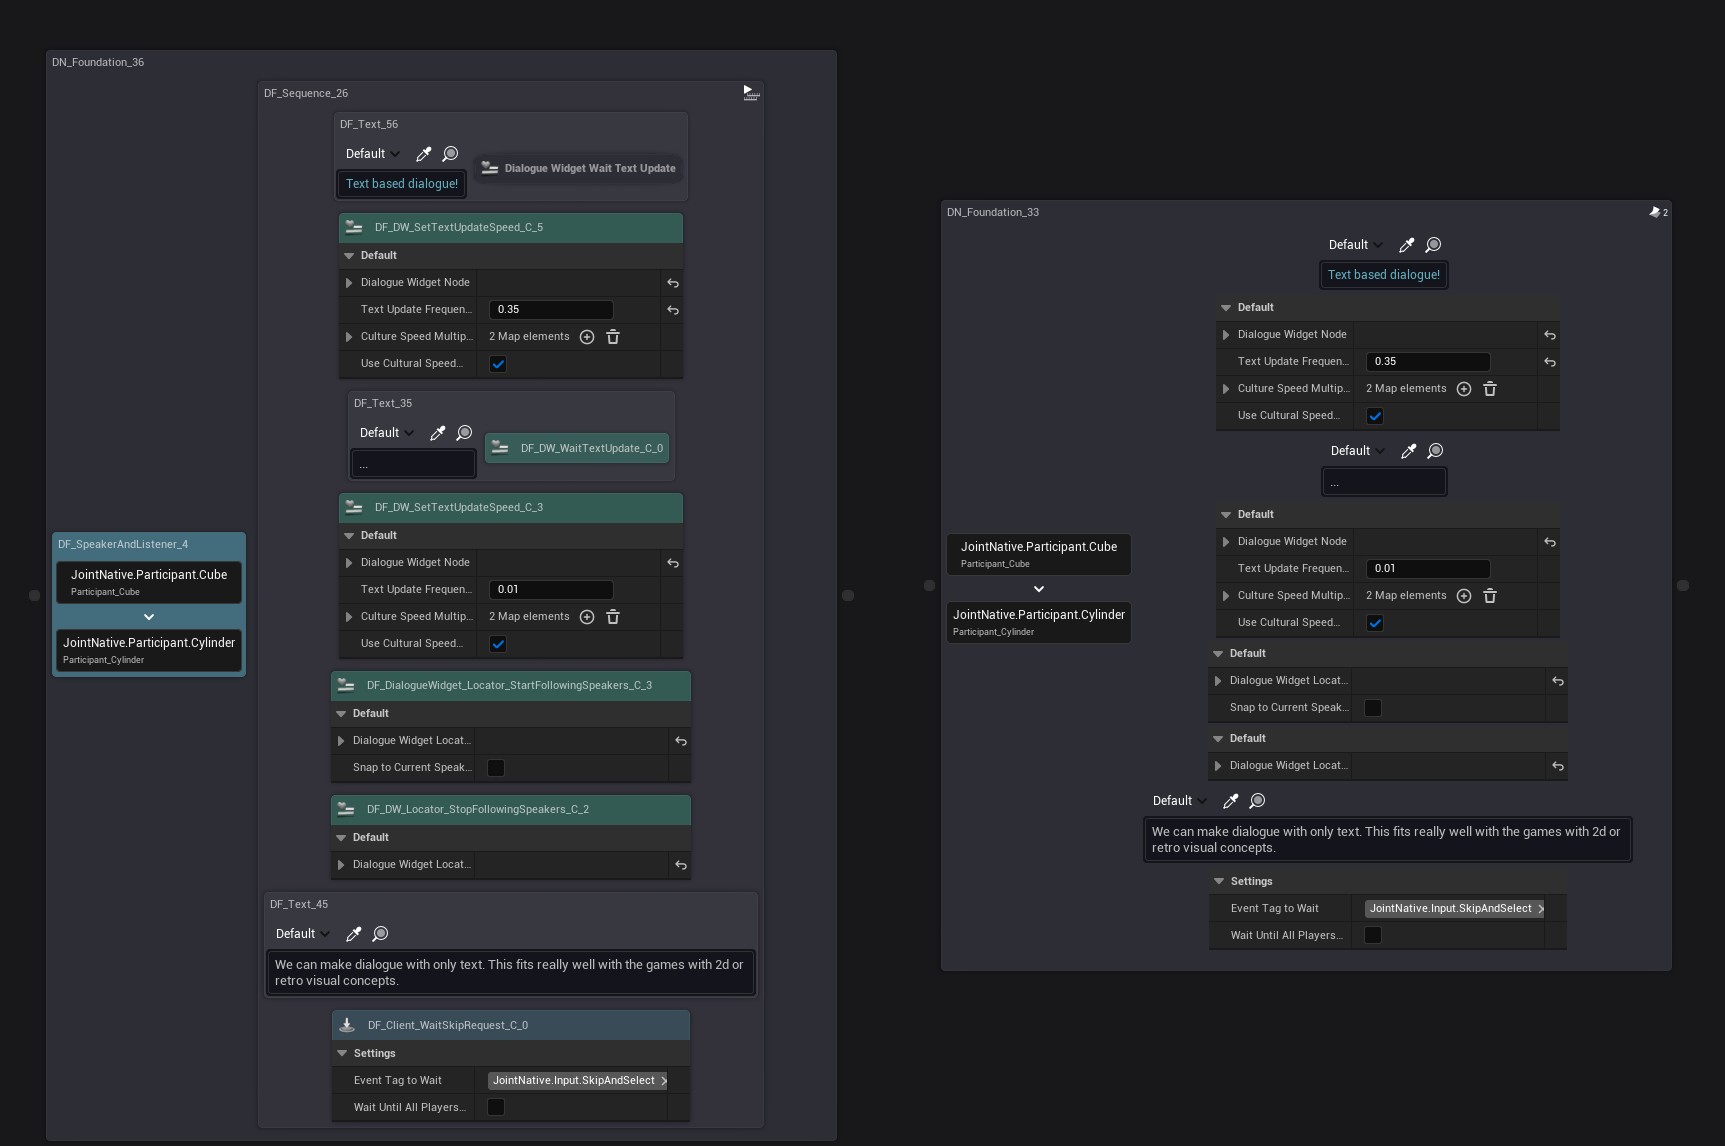
We expect it to be useful for the nodes that are very frequently used so almost always present each node (such as text, speaker and listeners, wait skip) to be looked like the part of the parent node - to be more intuitive.
You can dissolve a composite node by right-clicking the node and selecting Dissolve Sub Nodes or by selecting the node and pressing Ctrl + Shift + D.
You can solidify a dissolved node by right-clicking the parent node and selecting Solidify Sub Nodes or by selecting the parent node and pressing Ctrl + Shift + S.
Changing the visibility of Simple Display Properties per node basis
You can hide some simple display properties of nodes to reduce visual clutter in complex graphs.
This is extremely useful when you have nodes with many properties, but you only want to see a few of them for better readability.
Please refer to the Simple Property Display document for more information about it.
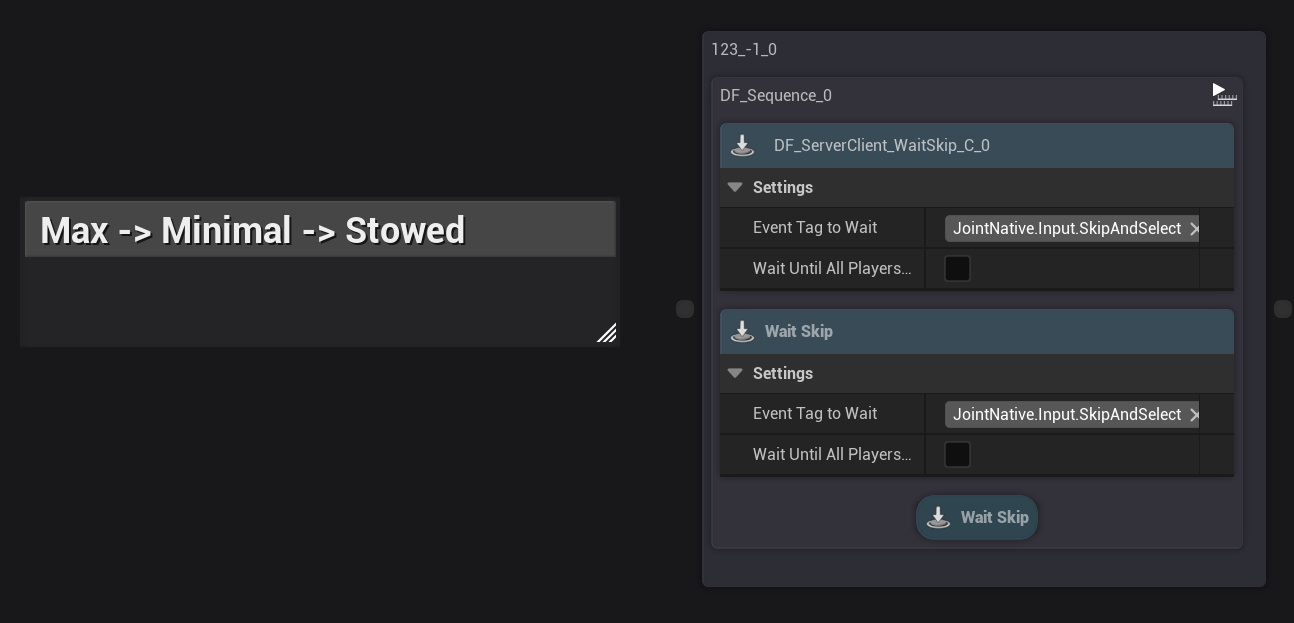
Stowing & Minimalizing Node's Slate
Joint provides options to stow or minimalize a node's slate to reduce visual clutter in complex graphs.

Select nodes, and go to the detail panel's 'visual' section to find the slate level of detail and change it as you need.
EdSlateDetailLevel defines how much detail is shown on the node in the graph editor.
We provide "Max", "Minimal", and "Stowed":
- Max mode shows all details of the node.
- Minimal mode is quite similar to Max mode, but it displays the name of the class instead of the friendly name hint next to the iconic node.
- Stowed mode hides all the widgets on the node, showing only the iconic node and name of the class.
Node Shortcuts
You can use keyboard shortcuts to quickly place some specific nodes.
| Node Type | Shortcut Key |
|---|---|
| Comment Node | C |
| Foundation Node | F |
To use these shortcuts, simply press the corresponding key while your cursor is over the graph editor area. The selected node will be placed at the cursor's position.