QuickStart
In this document, we are going to explain the plugin with Joint Native's assets.
This document is outdated - we have much better methods for the most of the steps we introduce in this tutorial now, and many features have been added and reworked since this tutorial was first made - but we still keep this document because it still provides the basic concept of Joint system quite well.
So we recommend you to check out the other documents on this website to learn the latest and better ways to use Joint system after you read this tutorial.
In the newer version of Joint, Name of the functions or classes with "Dialogue" are now renamed to have "Joint" instead of "Dialogue". (e.g. UDialogueFragment -> UJointFragment, CreateDialogue -> CreateJoint etc.)
Please be aware of that when you follow this tutorial.
Hello, welcome to the world of Joint!
In this document, we are going to learn very basic control and concept for the system.
We are not going to explain the whole stuff here so if you need to learn the other advanced concept for the plugin then please check out the API reference document and sample assets provided on Joint Native. If you are a programmer, reading the comments on the header files will also help you much.
If you have any question, then please feel free to visit out official Discord and ask them!
1. Creating Joint Manager
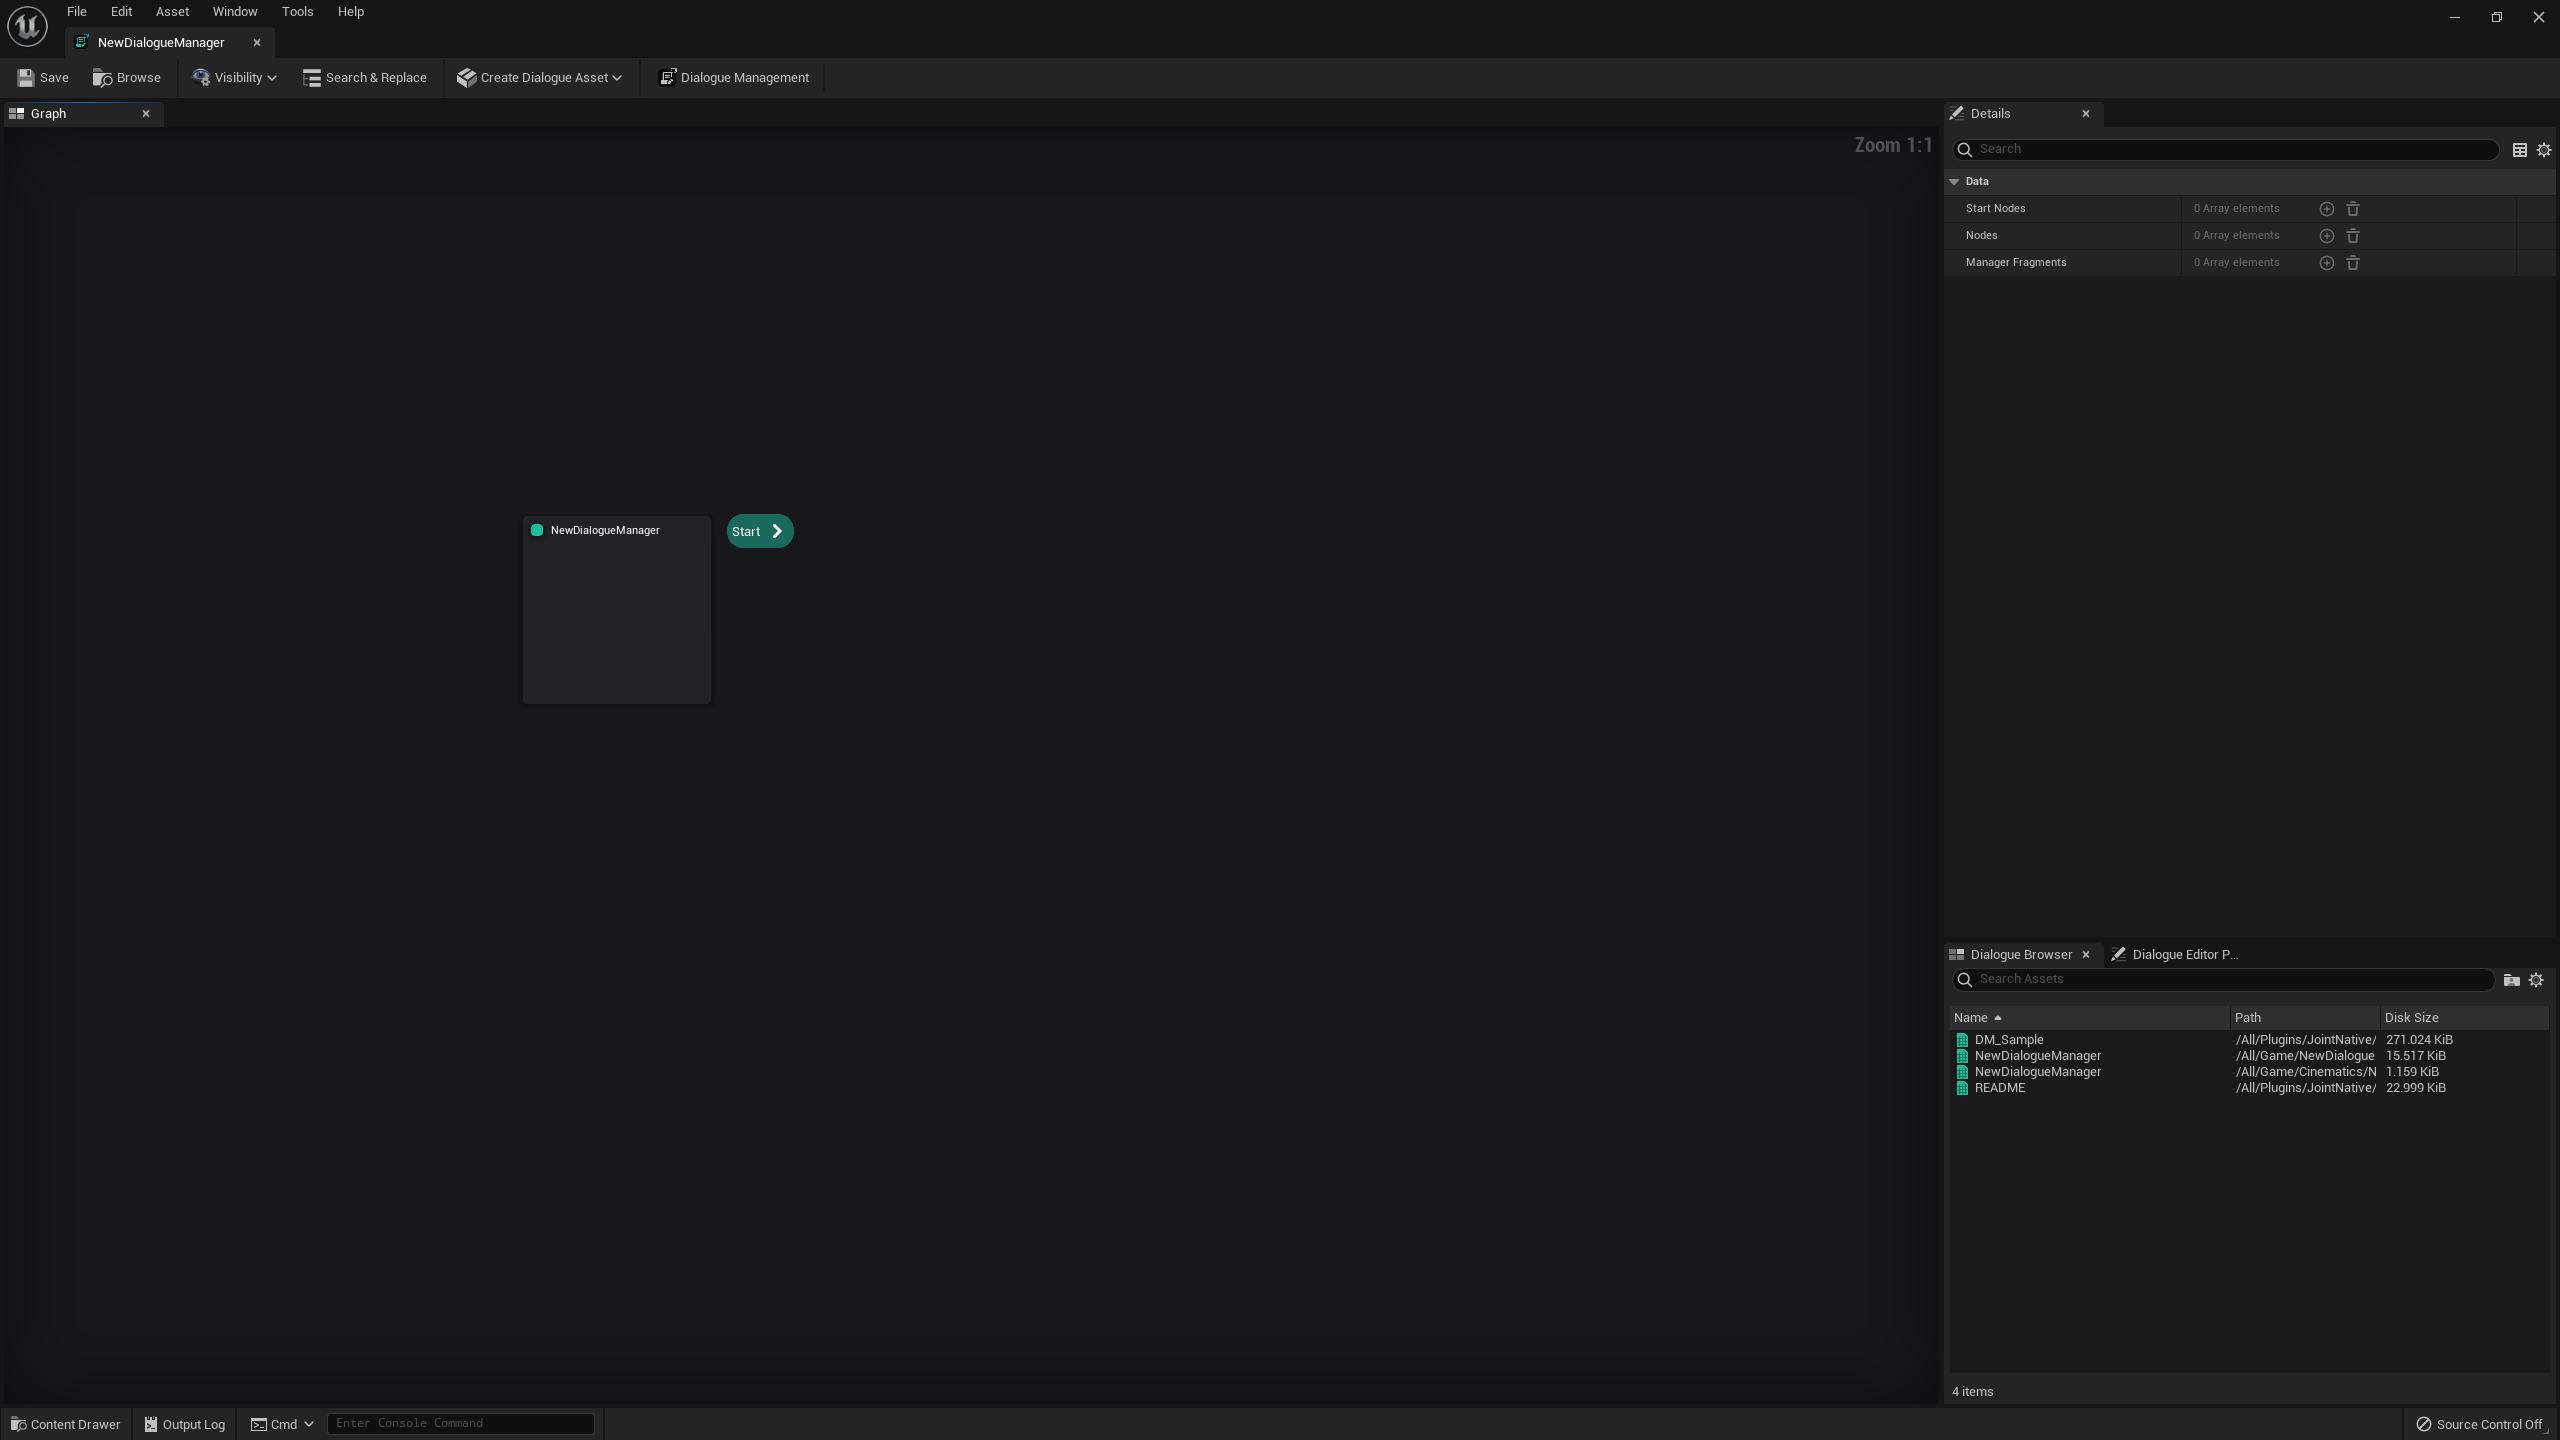
Joint Manager is an asset type that refers to a single set of conversation on projects. Joint manager is the object that you store all the nodes and process it at.
Let's make a new Joint manager we are going to use on this tutorial. Right click on the content browser and go to the Joint section and click Joint Manager.

Then you will have a new Joint Manager asset on your project.

Once you open this asset, then you will see a screen like this.
2. Placing Base Nodes on Graph
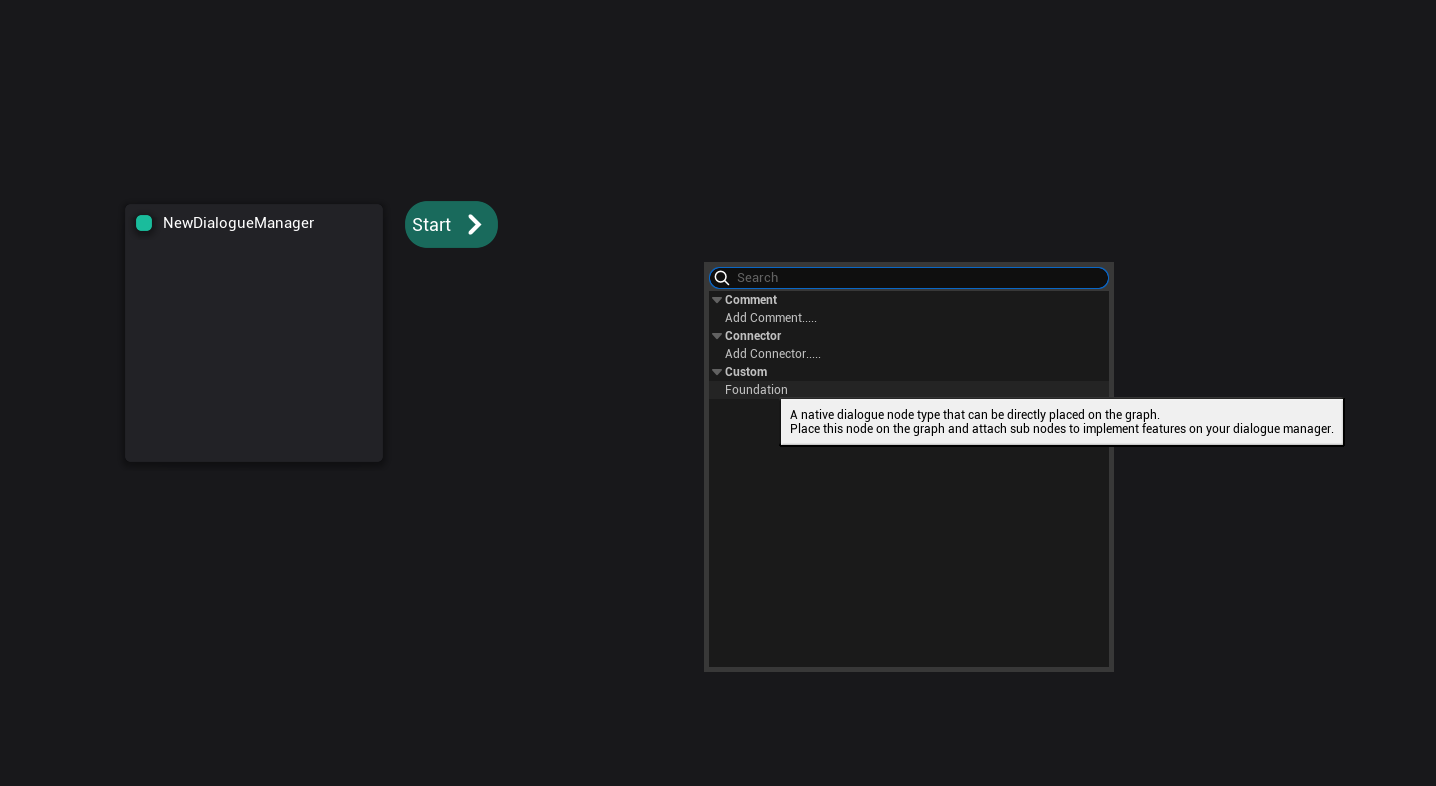
Now we need to create an actual Joint to play. In Joint, we implement our Joint by placing and connecting multiple Base Nodes on the graph.
Base node is a type of nodes that is playable on the graph and can be placed directly on the graph at the same time.
We currently have only one type of base node, Foundation.
Right click on the empty space on the graph then you will see a context menu shows up, then find Foundation from there and press it.
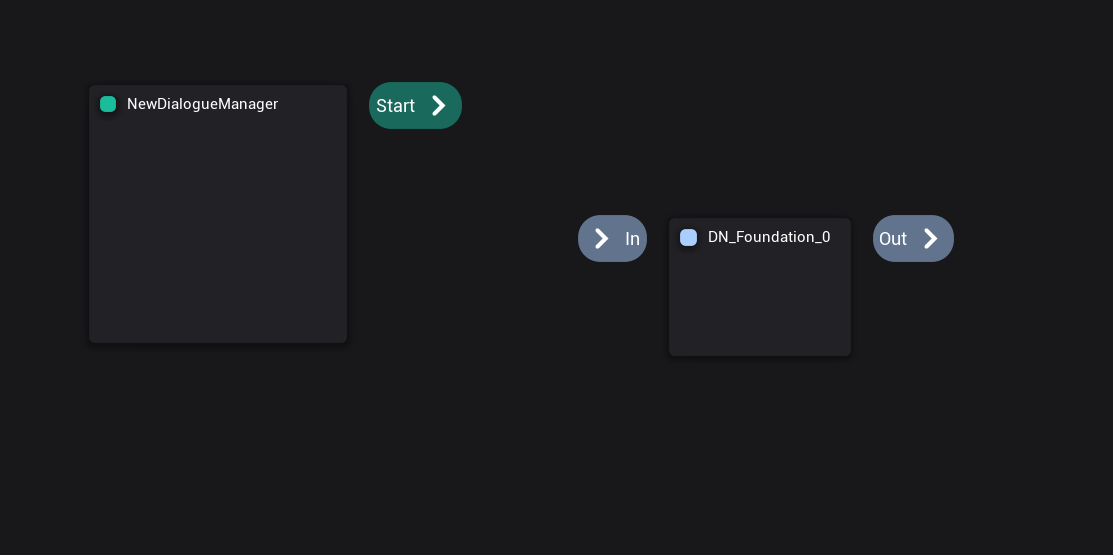
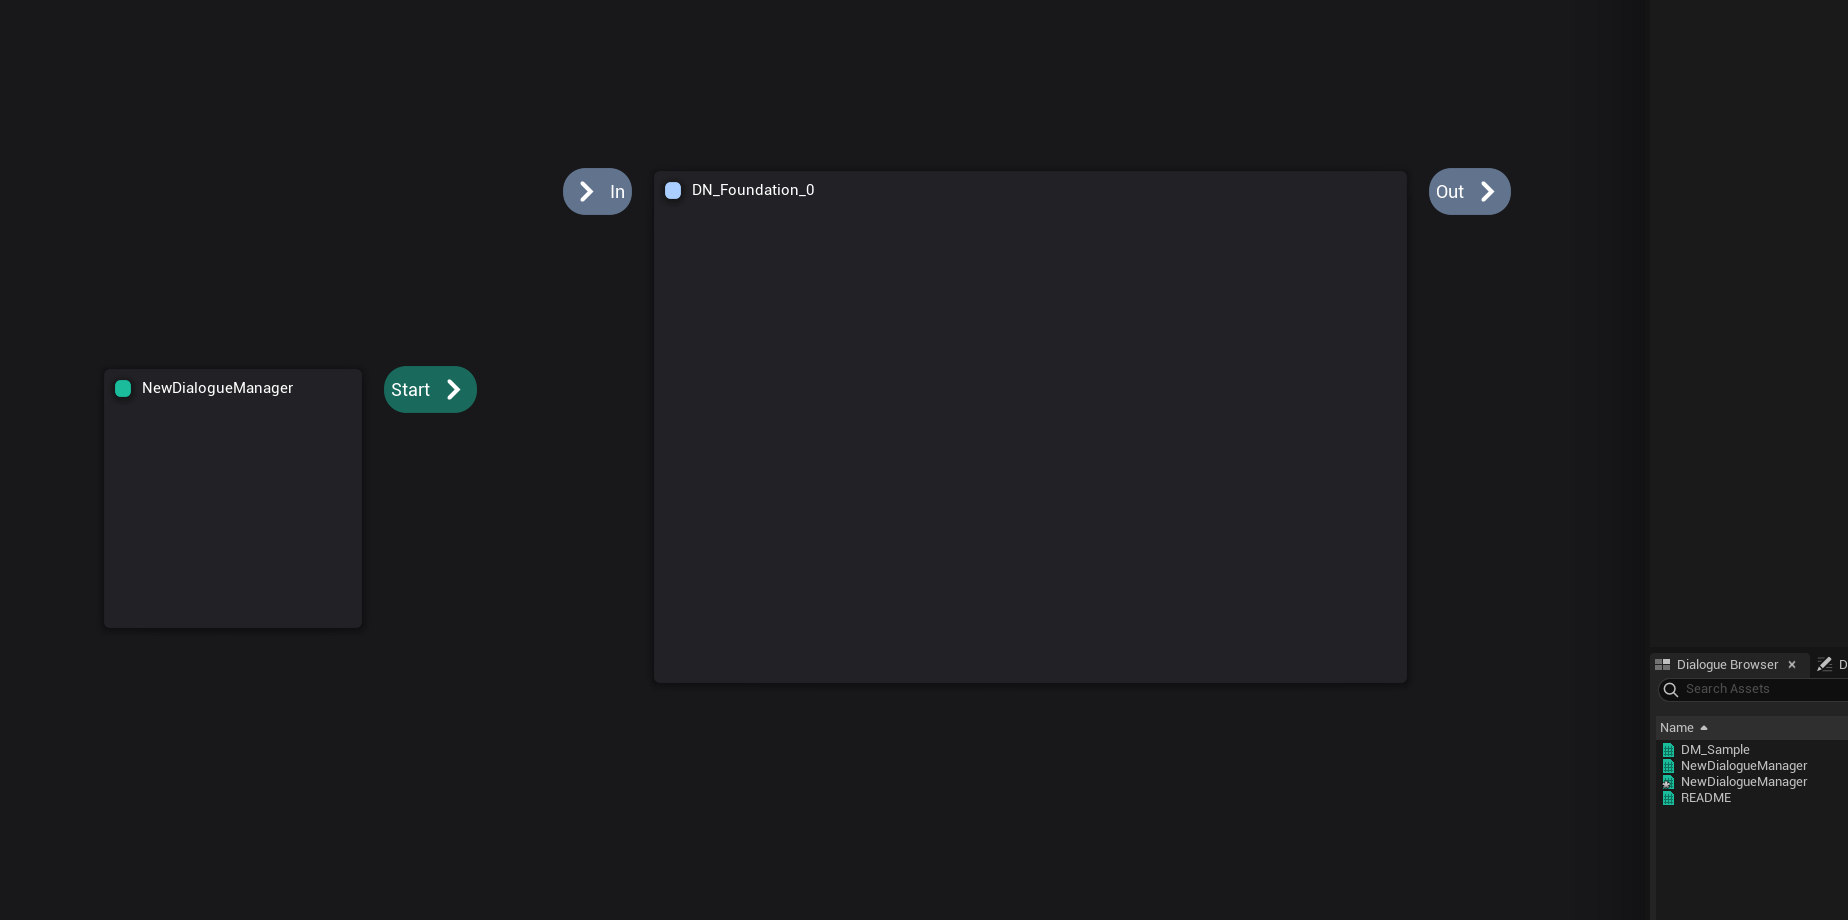
Then you will get a new foundation node for the graph.
You can drag the edge of it to resize the node to the size you want for that node. Let's make it a little bigger.
3. Creating Joint Fragment
Fragment is a type of node that has been designed to be attached on the other nodes to execute its unique events and contain data for the graph and its parent nodes.
In Joint, we implement our feature for the conversations by defining and attaching fragments for that feature on base nodes and other fragments.
Let's make a new fragment for the system.
Creating new fragment starts from making new class derived from UJointFragment.
You can create a new fragment class with single click on the toolbar of the Joint Manager Editor.
Of course, you can manually override the class in New Blueprint tab.
Once you open the newly created fragment, then you will see this blueprint editor has been opened.
In this tutorial, We are going to make a fragment that provide QTE action for the Joint, and spawn a button and counter that indicate how many times it has been pressed. With the fragment, you will learn how to make a fragment that interact with the other fragments, interact with players, and interact with the playback of Joint.
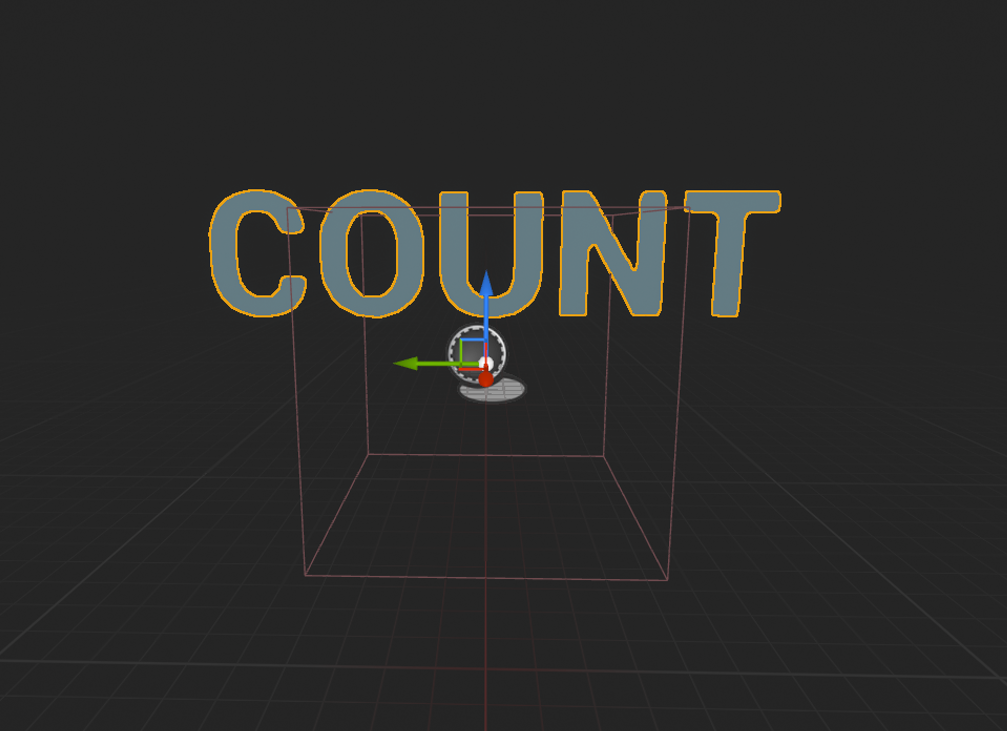
Prior to this, we made a simple actor blueprint that contains a text render component that will be used as a counter for the node and named BP_Button.
For that fragment, we need 4 variables for a participant to spawn the button at, pressed button count, goal count to finish its action, and also need the reference to the spawned button, so let's add those.
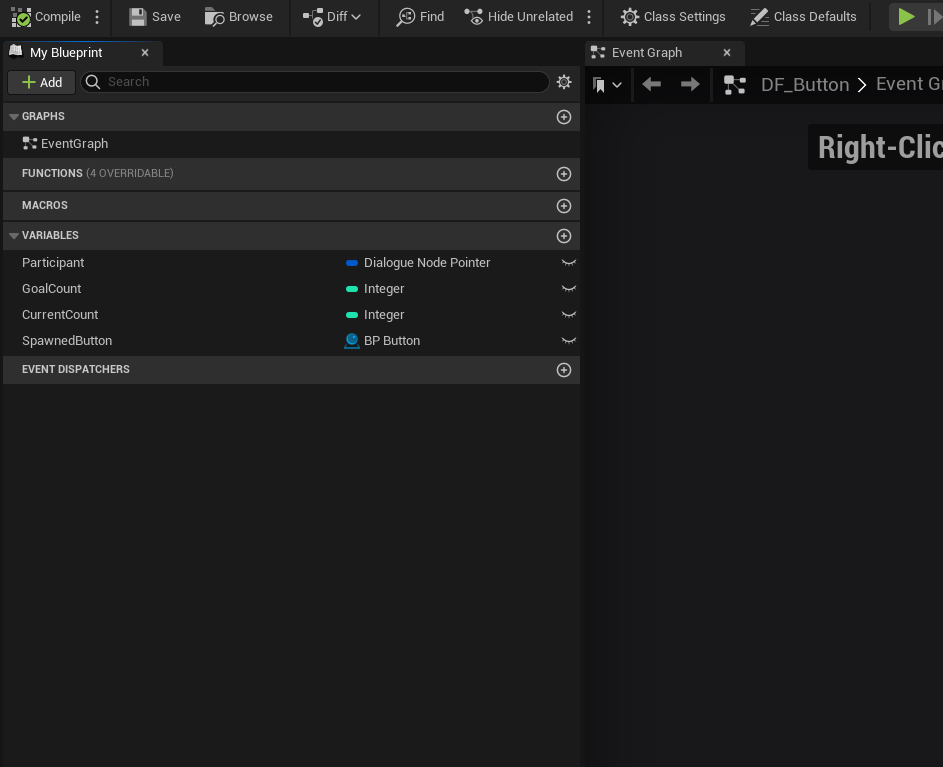
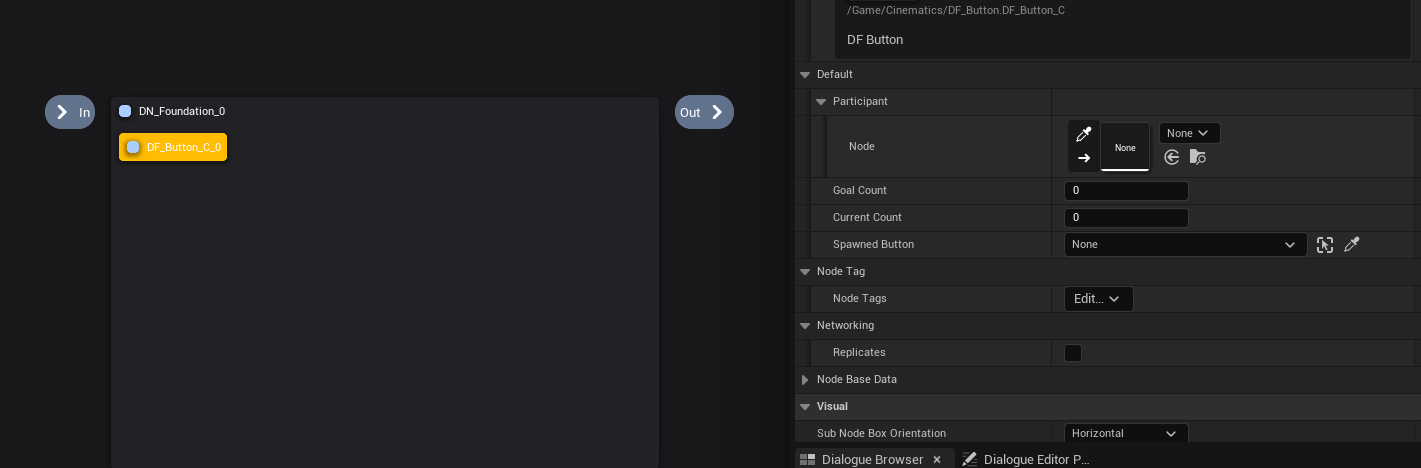
Joint Node Pointer (FJointNodePointer) is a structure type that allows you to pick up a node from the graph.
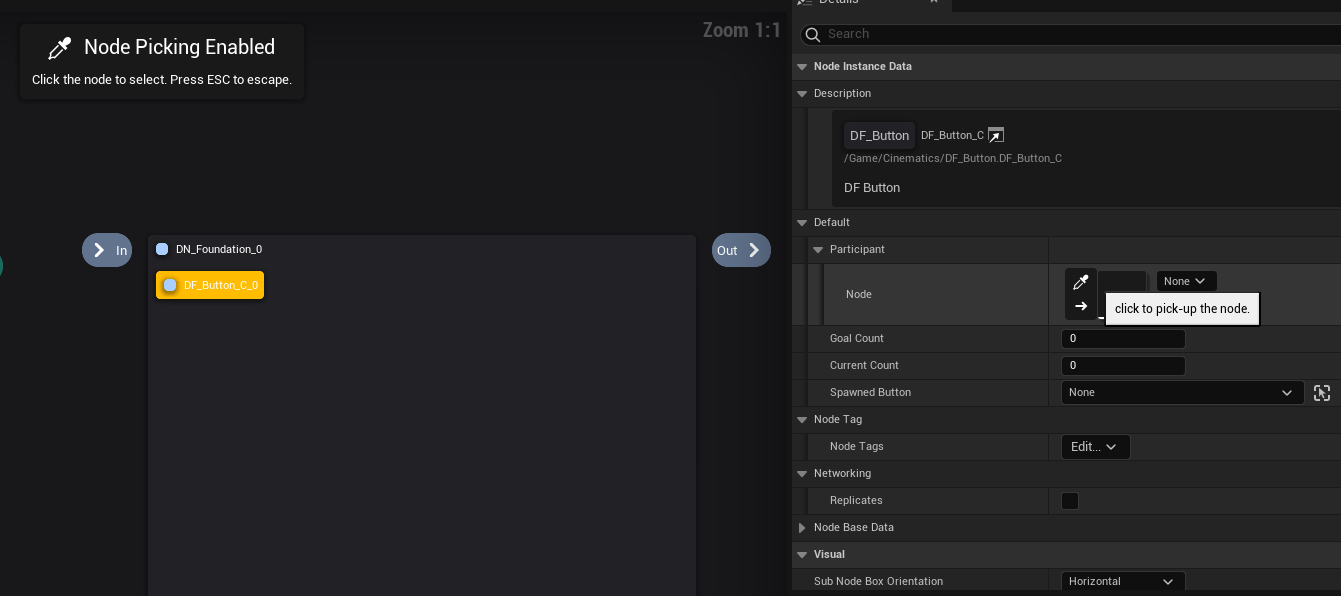
This is useful when you want to grab a node over the graph. In this tutorial, we are going to grab the participant node with this structure property.
Since we want to display the variables on the editor, let's make it public.
Properties that have been marked as public will be visible in the Joint editor.

Now let's implement the actual logic for the fragment. In this tutorial, we are going to make the fragment spawn the button when the fragment has been played on the graph, and destroy that button when it has been end played.
When you click the override button, then you will see those functions are available.
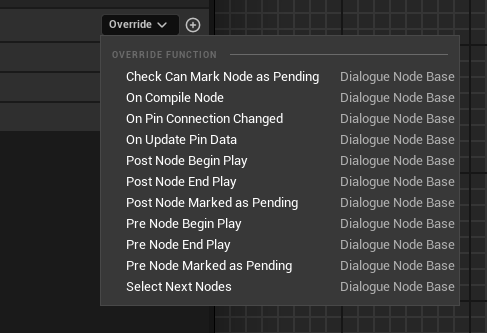
Here is the description for each function:
- Pre Node Begin Play : An event that is executed when the fragment has been played. It will be executed before the notification delegate, so before any other objects notice the change. It's good for preprocessing.
- Post Node Begin Play : An event that is executed when the fragment has been played. It will be executed before the notification delegate, It's good place for general logics, and especially sub node playback related logics must be placed on here.
- Pre Node End Play : An event that is executed when the fragment has been end played. It will be executed before the notification delegate, so before any other objects notice the change. It's good for preprocessing.
- Post Node End Play : An event that is executed when the fragment has been end played. It will be executed after the notification delegate. It's good place for general logics, and especially sub node playback related logics must be placed on here.
- Pre Node Marked As Pending : An event that is executed when the fragment has been marked as pending. It will be executed before the notification delegate, so before any other objects notice the change. It's good for preprocessing.
- Post Node Marked As Pending : An event that is executed when the fragment has been marked as pending. It will be executed after the notification delegate. It's good place for general logics, and especially sub node playback related logics must be placed on here.
- On Pin Connection Changed : An event that will be executed when the node connection or data has been changed. You can grab the node's connection (pin) with other nodes here, to store and use them. Check out Branching fragment to see more.
- On Update Pin Data : An event for the pin data update. You can implement the node's pin here. Check out Branching fragment to see more.
- Select Next Nodes : Return the array of base nodes that will be played as the next node on the graph if this fragment has any to suggest. Base node will call this functions to the sub nodes on its hierarchy and get the first node that has been returned as the next node to play. If it failed to find any, then the Joint will be ended.
- Check Can Mark Node as Pending : Return whether this node can be marked as pending when it is tested on the sub node's pending event.
- On Compile Node : An event that will be executed on the graph compilation. You can clean up & check out possible issues here. If it returns errors, it will also make the cooking process halt to prevent that error to be contained in the actual product.
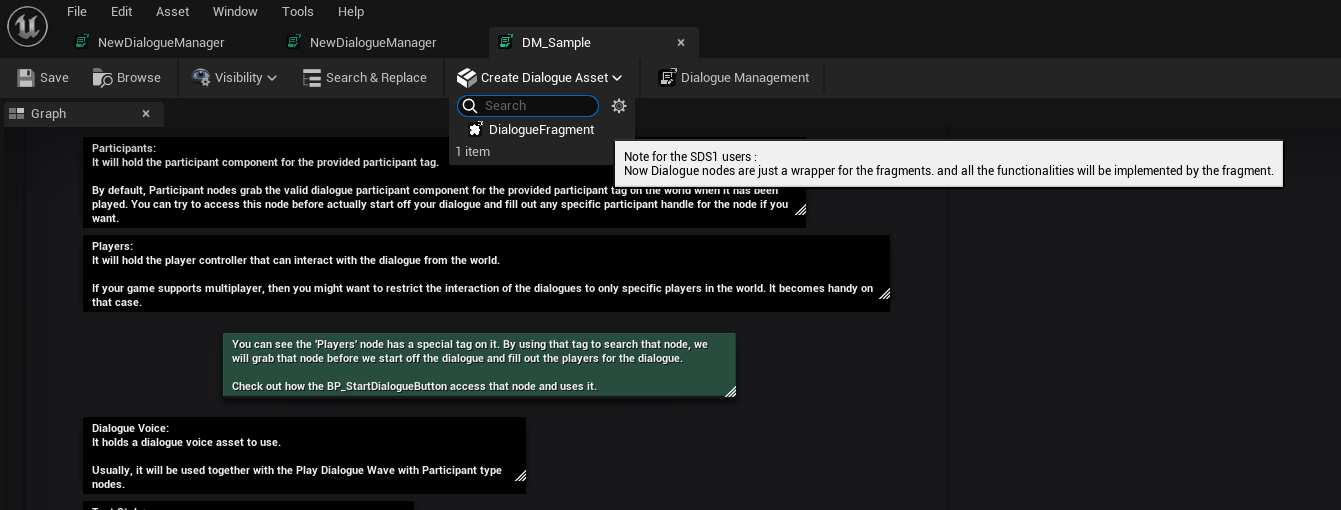
In Joint 2.6.0, We changed the name of function On Node Begin Play and On Node End Play to Post On Node Begin Play and Post On Node Begin Play
So please notice that and follow this tutorial.
Pending means the state of node that has played all the necessary logic to execute, ready to finish the node playback anytime the parent node want, and no longer holding the playback. In Joint, nodes are tested whether to be marked as pending whenever any of the sub nodes (fragments) is marked as pending. And by default, it will be marked as pending when all the sub nodes are marked as pending, and you can control this behavior by overriding that function.
All the nodes in the system follow this rule if you didn't override its behavior. and when the base node has been marked as pending by this logic, the base node will start to be end played.
In this fragment, we are going to use On Node Begin Play and On Node End Play. Let's override that function and add logic on that.
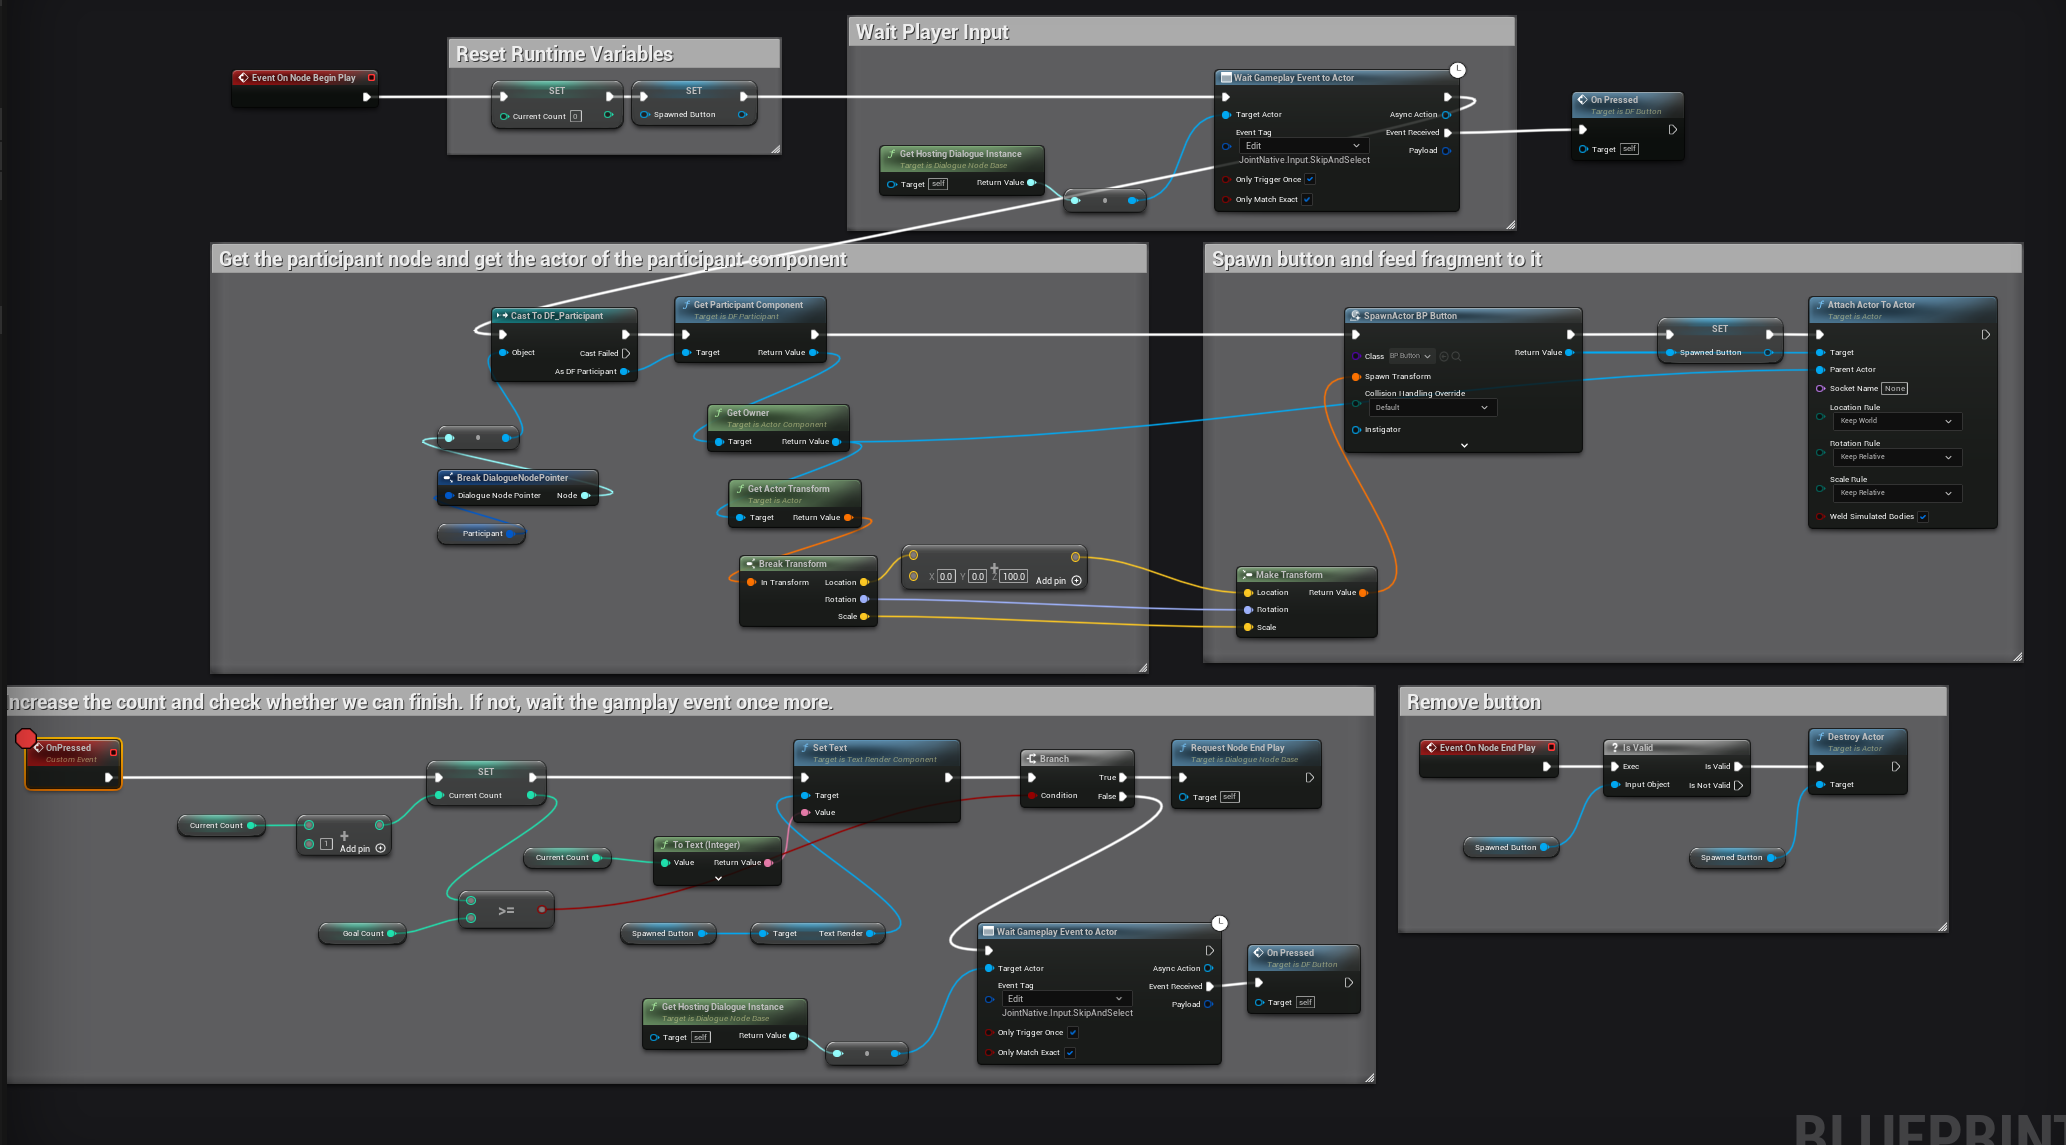
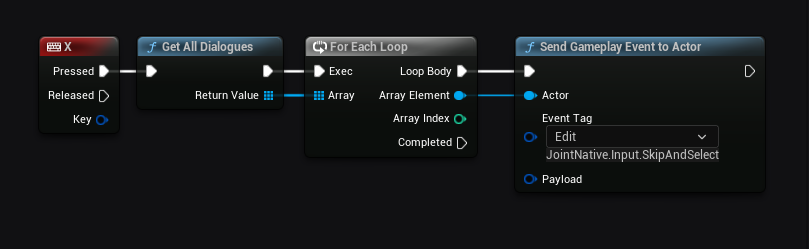
It will wait until a player fires the gameplay event to the Joint actor, and when it received the gameplay event, it will increase the count, and also apply it to the spawned actor.
And also in the player controller, we attached this simple logic to fire that event to the Joint actor.
Joint Actor is an actor that actually plays the Joint in Joint system. We talk about it further in the next chapter.
This is just for the example. We highly not recommend you to use this method in real product. Of course, you have to control the Joint references the players can interact to with a more reasonable way.
4. Attaching Joint Fragment
Now, let's attach a fragment on the node and see the execution result. Go back to the Joint Manager and right click on the base node, and go to the Add Fragment section. Then you will see those menu and you can find out the fragment we just created.
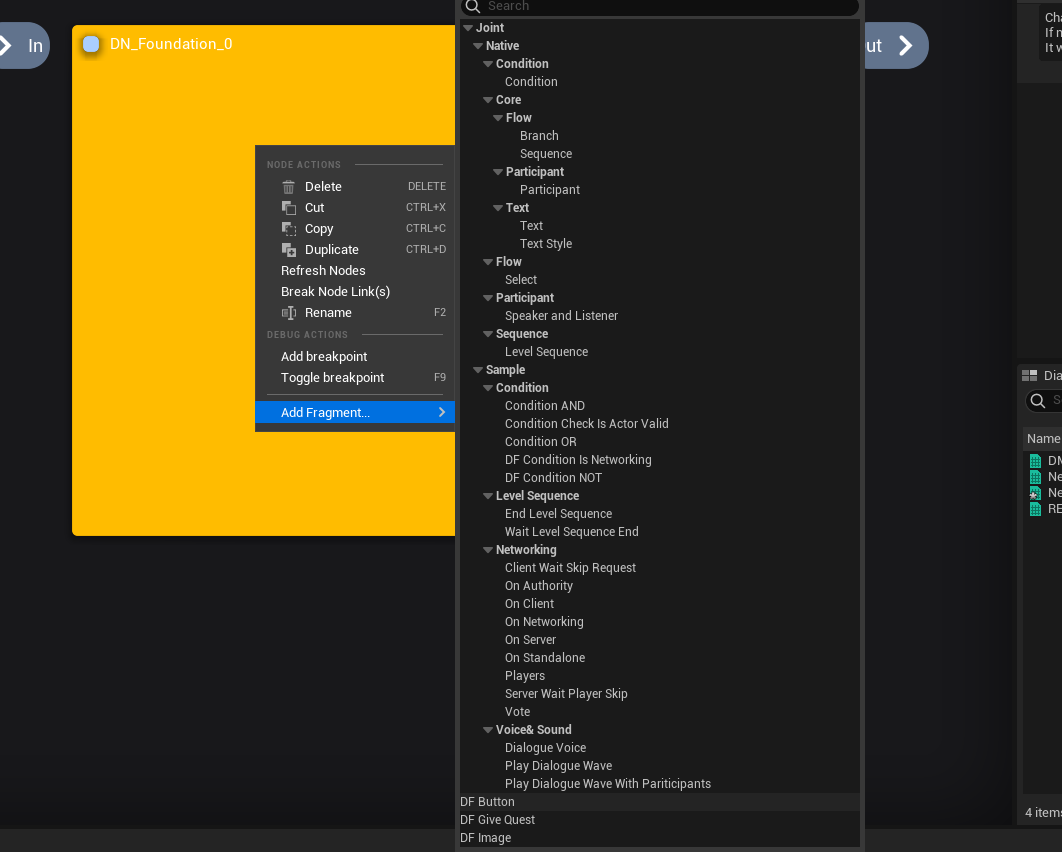
When you installed Joint only, not Joint Native together, then you will see only the fragment we just made is available by default. We recommend you to install Joint Native if you are new to Joint system.
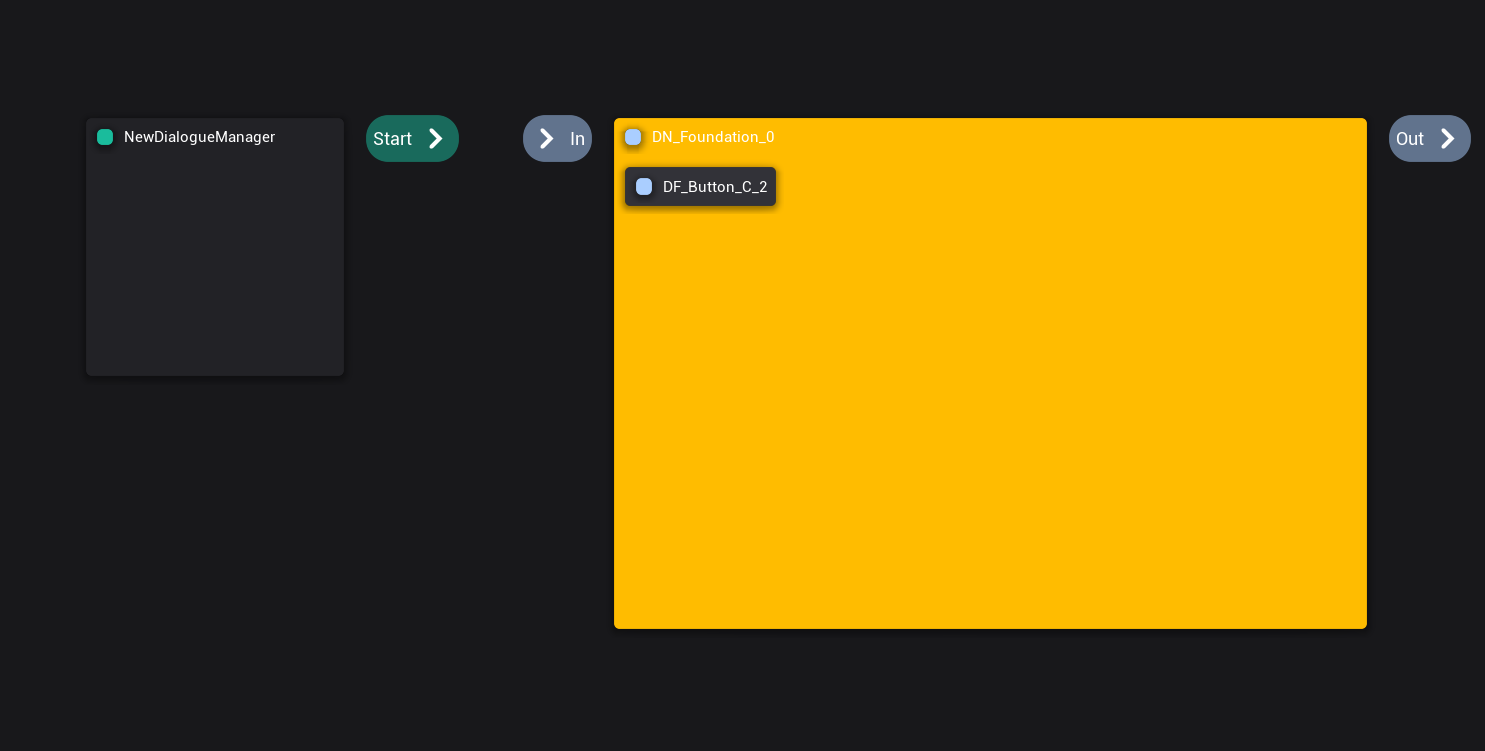
Once you click that, you will see our fragment has been attached on the base node.
And we also attached a participant fragment we will use on the graph on root node, and provide a participant tag that is defined in Joint Native.
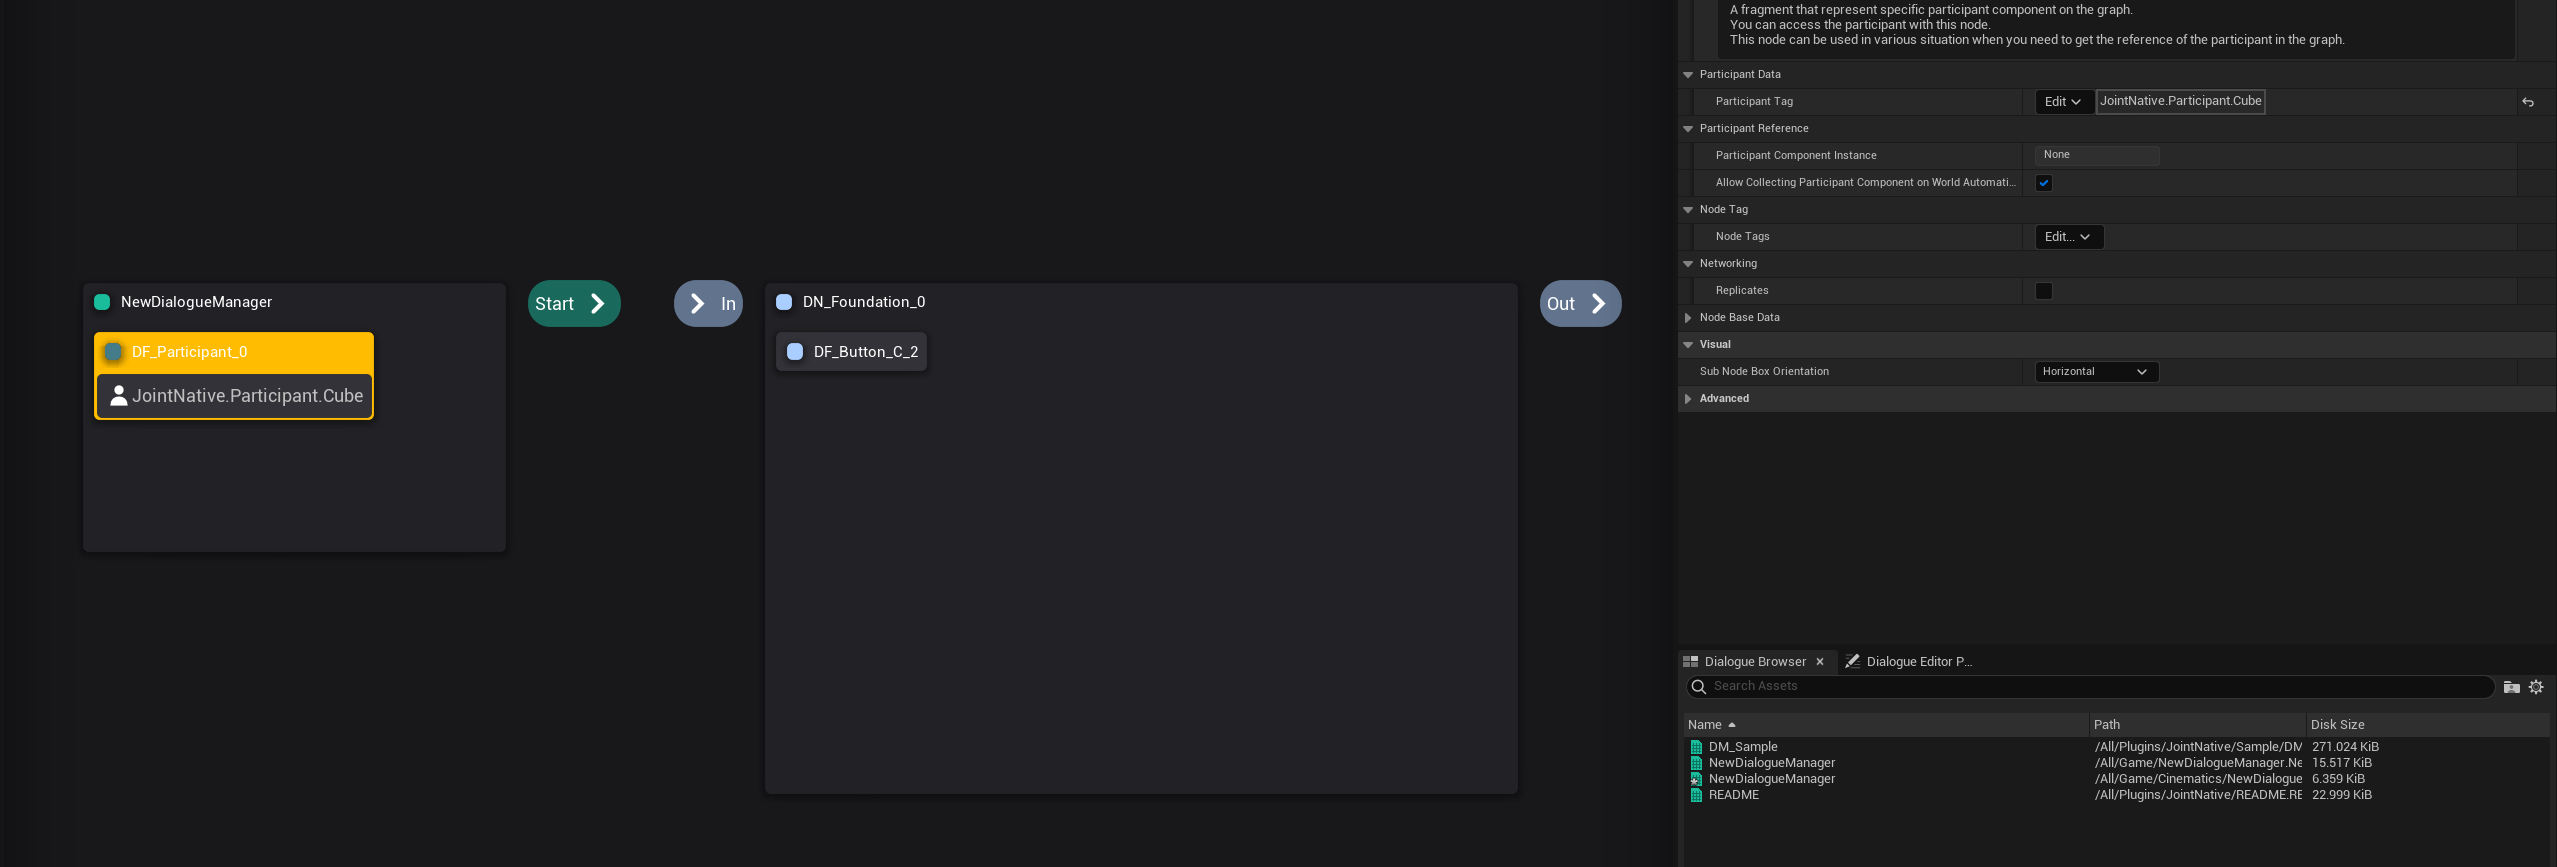
Root node also can have fragments. These fragments that are attached on the root node called Manager Fragment. Their life-cycle follows the life-cycle of the Joint itself. (it will begun played when the Joint starts, and end played when the Joint ends.)
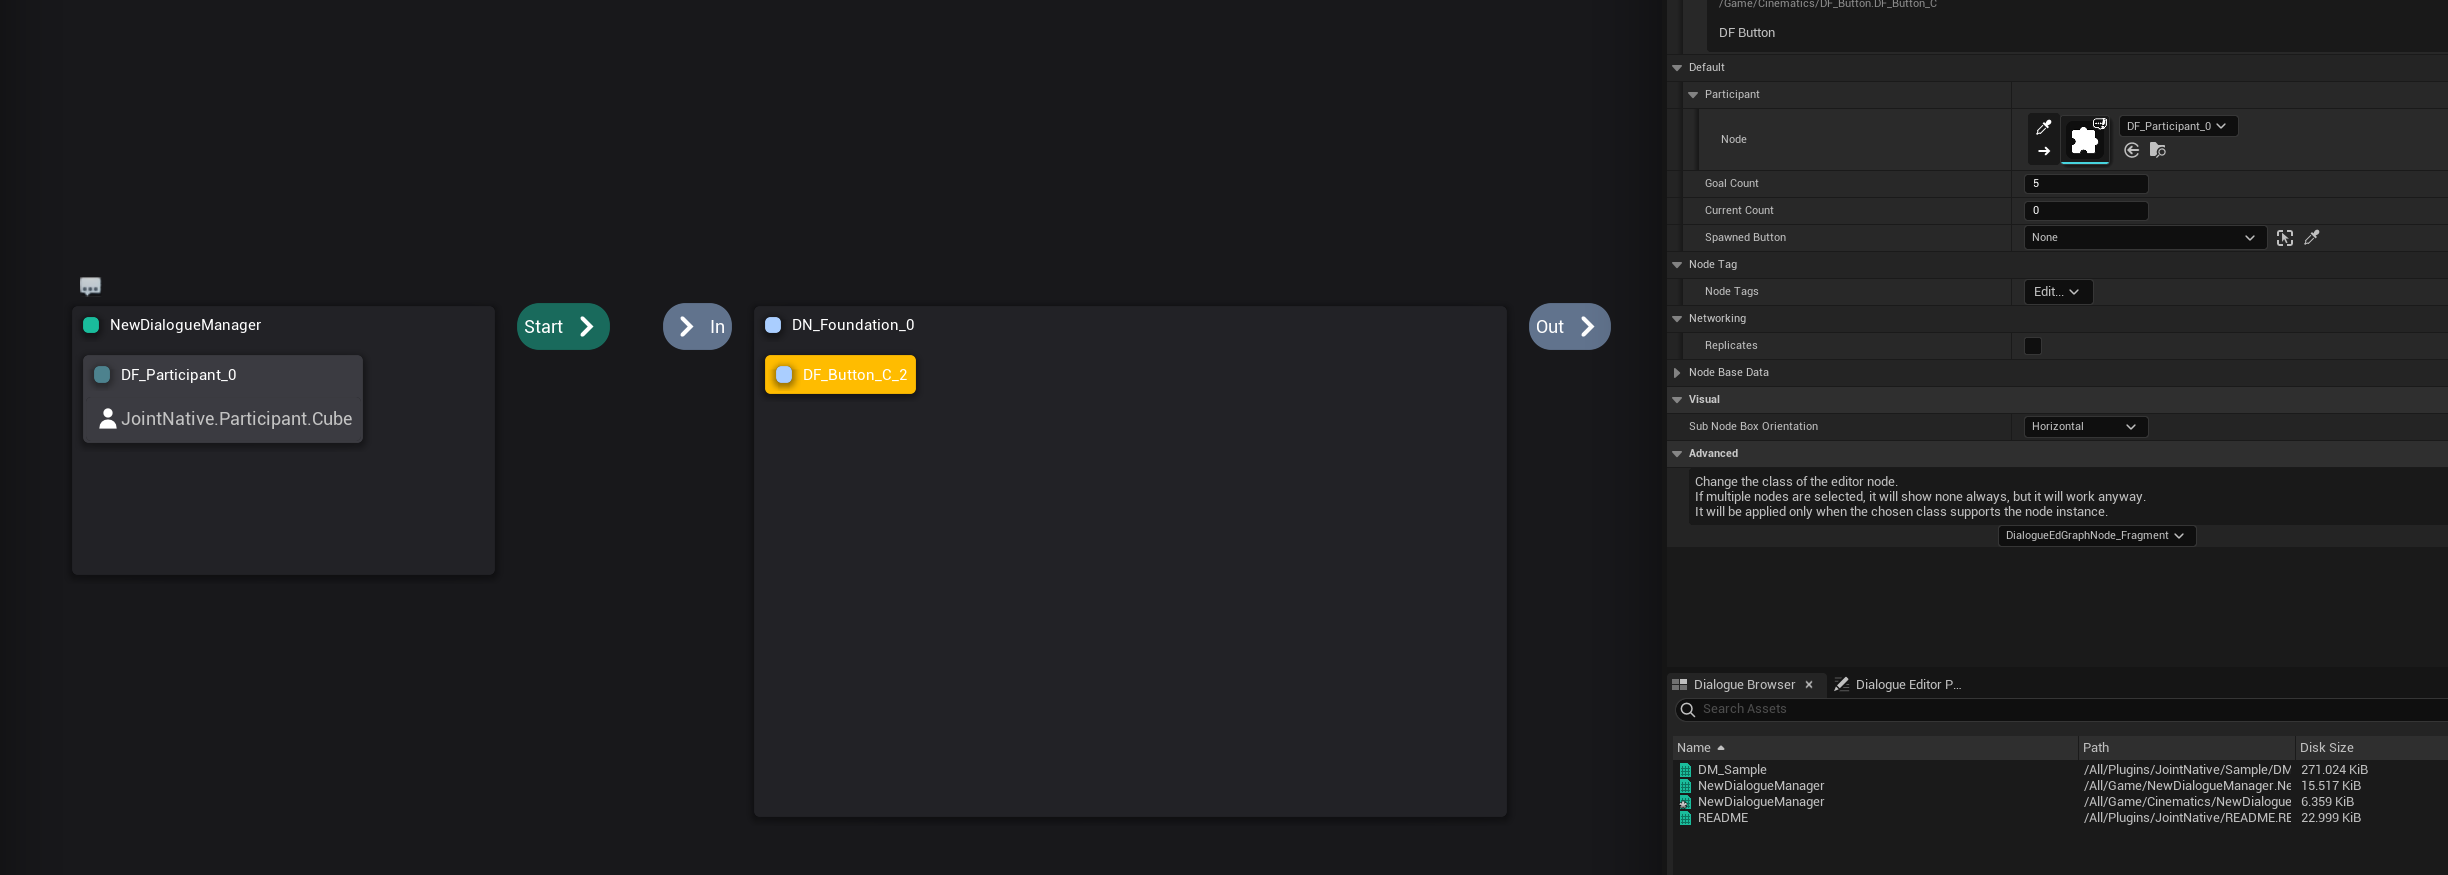
Great, now let's set the value to our fragment. Click our button fragment and feed some data to it. Let's set the goal count to 5 and pick up the participant fragment on the root node and feed it to the participant property of the button fragment.
You can pick up the node with the pipette icon.
Then everything is done here!
5. Placing Participant and Playing Joint
Now let's actually play this Joint. But before than, let's place a participant on the level.
We are going to use an actor with simple cube static mesh as a participant on our Joint.
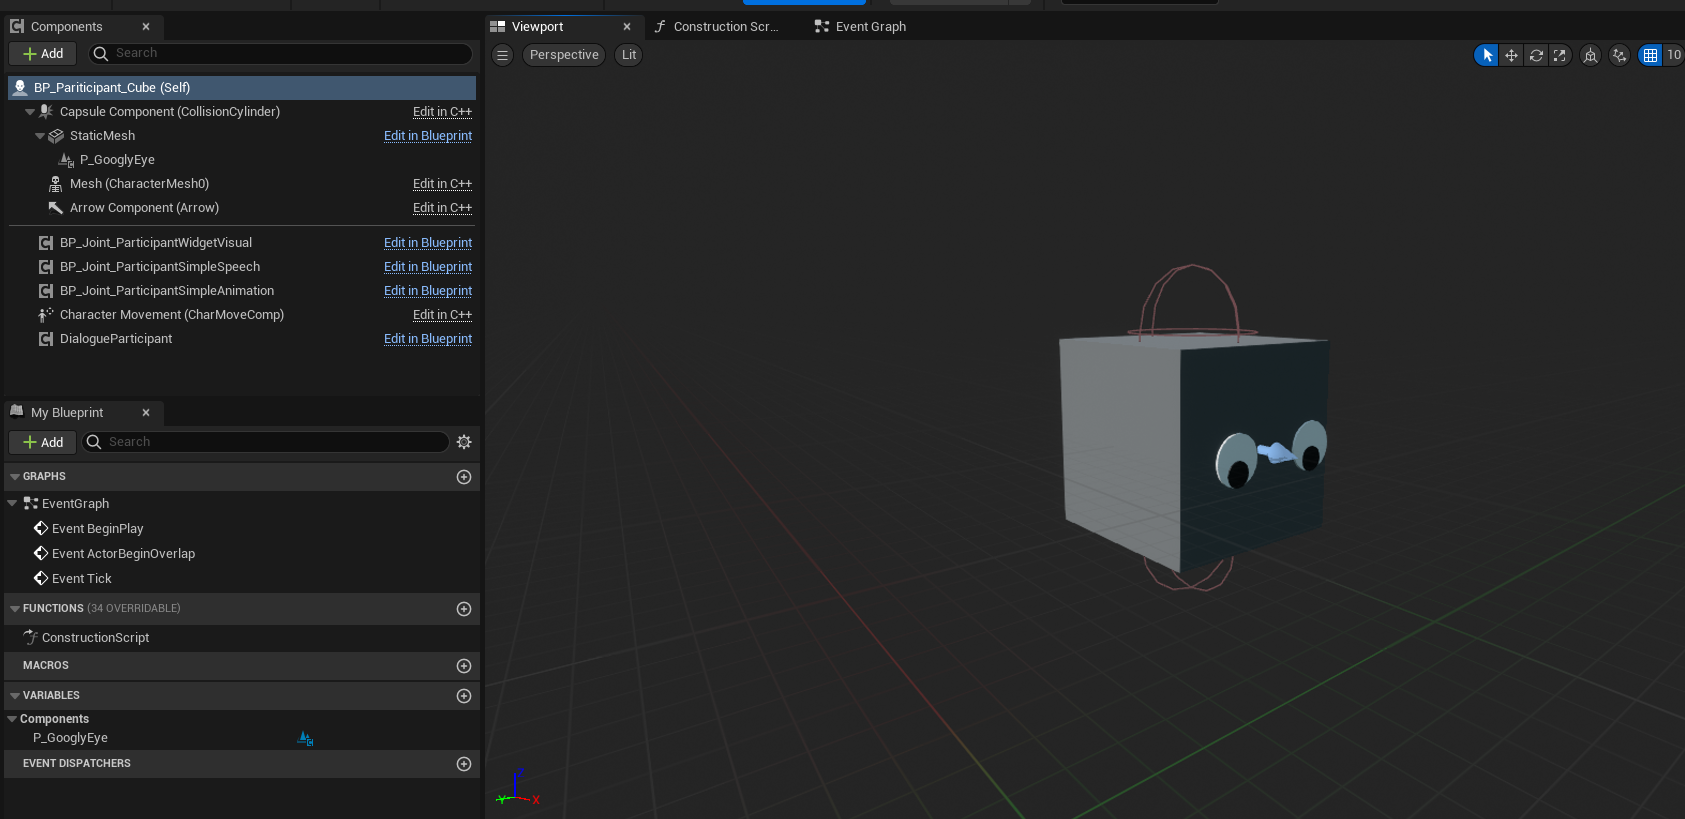
What you have to do to make this actor work as a participant, You have to attach a Joint Participant component on it.
In Joint, the participants are implemented with the Joint Participant (UJointParticipant) component. Let's attach it.
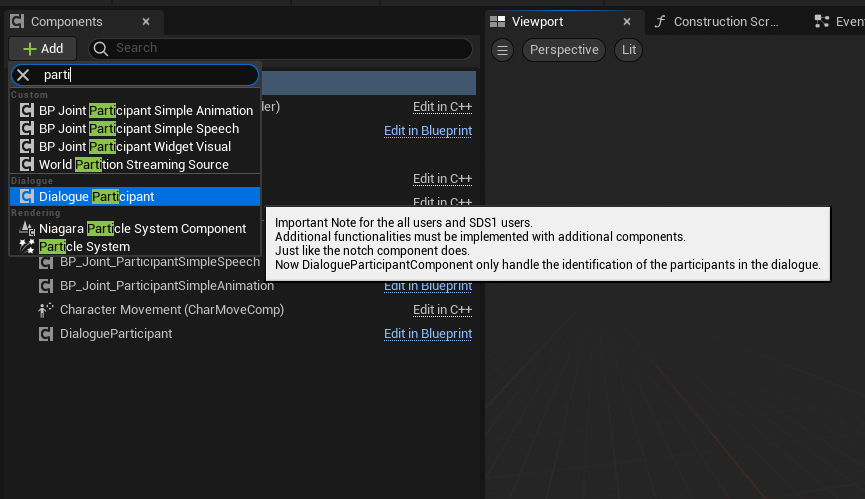
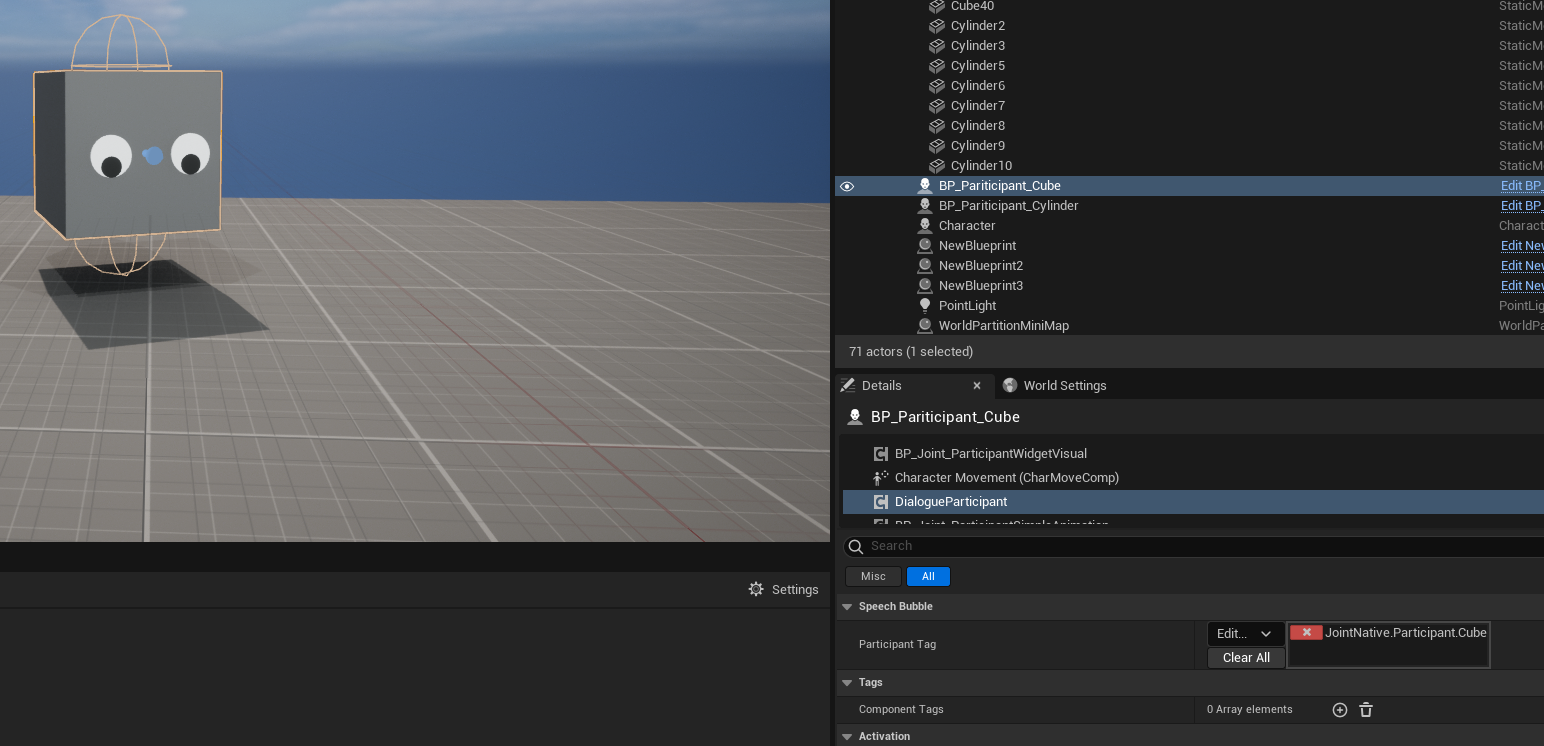
And now let's place this actor on the level, and feed the participant tag we used on the Joint Manager.
Joint Participant doesn't do anything by itself. It exists only for the identification for the system. If you want, you can create your own participant component to implement custom logic for that. In general, we attach some features to the participants by implementing and attaching additional components to the actor with participant component.
Now the participant is ready. It's time to play the Joint.
Play a Joint is done by spawning a Joint actor on the world, setting Joint manager to play, and executing Start Joint function on it.
In this tutorial, We are going to make the participant play the Joint on Begin Play event.
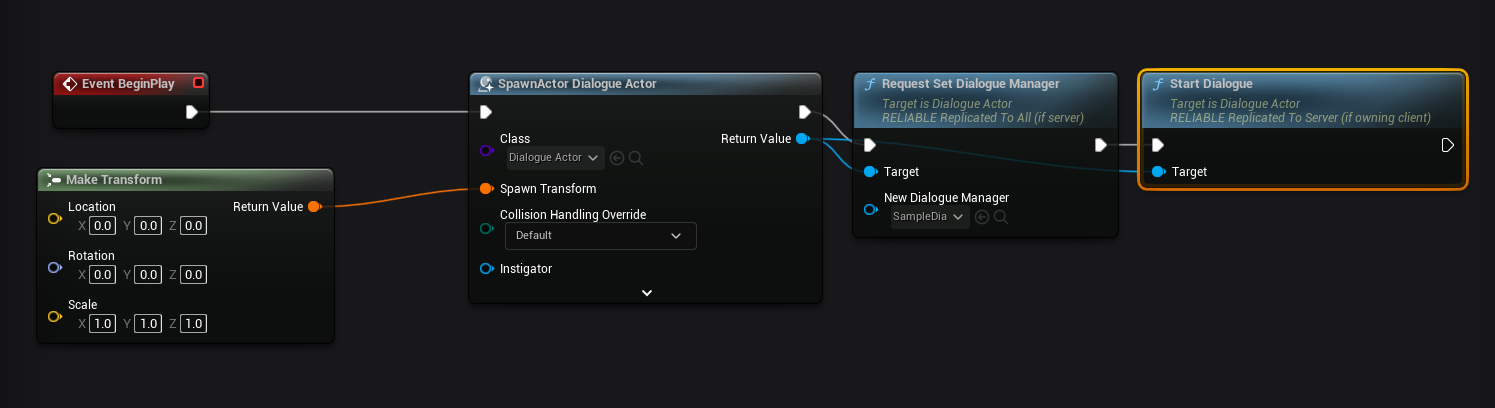
Now we have better way. Use create Joint instead.
Now let's start PIE.
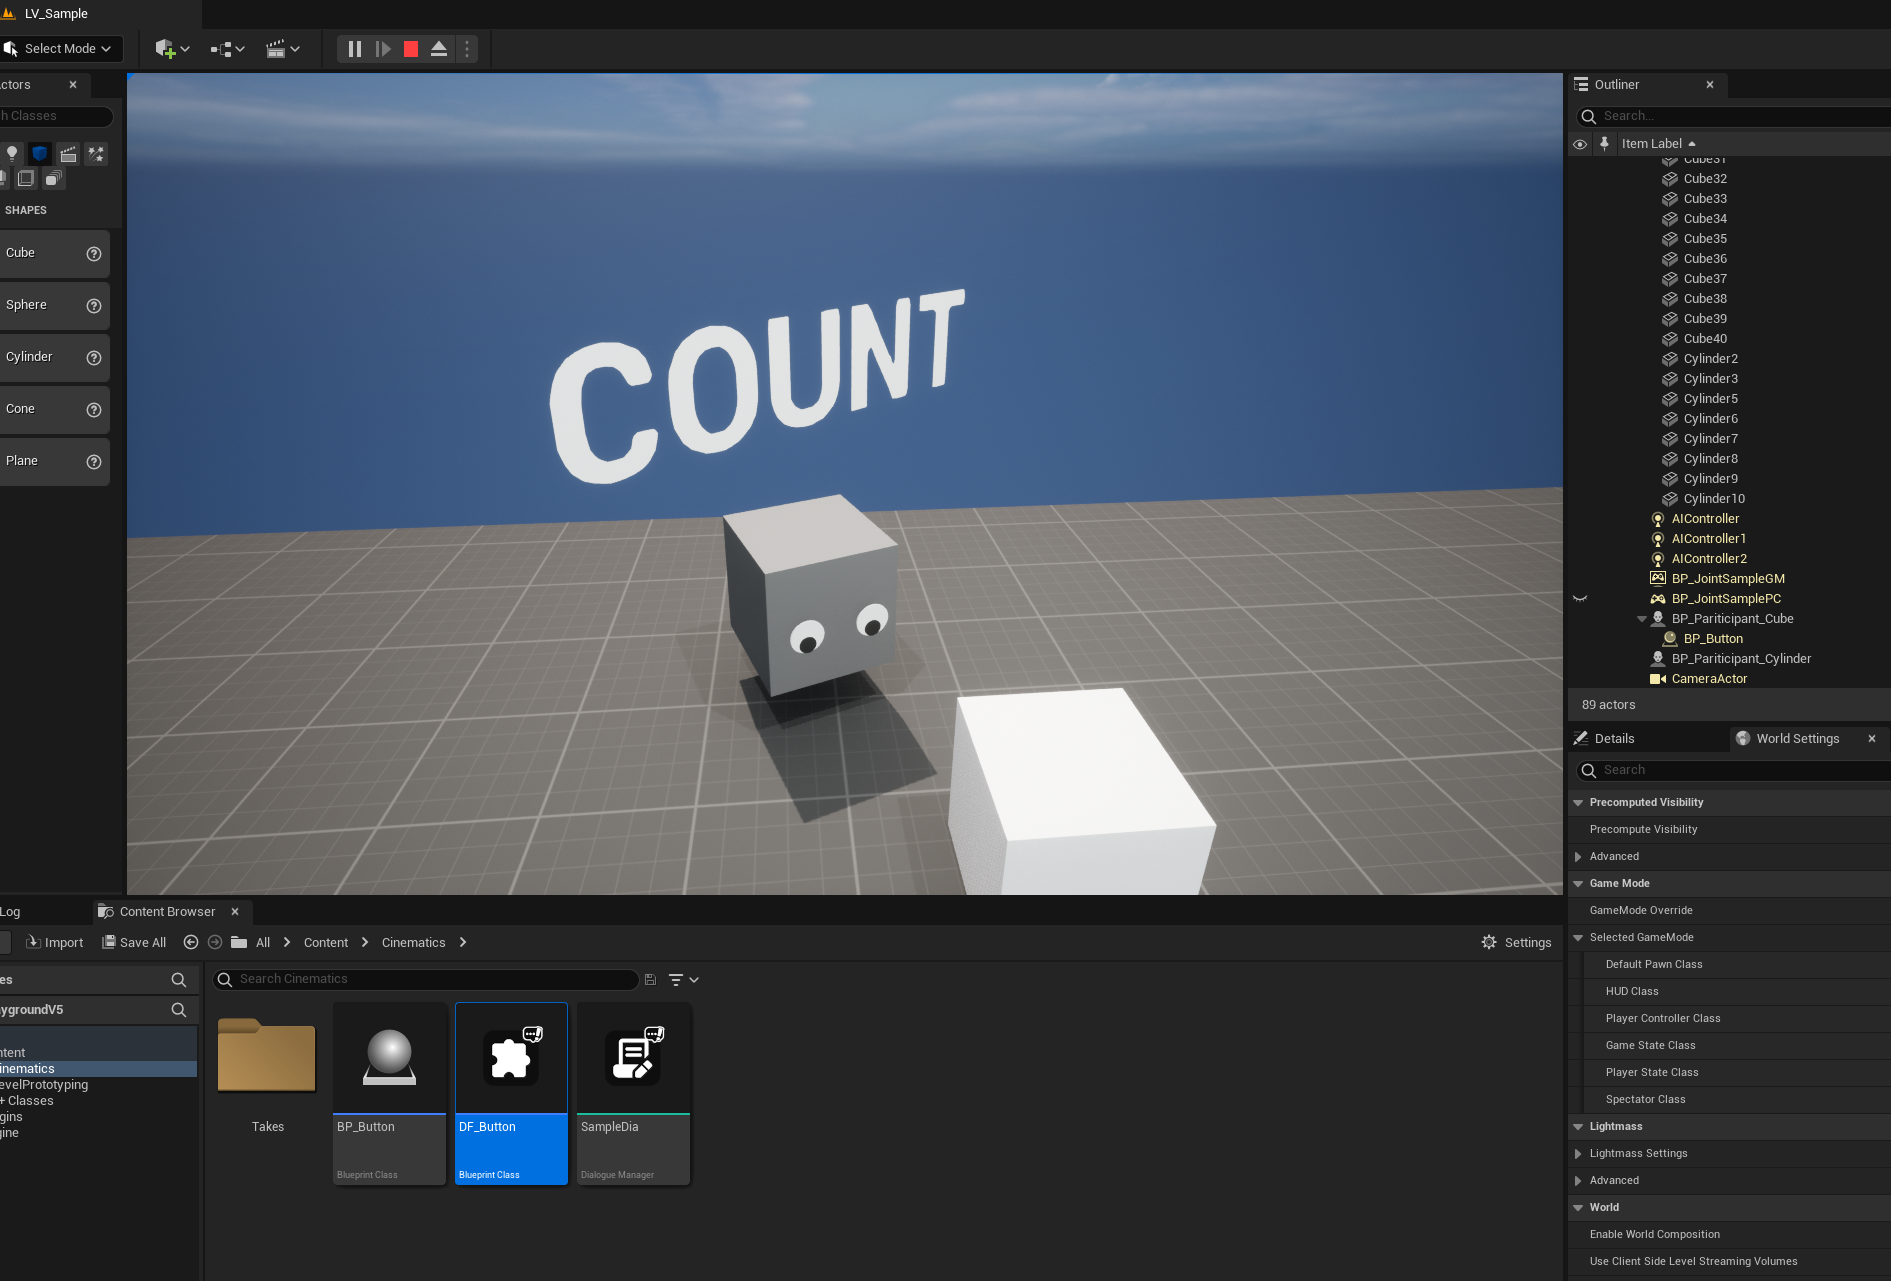
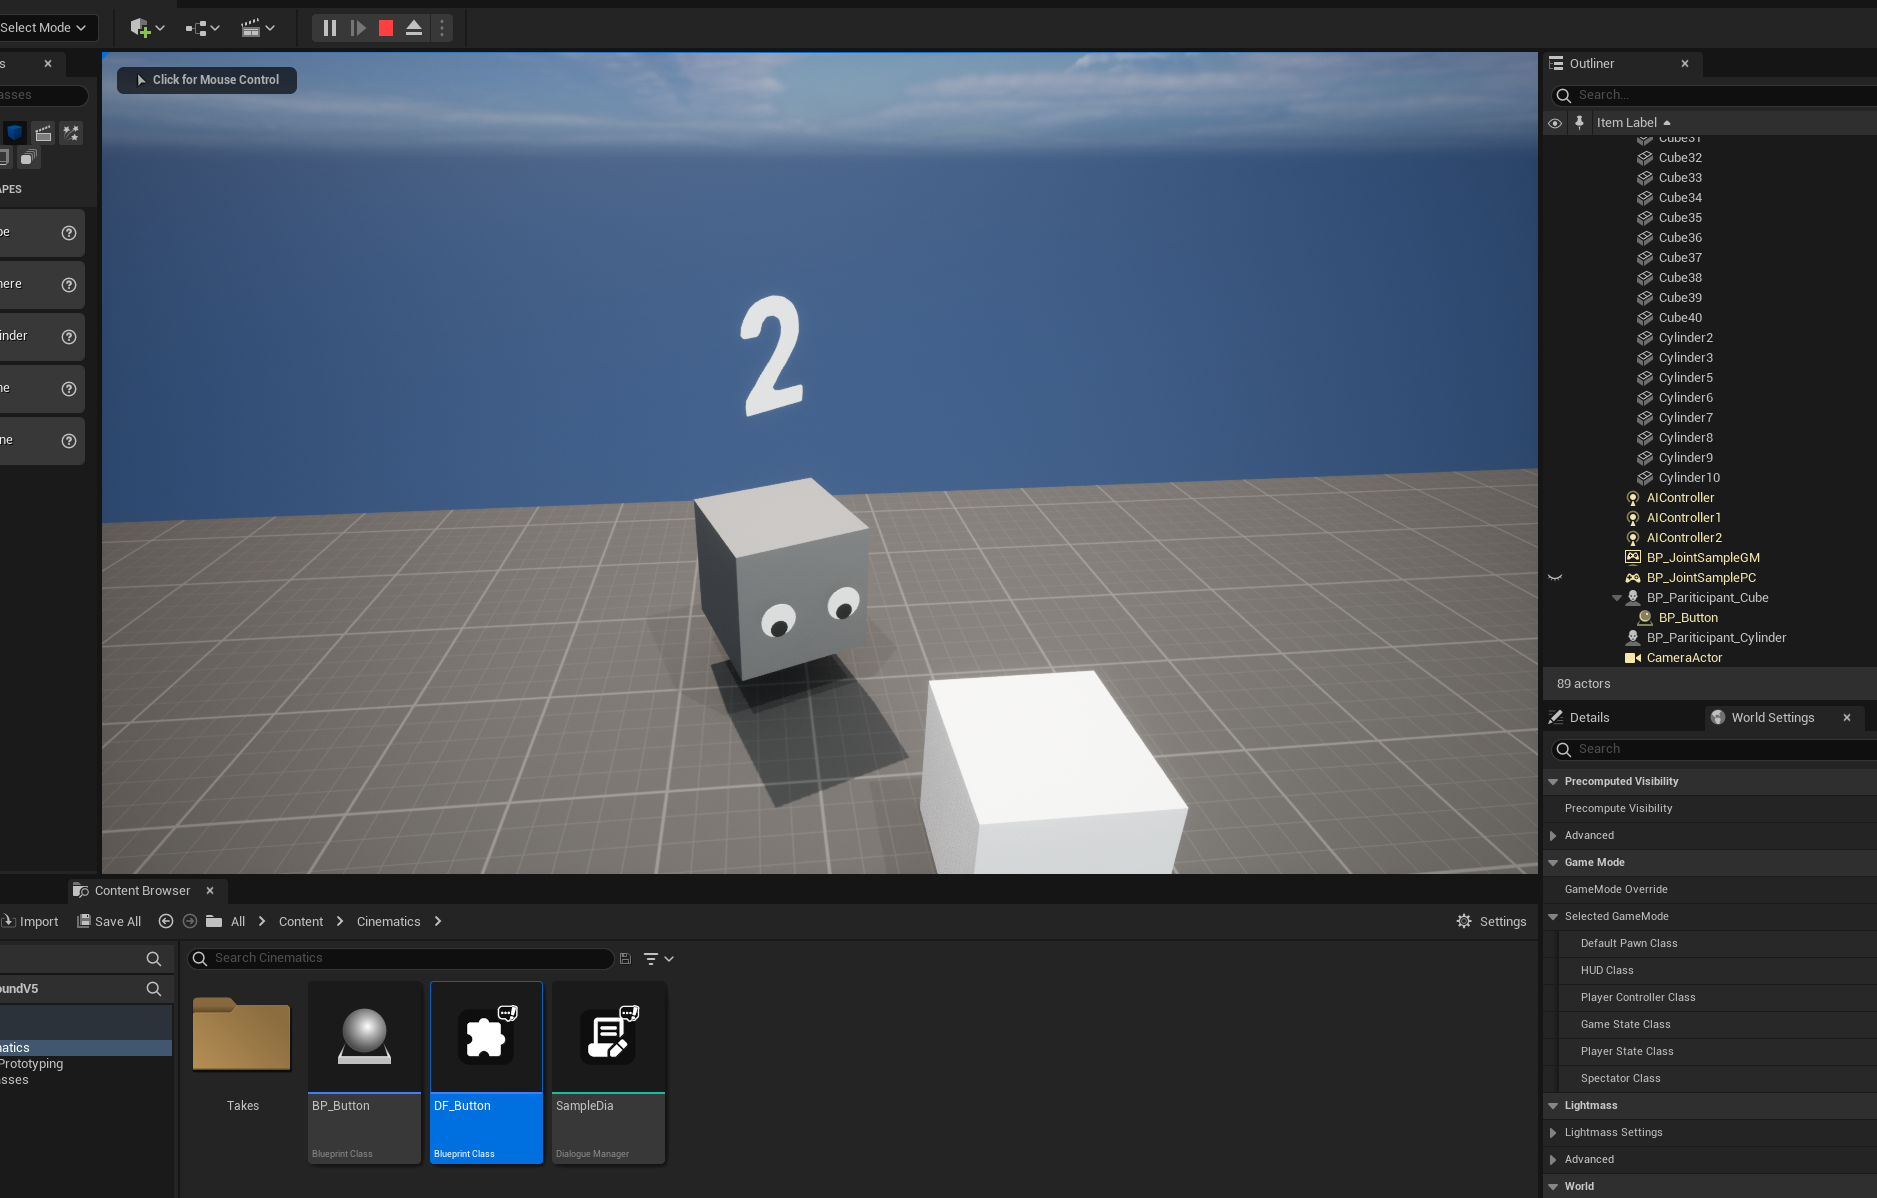
Great, we can see the button actor we made has been spawned and attach to the character well.
5. Using with The Other Nodes
Then now, let's use it with the other nodes on the system, let's make it actually hold the playback just like the other QTE does.
Open the Joint manager and attach 1 sequence node, 2 text nodes and place it like this, and also attach 1 text style node to the root node.
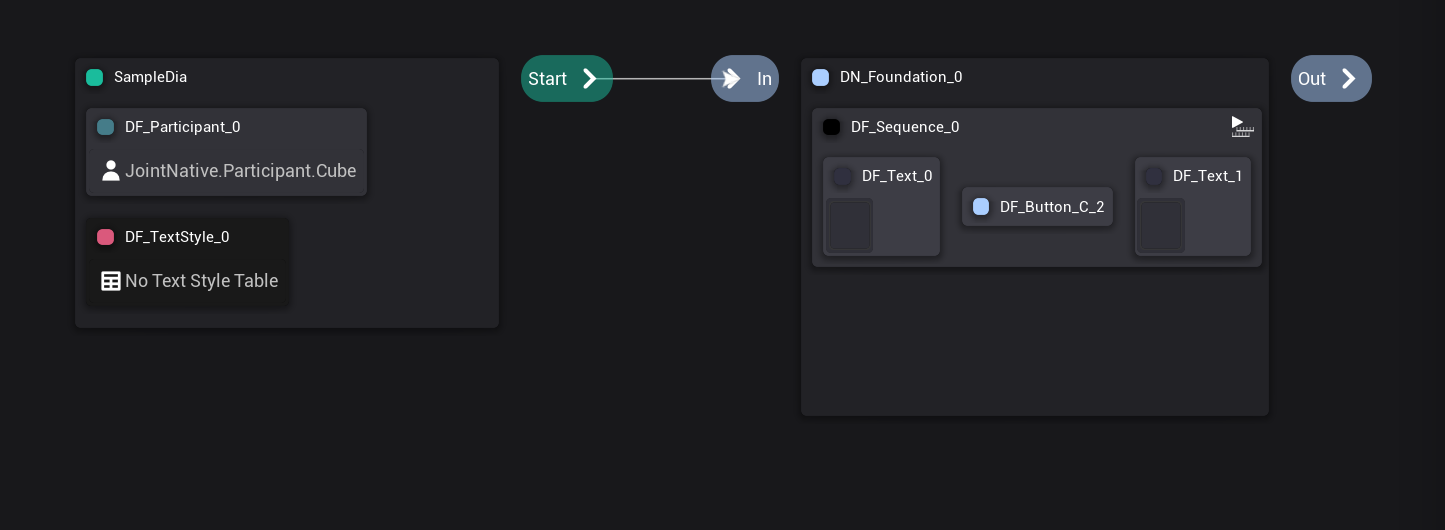
Now, let's fill out some basic data for the nodes. First, click the text style node and select the default provided text style table asset.
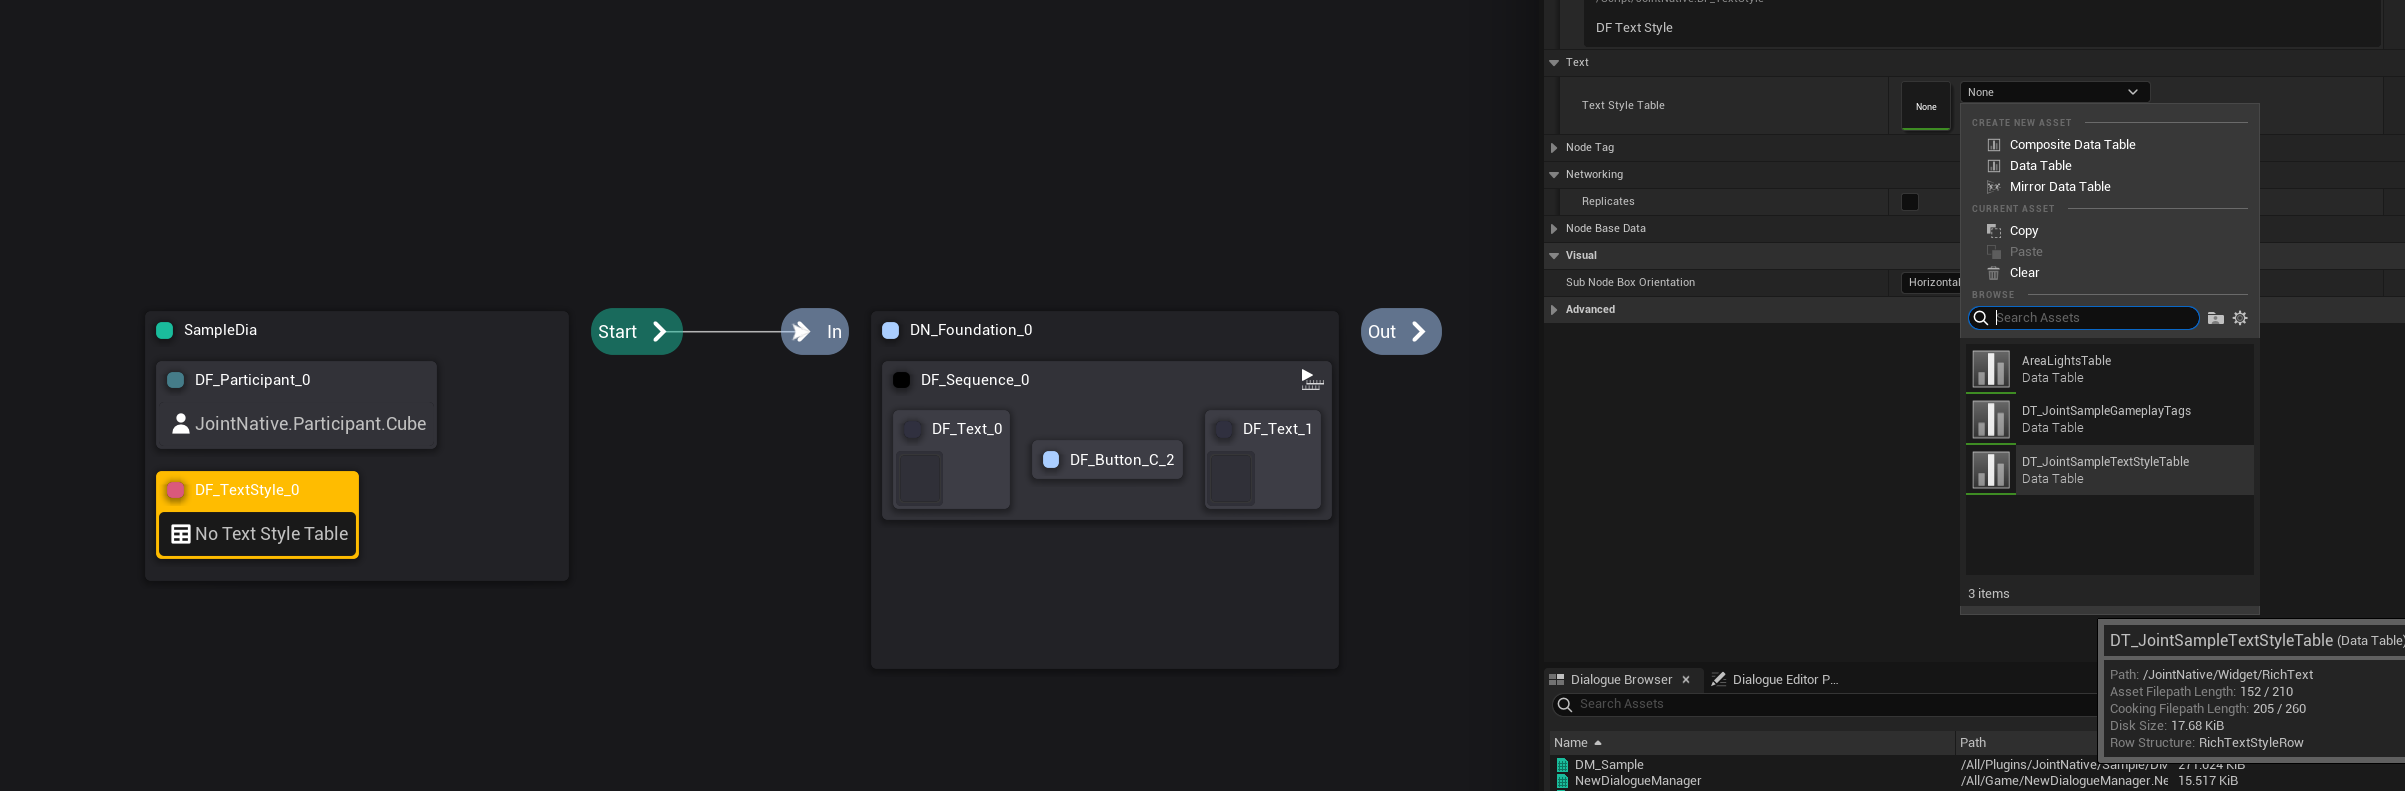
Then select both of text nodes and click the pipette button on the Text Style Instance property, and click the text style fragment on the root node.
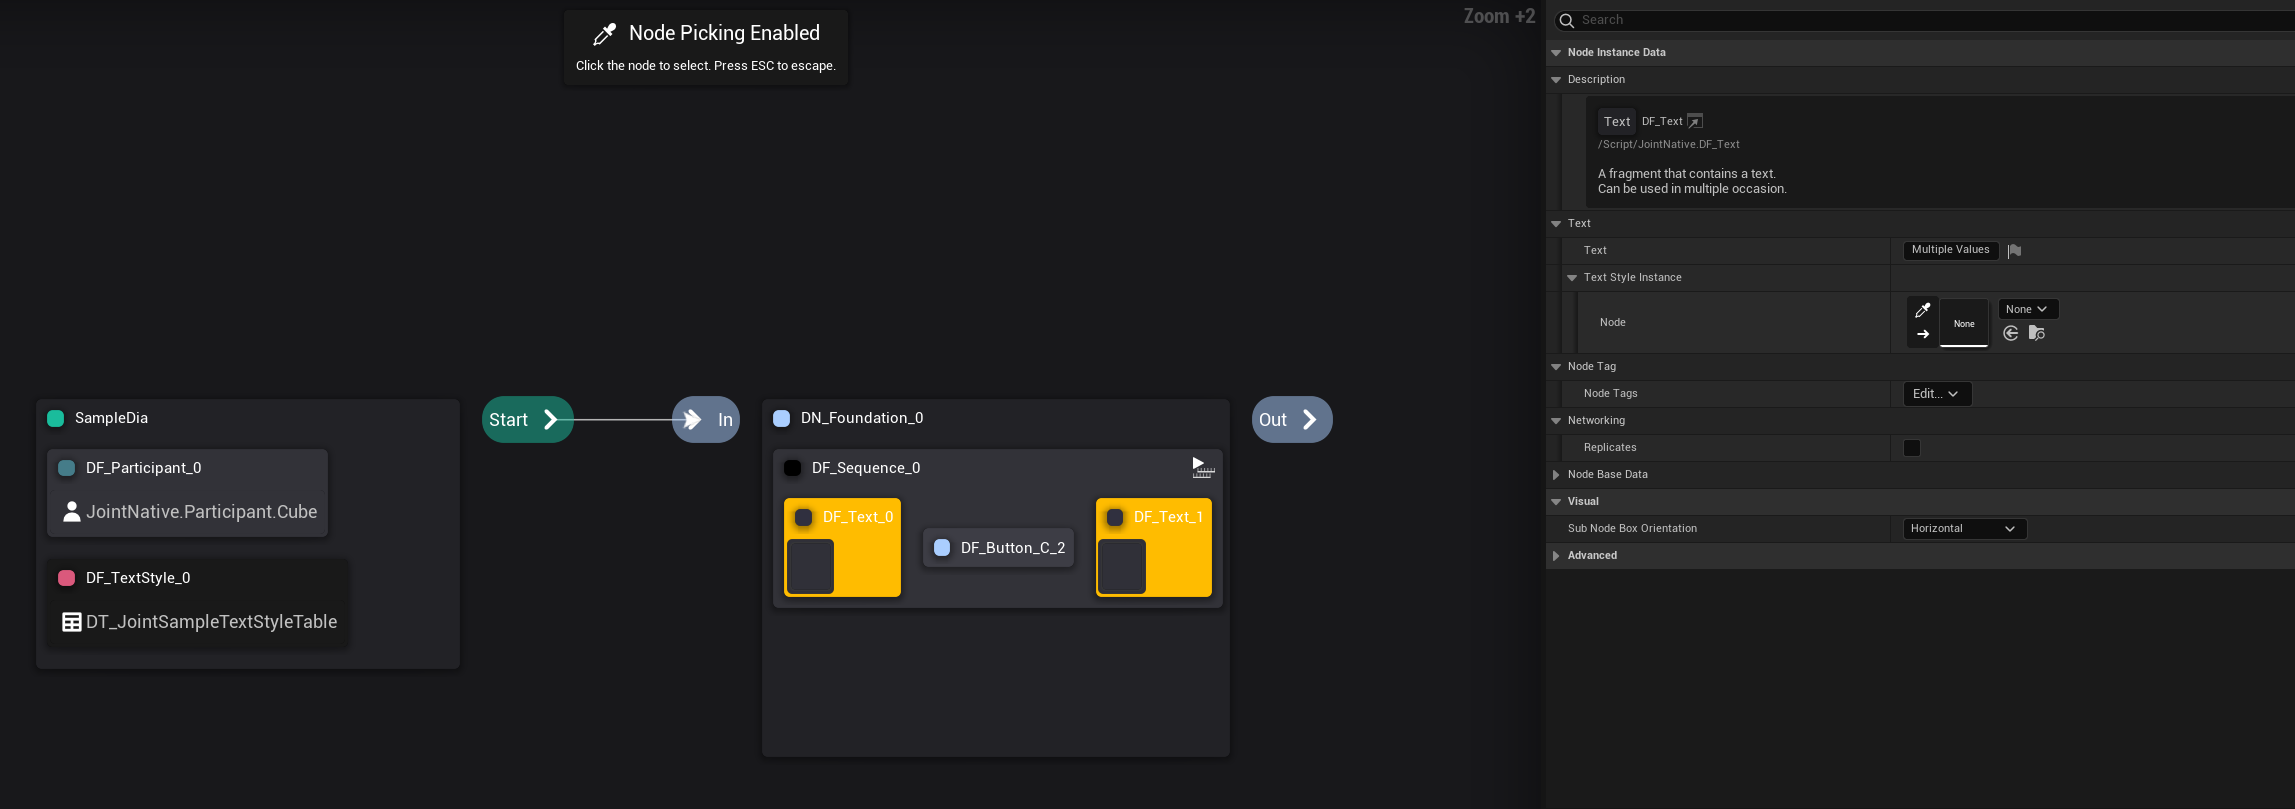
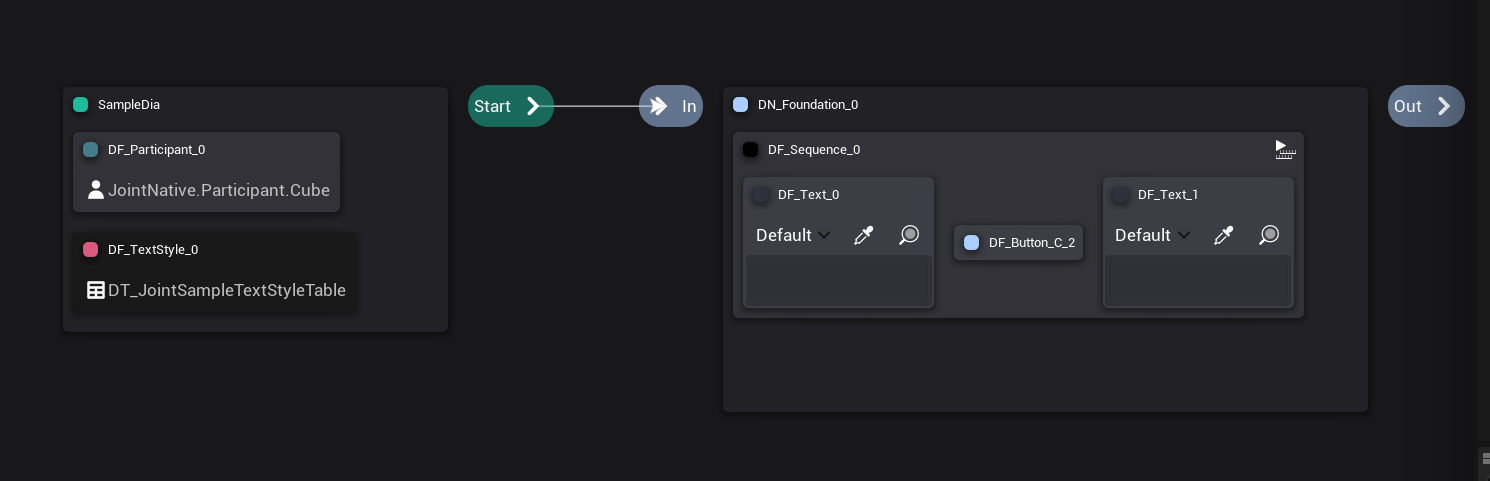
Then you will see the text style has been applied on the text block, then fill out some texts on it, and also changed the goal count of our button fragment to 100.
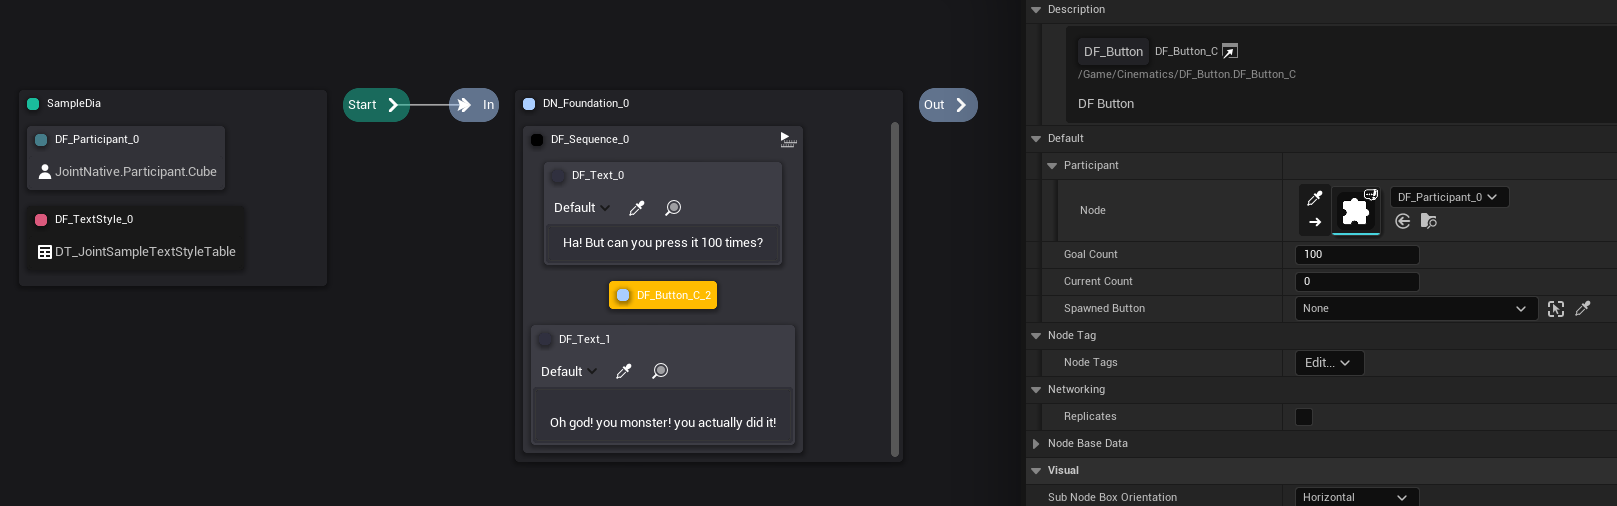
Those texts will be displayed on the Joint widget when it has been executed.
We want to display the second text when player finishes to press the button for 100 times, so we need to delay the execution of the fragments that are placed after the button fragment. By default, the nodes in Joint just iterates the sub nodes and execute begin play event immediately. So without sequence node, there 3 nodes will be executed at the same time. And we don't want that to happen.
And Sequence Fragment comes handy in this case. Sequence Fragment is a fragment in Joint Native. It plays its sub nodes one by one, waiting the prior node to be ended.
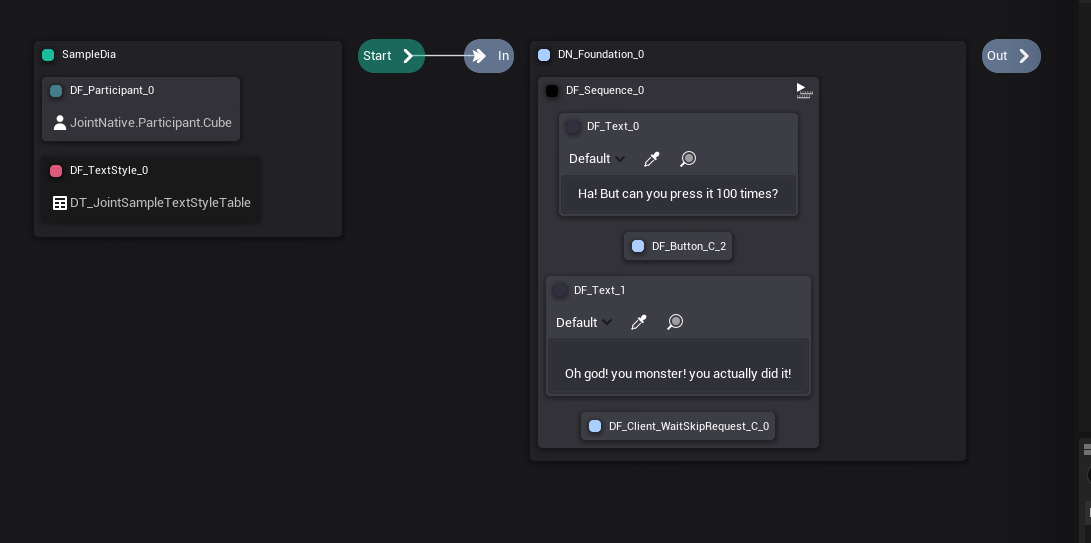
And finally, let's add WaitSkipRequest fragment at the tail of the sequence node.
Text nodes are just a node that contains a text inside and will be end played as soon as they be played. So if we don't have something else to block the playback, then the Joint will end as soon as you press it 100 times, and we don't want that because we want to see the final result.
Well, now let's play it again. But before we proceed, we need a Joint widget to see the text on the node.
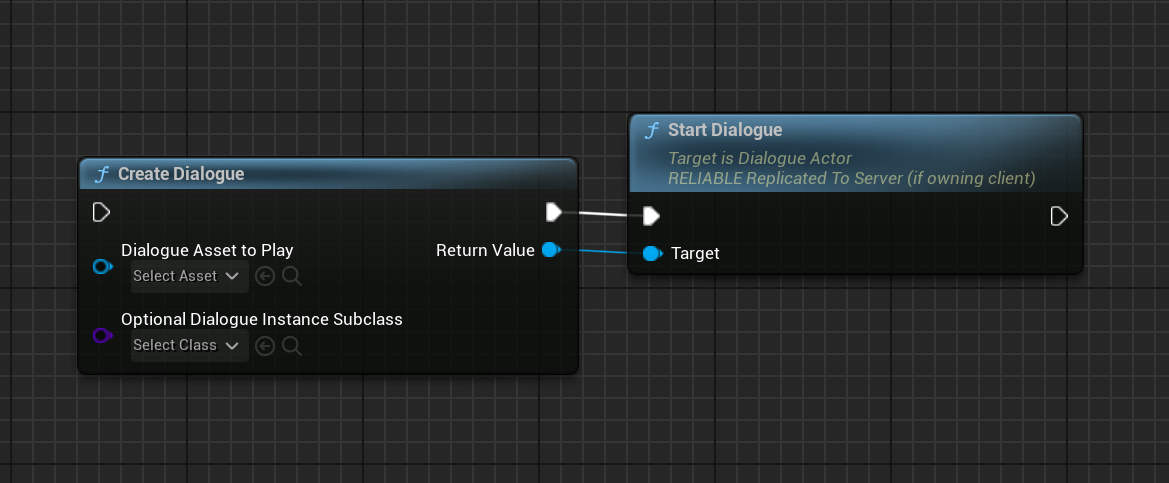
also we have better way on spawning Joint. Use create Joint instead.
In this tutorial, we are going to use WB_JointWidget in Joint Native.
Open the participant blueprint editor and change the logic where we starts off the Joint like this.

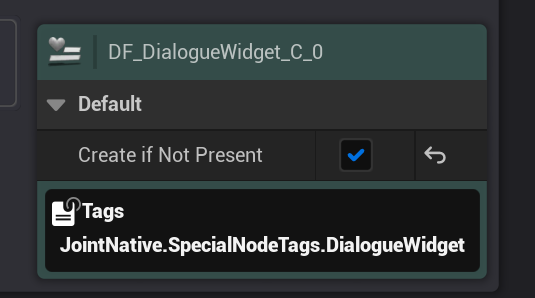
Now, you don't need to manually make a Joint widget outside the Joint. The world has changed, pal!
Just check CreateIfNotPresent property to true on the Joint widget fragment.
Then let's play the PIE again.
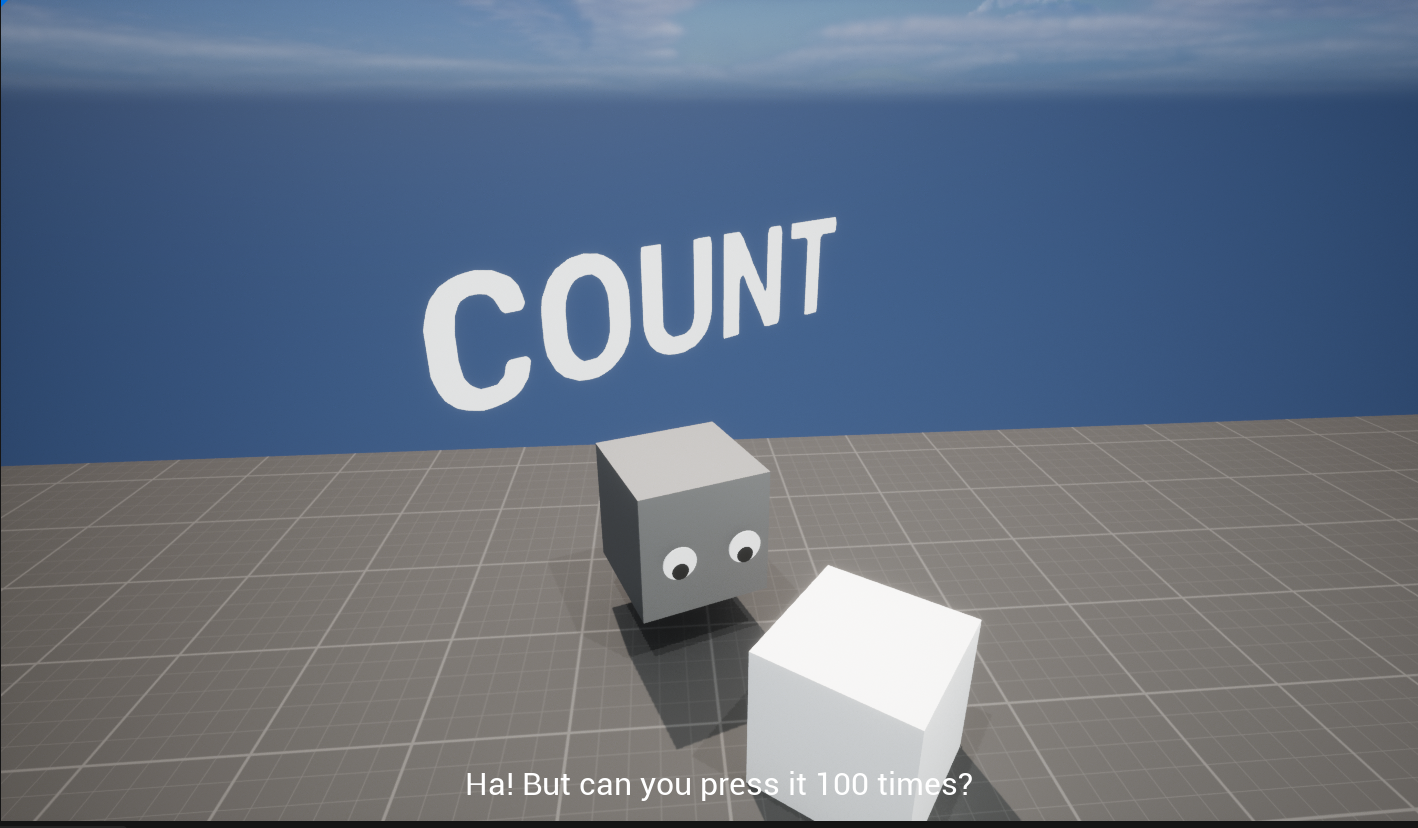
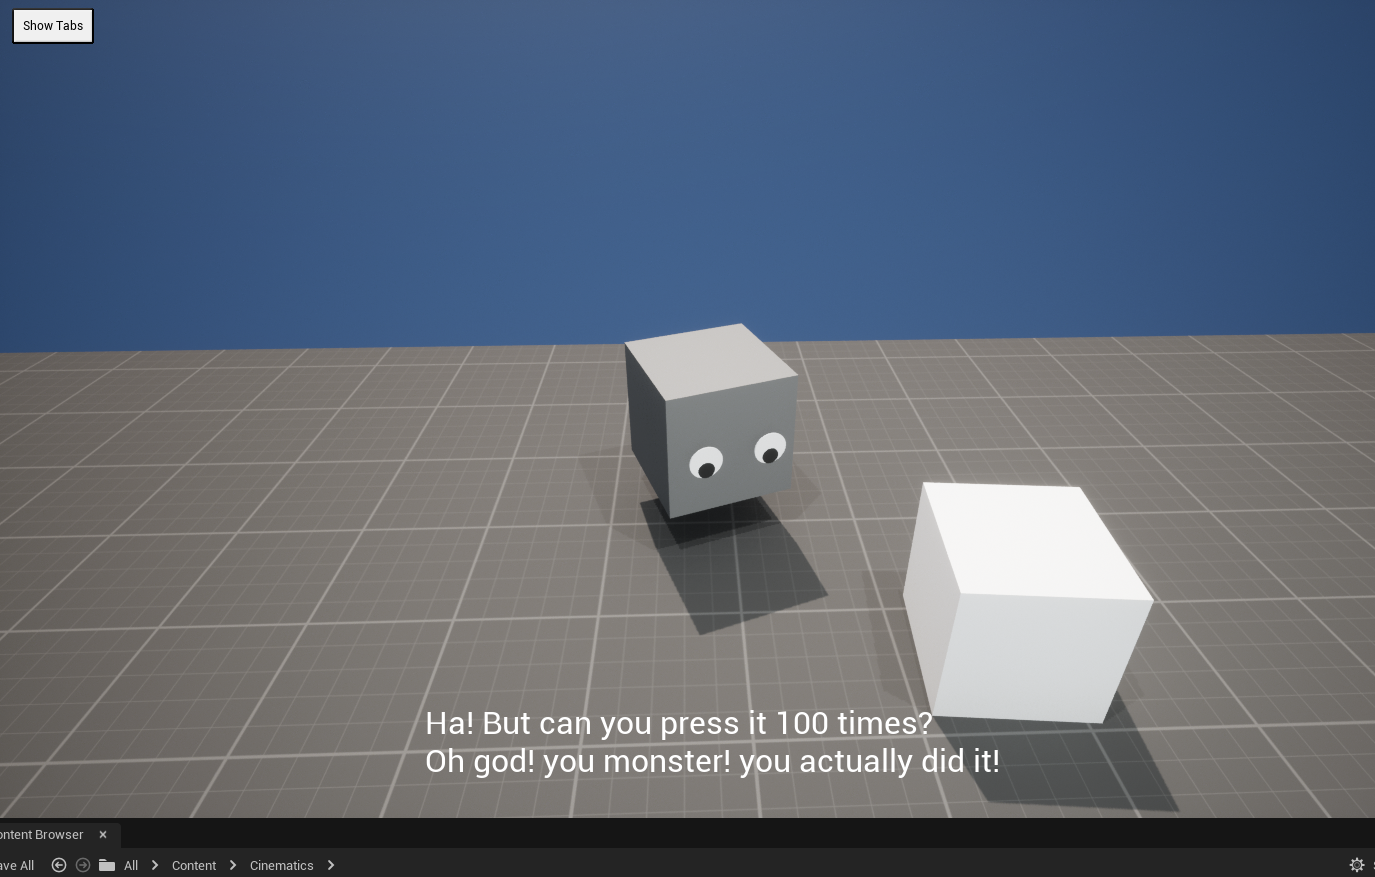
Now you will see the first text has been displayed on the screen, but the second text doesn't. This is because our button fragment between them is still being played and halting the sequence node's playback. Now let's press it up to 100 times...
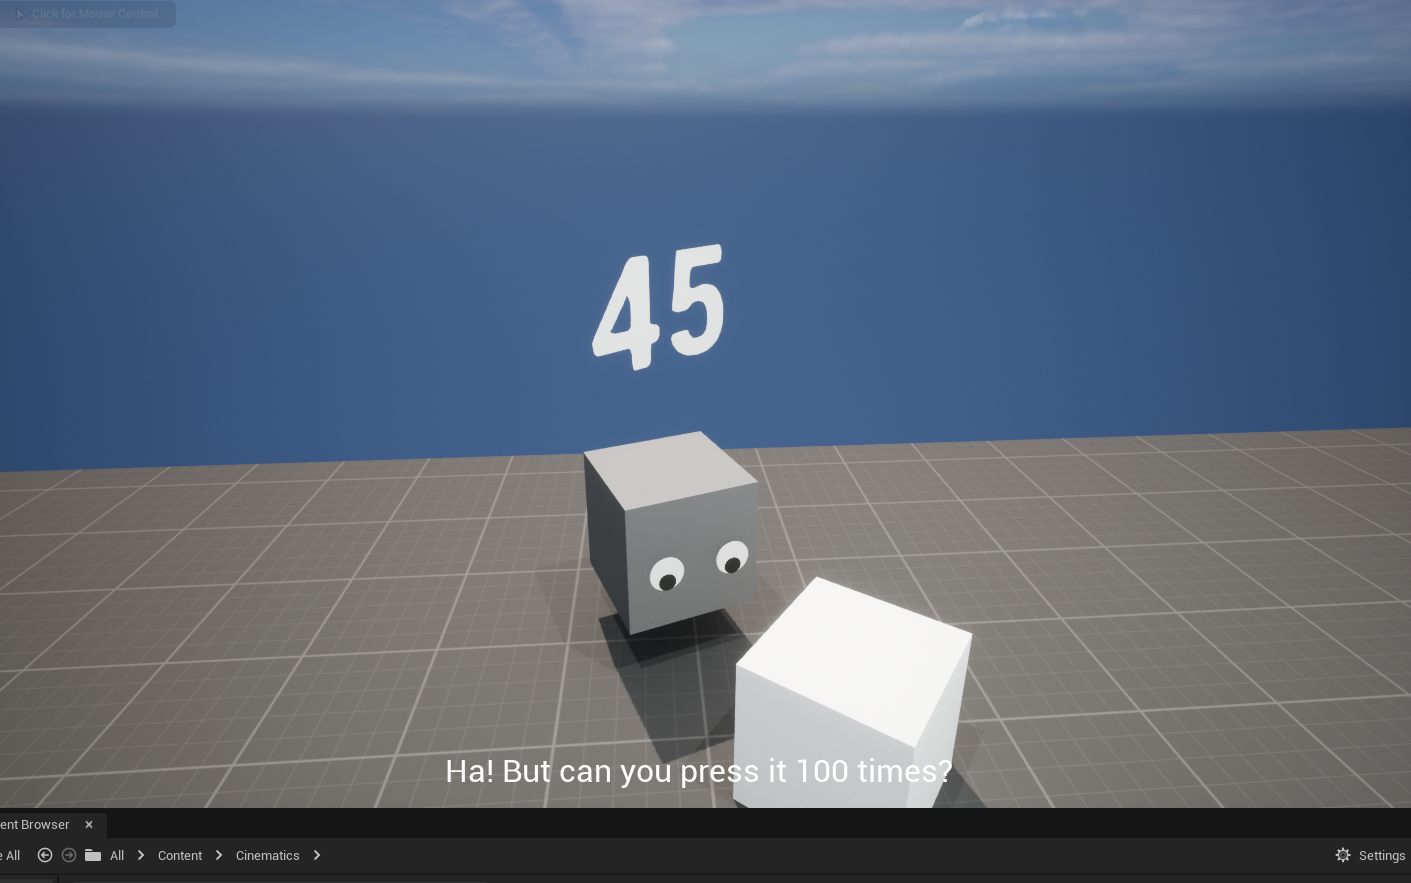
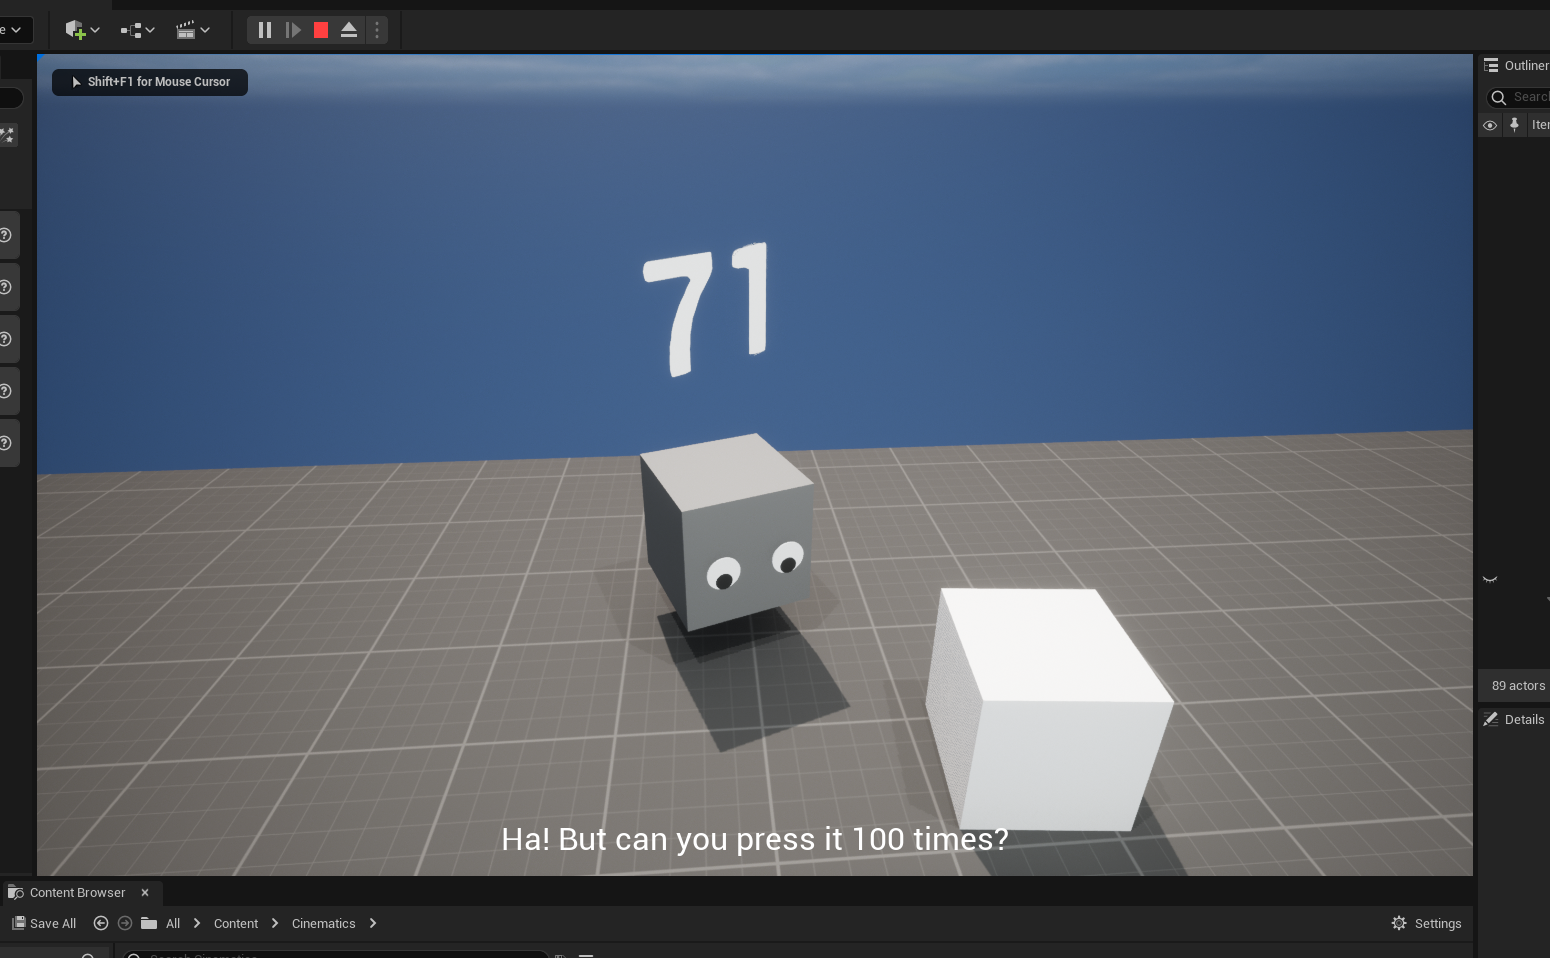
As soon as you pressed it 100 times, the second text will be displayed on the text.
6. Making Widgets React to Fragments
Customizable widgets with Joint system is a key point of any Joint systems, and you might wonder how can we achieve this with our custom fragments, and how WB_JointWidget handle this.
If you see the WB_JointWidget's logic, then soon you will find out these and realize that it is very simple trick.
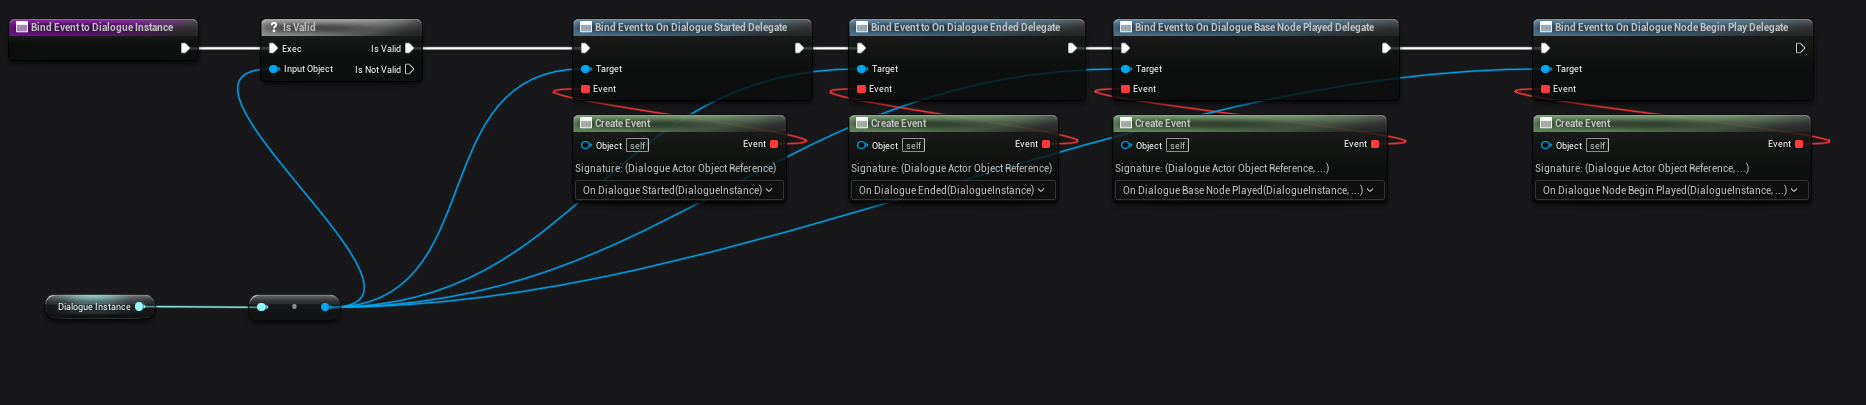

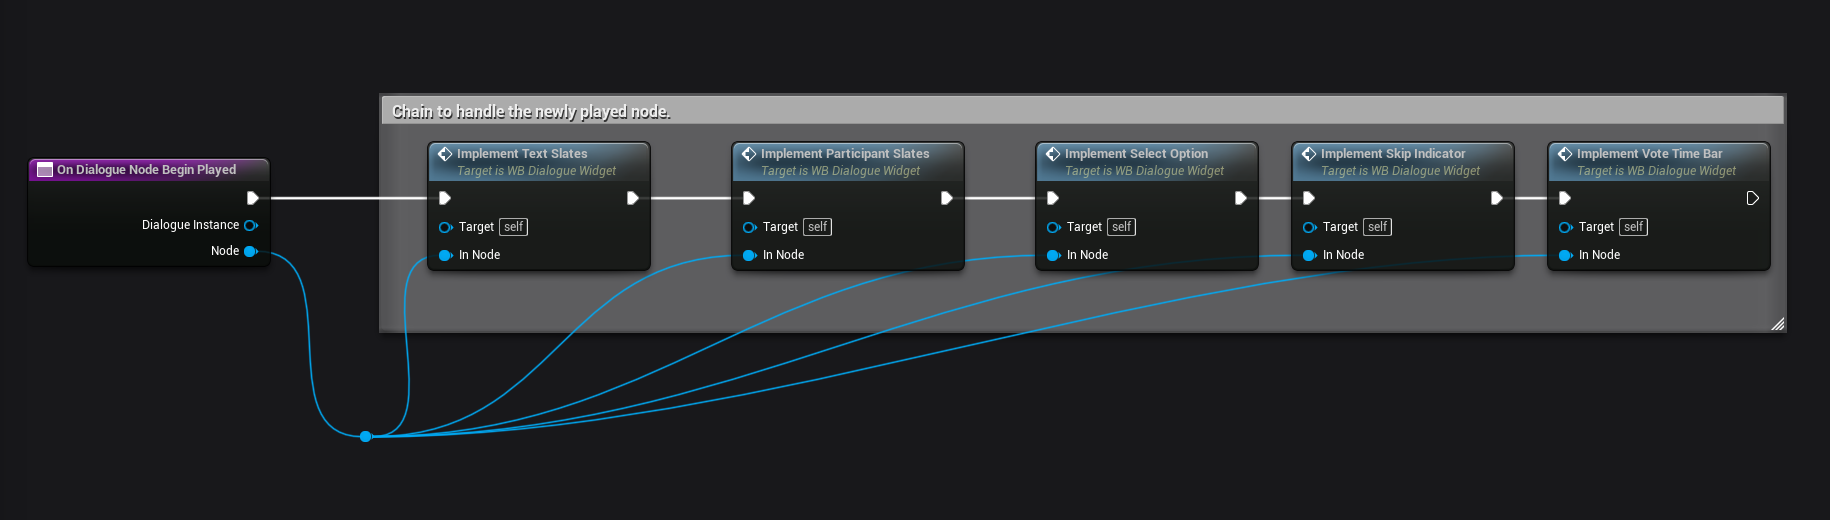
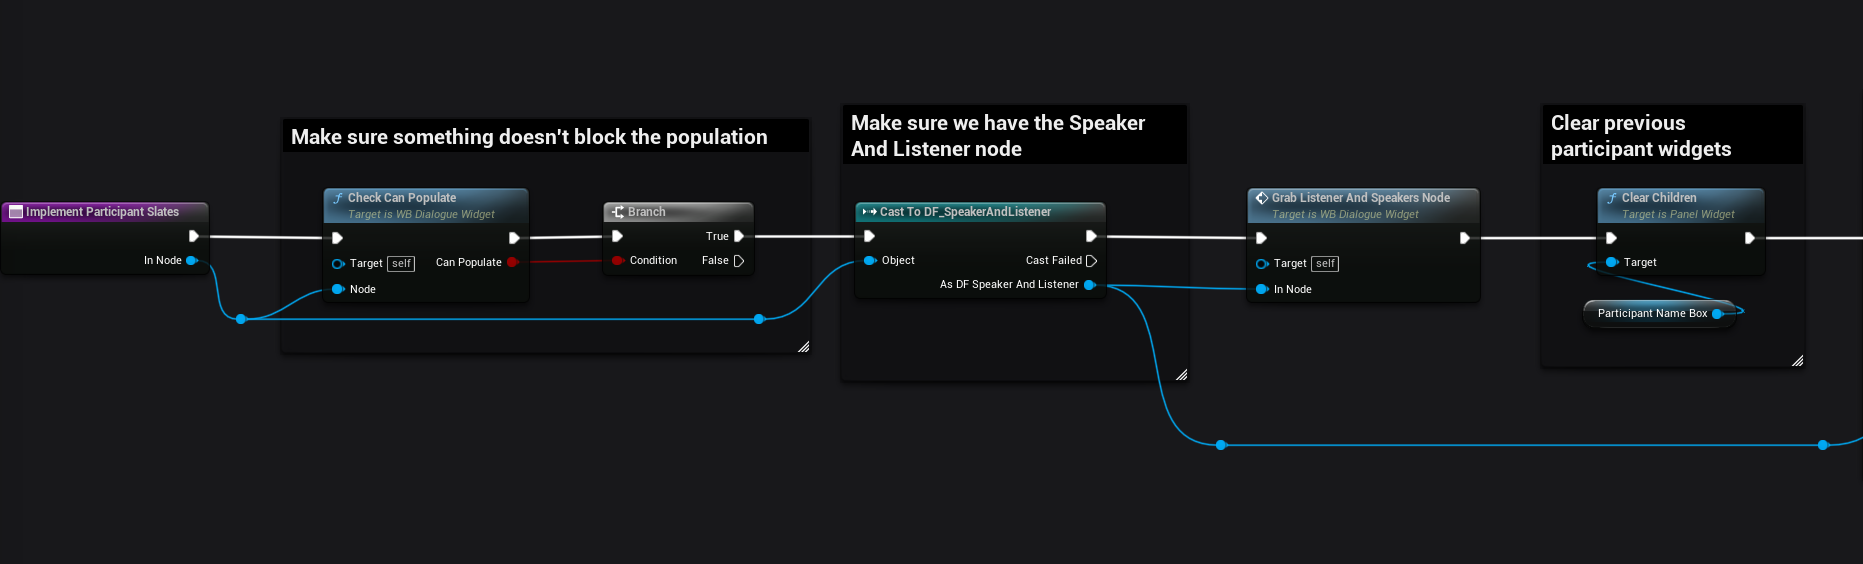
What it does to update the slate is basically when a new fragment has been played on the provided Joint actor, it gets that node and try to populate or update children slates for the node with possible. And when the next base node has been played, it simply just reset the widget at its initial state.
It means, you can make the widget react to your custom fragments if you need.
7. Still Have A Lot More To Show You!
Joint has a lot of other features that we didn't listed on this document, including multiplayer support, Localization support, Joint Debugger, Editor features like custom graph node, WYSIWYG Editor, Search & Replace etc. Anything will be explained on this website, so please check out the other documents.