Creating Your First Dialogue
Once you've installed and activated the Simple Dialogue System in your engine project, now it's time to create your first dialogue.
Creating a Dialogue Manager
Start by right-clicking in the Content Browser and select Dialogue -> Dialogue Manager from the context menu to create a new Dialogue Manager.
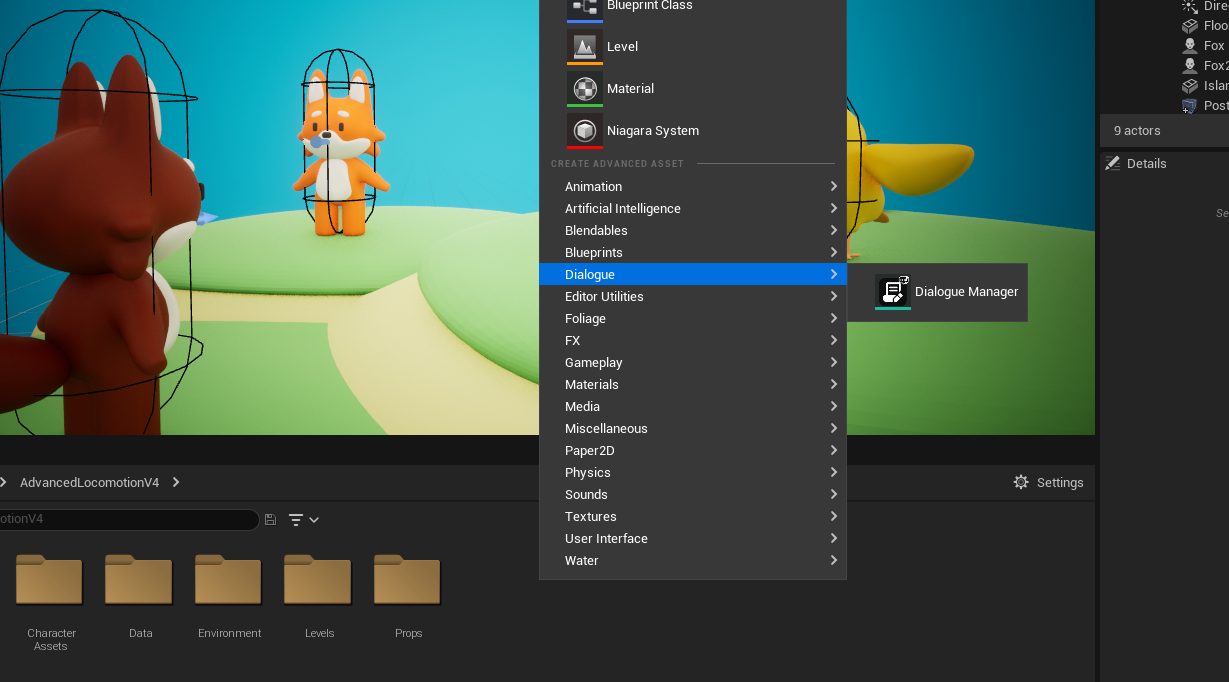
Dialogue Manager is a script bundle where you attach various dialogue nodes to express your own dialogues. All dialogues in the Simple Dialogue System are implemented through the Dialogue Manager.
Double-click on the created Dialogue Manager to open the Dialogue Manager Editor. Here, you can attach Dialogue Nodes to the Dialogue Root Node of this Dialogue Manager asset to implement the desired dialogues.
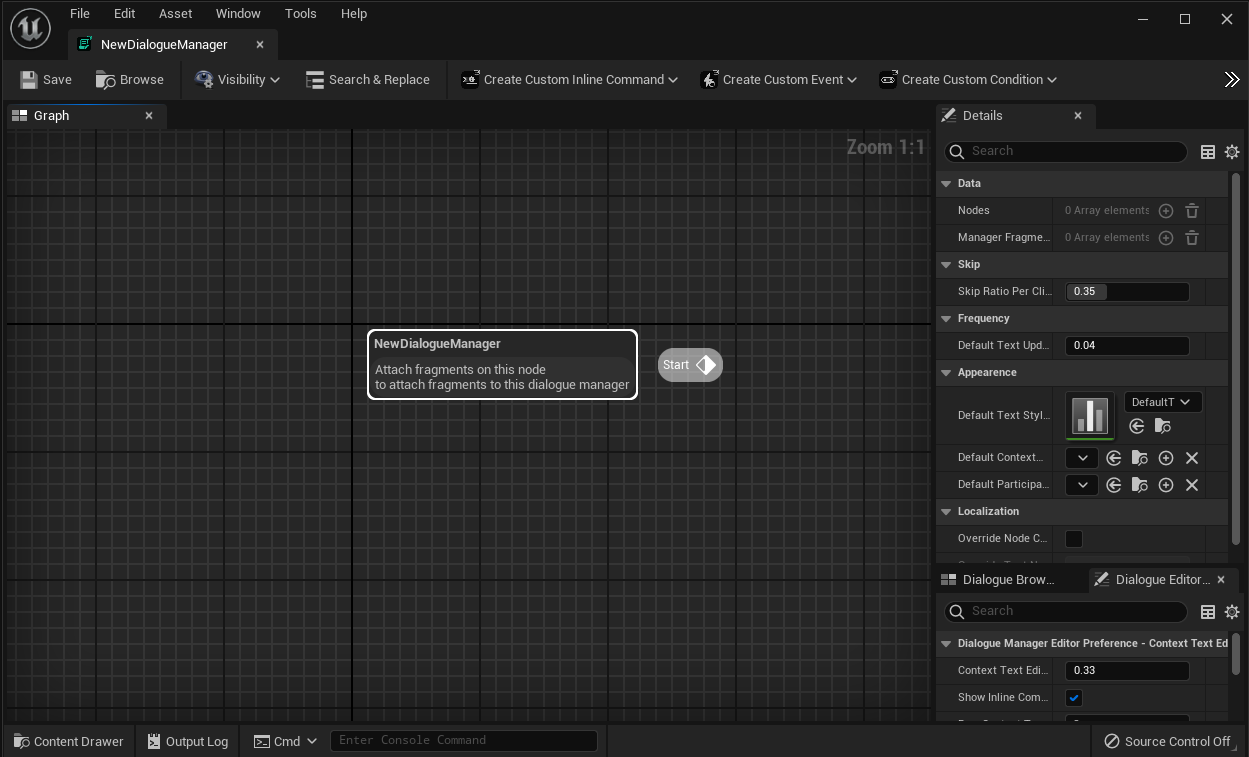
Attaching Dialogue Nodes
You can add new Dialogue Nodes by right-clicking in the empty space of the graph and open the node creation menu, and selecting the node type you want to use.
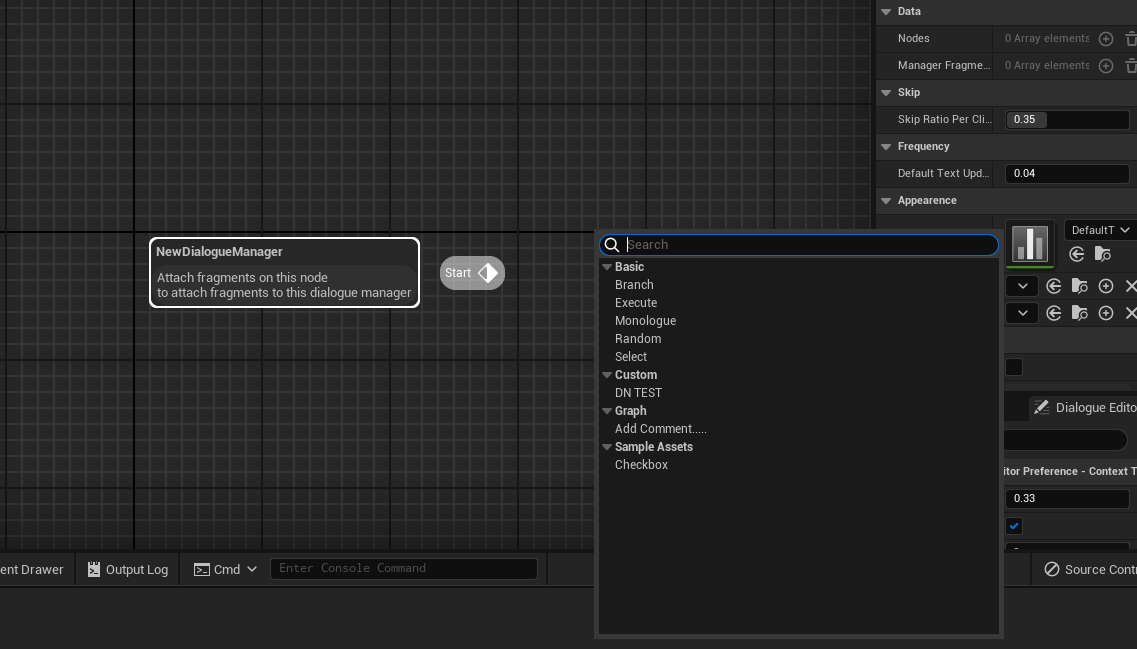
In this example, let's create one Monologue Node and connect it to the start pin of the root node.
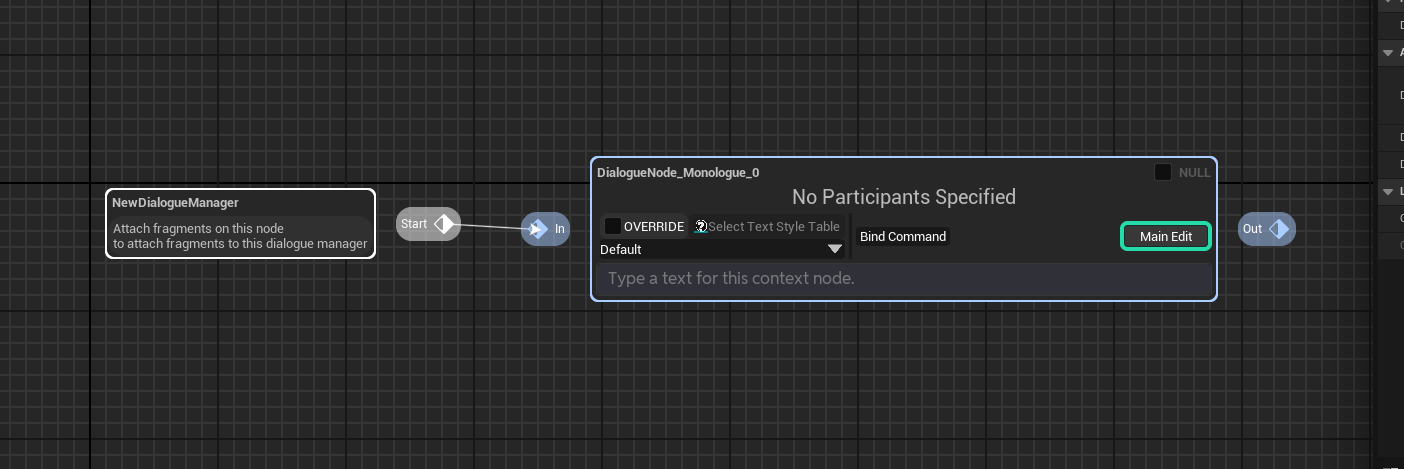
The Monologue Node is a basic node that represents a short dialogue between multiple participants.
Adding Dialogue to the Dialogue Node
Here, let's enter a basic dialogue into the text input box in the center of this Monologue Node.
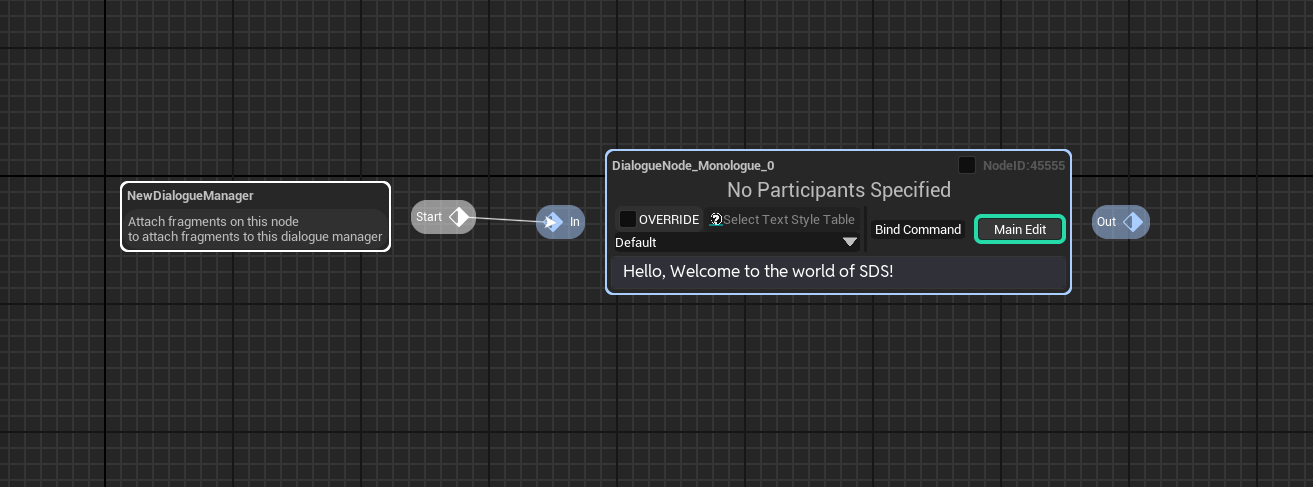
Nodes based on Dialogue Node Base Context have a text box in the center like this, allowing you to enter dialogue, and this text is stored in the Context Text property of the Dialogue Node Base Context class. This property serves as the dialogue spoken by this the node when encountered during dialogue playback.
Now, when this Dialogue Manager is played and encounters this node starting from the root node, the Dialogue Widget Base will display the message Hello, Welcome to the world of SDS! on the screen.
Running the Dialogue
Now, let's test out the Dialogue Manager we created so far!
Playing the dialogue for your gameplay situation and making it seemless and persuasive is on your own, but we provide a handy helper for the control of the dialogues, SimpleDialogueSubsystem.
In this tutorial, we are gonna play the dialogue with the SDSS(SimpleDialogueSubsystem) when the level is intialized.
We will open the level blueprint,
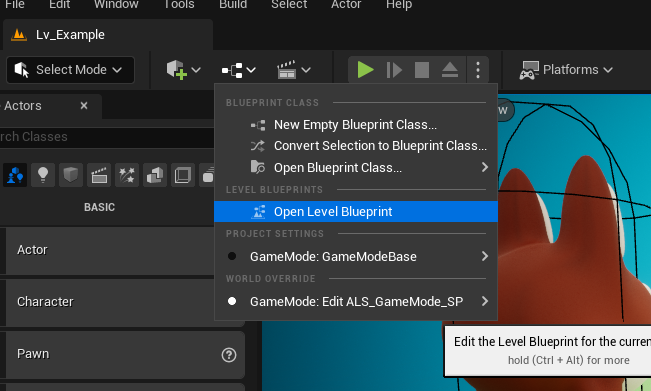
And find the SimpleDialogueSubsystem on the context menu.
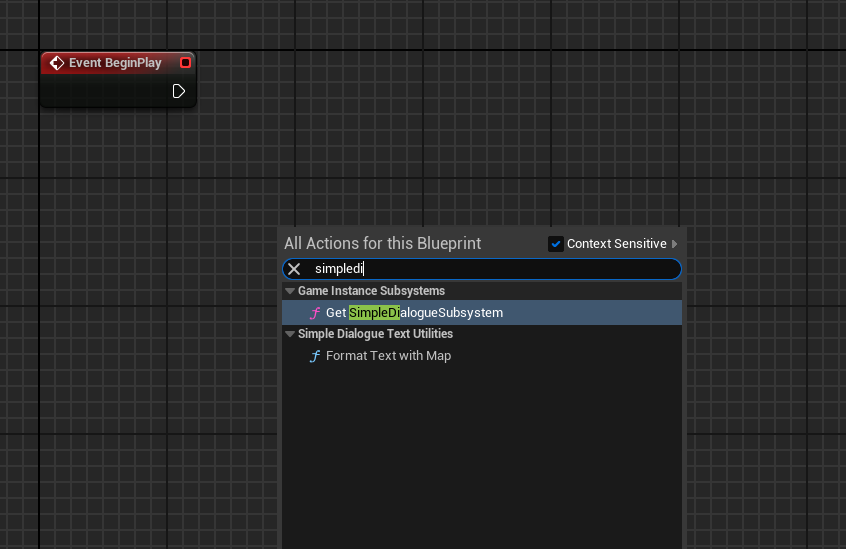
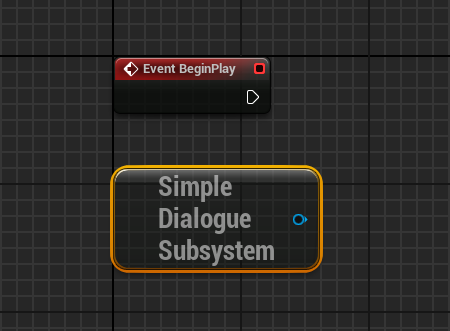
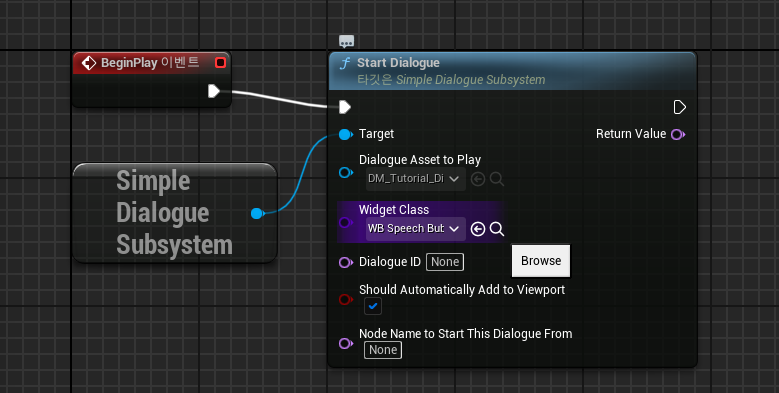
Once you added it on the event graph, Drag off from the pin on the subsystem and find Start Dialogue function.
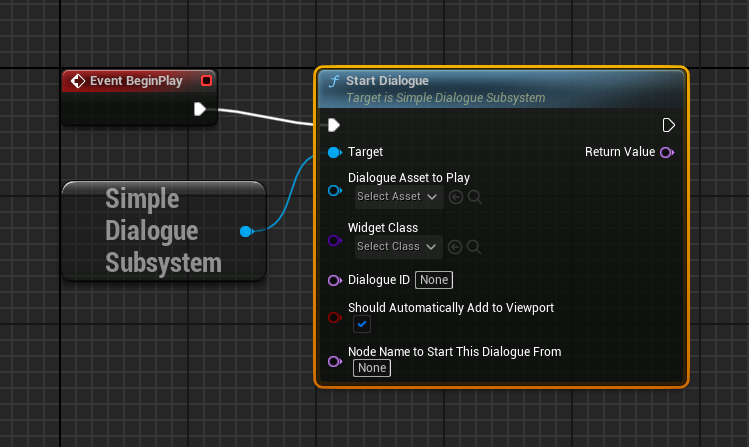
This function will start off the dialogue manager we specified and create a widget for the dialogue.
Now let's specify the Dialogue Asset to Play argument with the Dialogue Manager we just created, and also the Widget Class argument with WB_SpeechBubble.
WB_SpeechBubble is the sample widget blueprint enveloped in the plugin, that is derived from the SpeechBubbleWidget_Handled, base class for the dialogue widgets with speech bubble related actions.
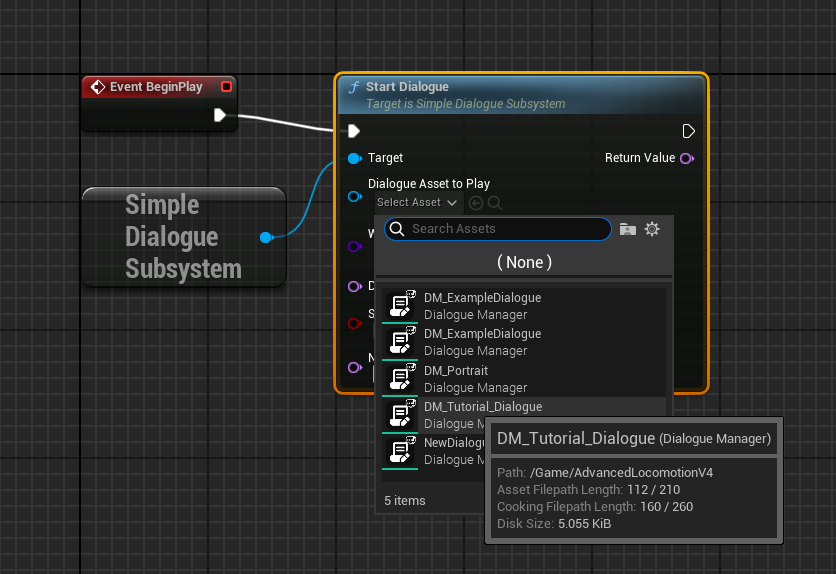
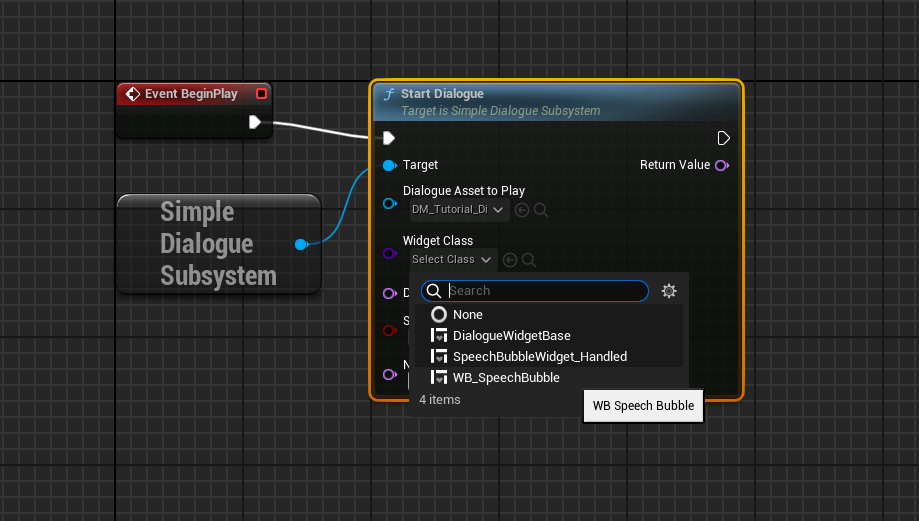
When you are done, let's start the PIE and see the play result of the dialogue.
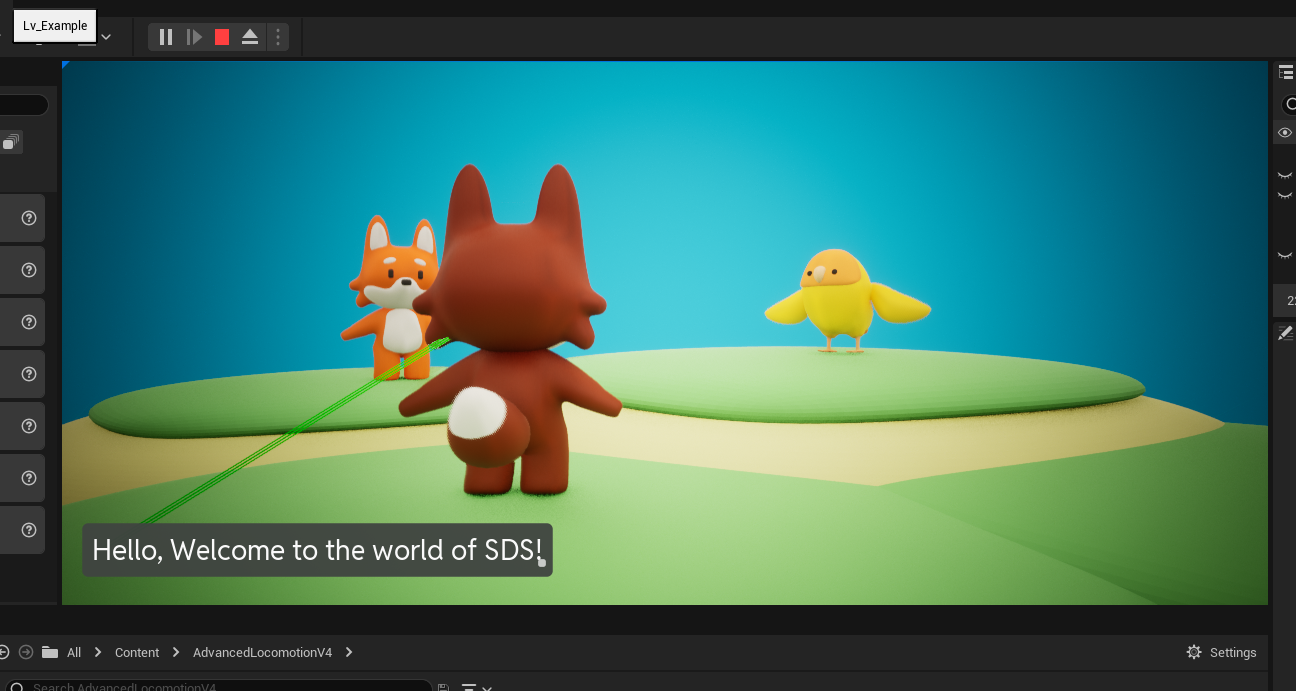
You can see the dialogue is being displayed on the screen.
Assigning Dialogue Participants
But in the first run, you would see that the dialogue widget was not being displayed properly. This is because we didn't set up the participants for the dialogue yet.
In the SDS, The plugin stores and regonizes the Speech Bubble Handle Component instance as participants of the dialogue, so if you want to make your character participate in your dialogue, then you must attach a new Speech Bubble Handle Component to your character actor first.
Let's add a Speech Bubble Handle Component to the characters we want to use as participants on the dialogue.
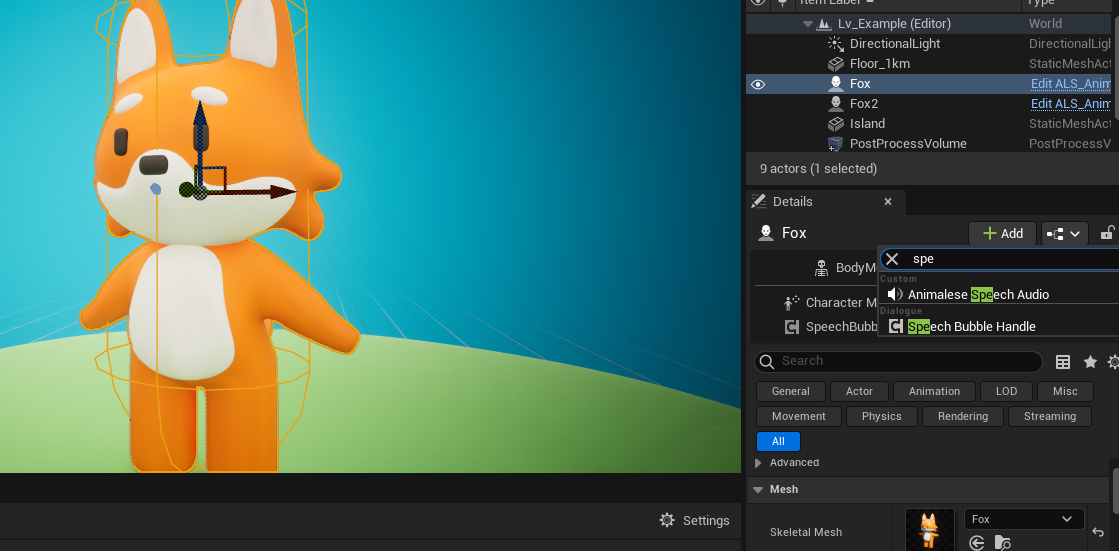
If you select the component, then you will see the properties on the Speech Bubble tab.
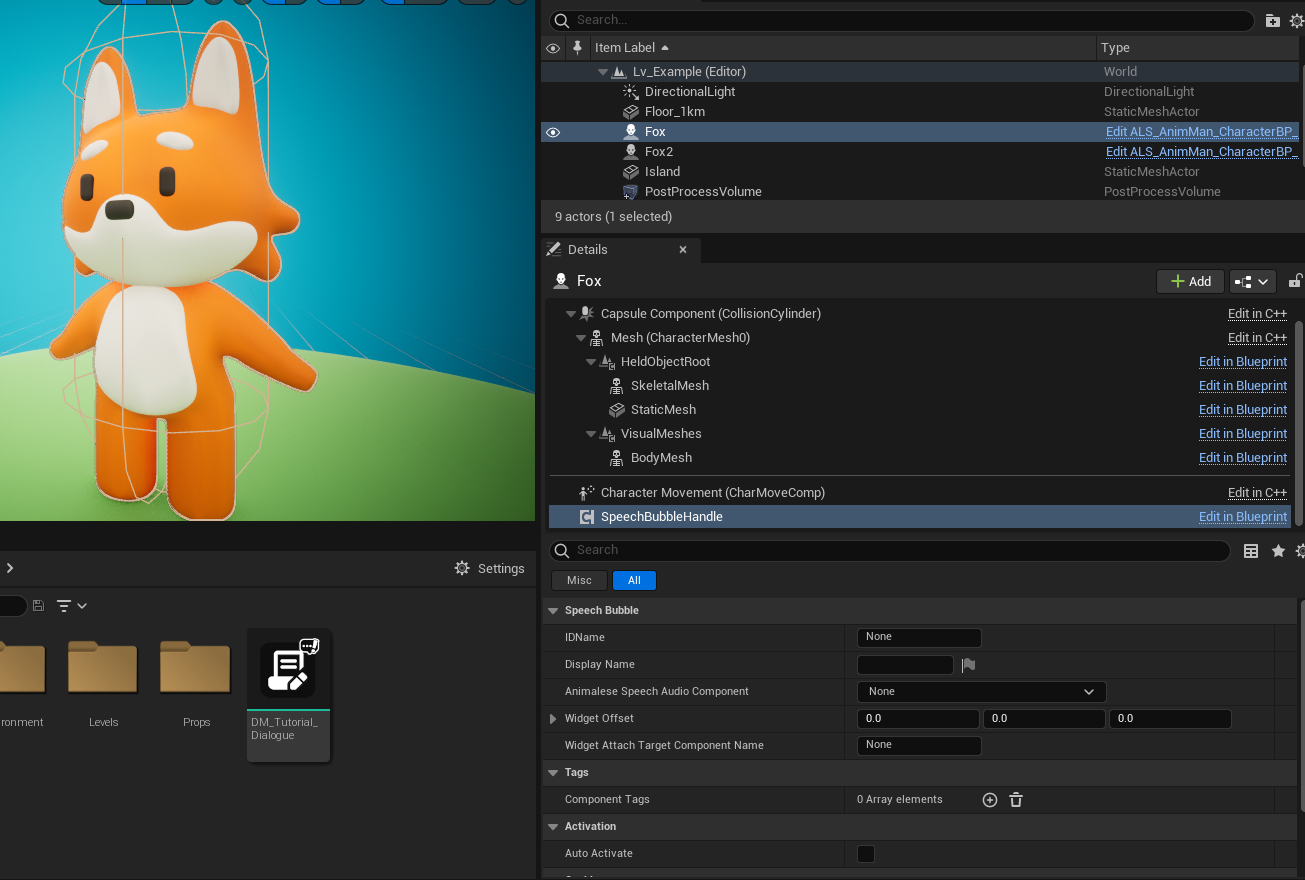
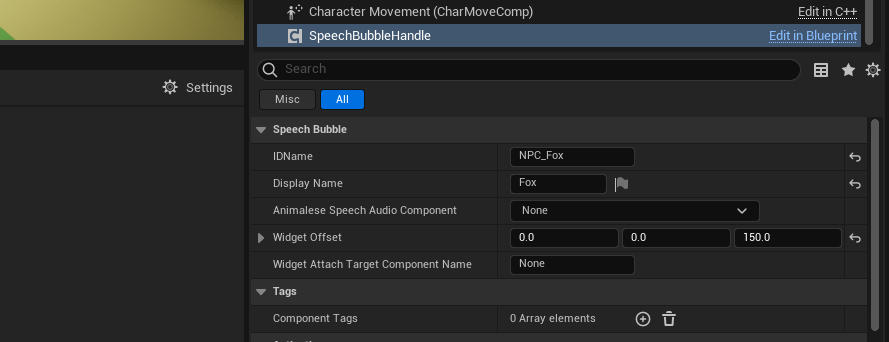
IDName is an identification of this participant component on dialogues. You will use this ID to specifying which characters are speaking on each node. In this tutorial, We will set it to "NPC_Fox"
DisplayName is the localizable name that will be displayed to the player. It is used only for the cosmetic purpose. In this tutorial, We will set it to "Fox".
Let's do this to the other character in the scene. In the tutorial, We will set the parrot character's participant component's IDName to "NPC_Parrot" and DisplayName to "Yellow".
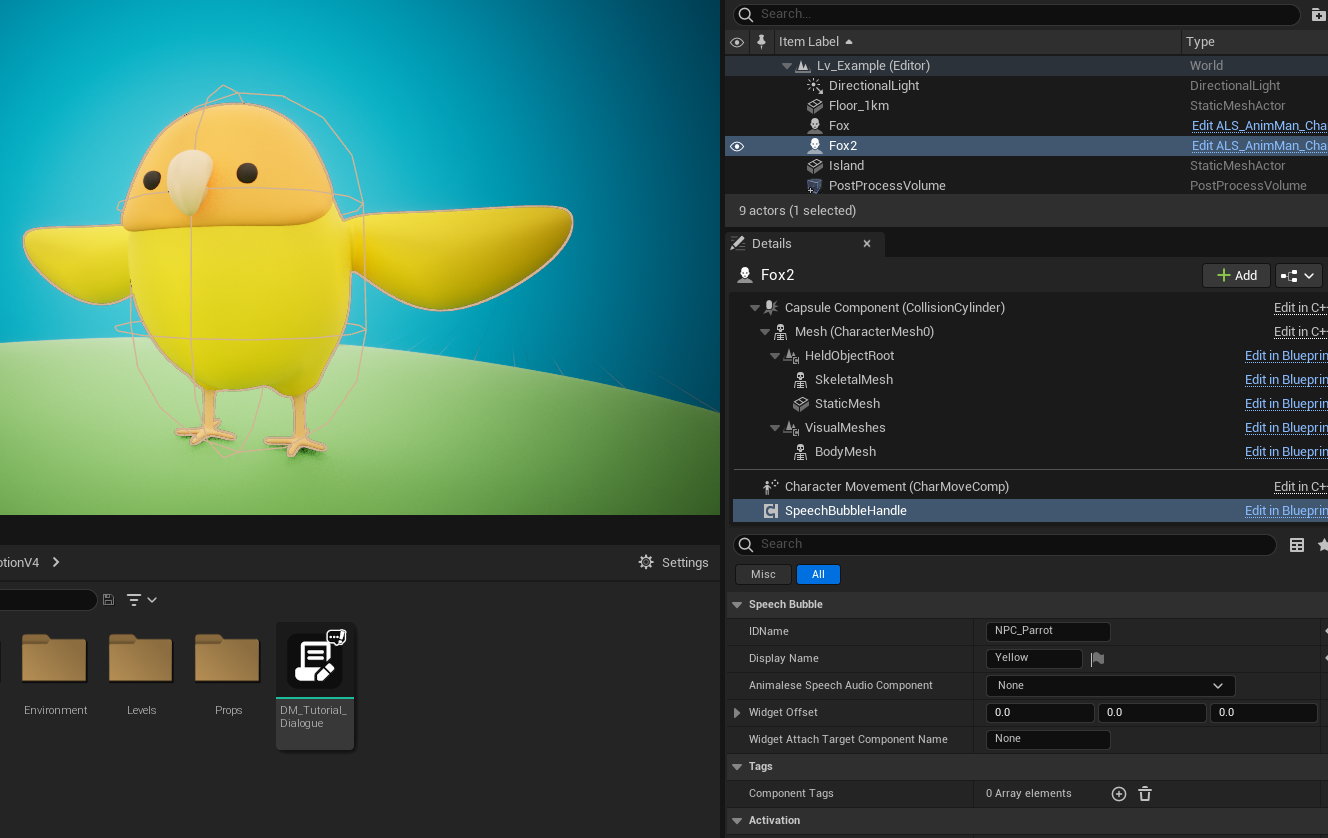
Repeat the process to the all the characters that you want to use as participants on your dialogues.
In practice, an actor can have multiple Speech Bubble Handle Components, each with a different IDName. This allows one actor to have multiple dialogue participants. This is useful when you have to make a character with multiple personality or just simply multiple heads (just like medusa). It's advisable to consider these components participating in the dialogue rather than the character actor.
Once we finished adding the dialogue components on the characters in the scene, then let's go back to the dialogue manager we created in this tutorial.
Now, let's specify the participants of the monologue node.
Select the Monologue Node, and see the detail tab and find the Participant property and unfold it, then you will see the Speakers property and Listeners property.

These properties represent characters speaking and characters listening to the dialogue.
To make the characters you want to participate in the dialogue, add an element to the array you want (speakers / listeners) with the IDName as the Participant Name that character's participant components use.
In this tutorial, we will make the fox say this line to the yellow (the bird), so we will add an element to the speakers array with NPC_Fox as participant name, an element to the listeners array with NPC_Parrot as participant name.
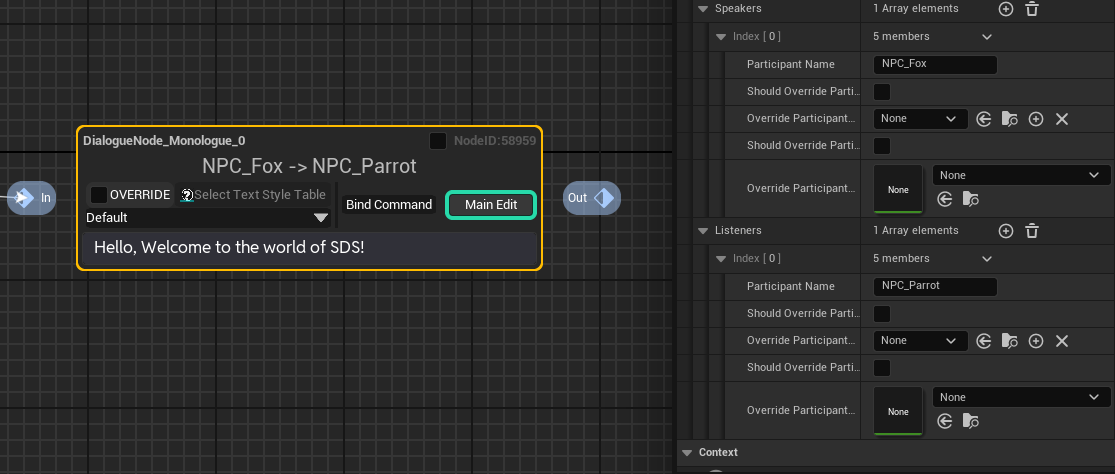
let's run this dialogue again.
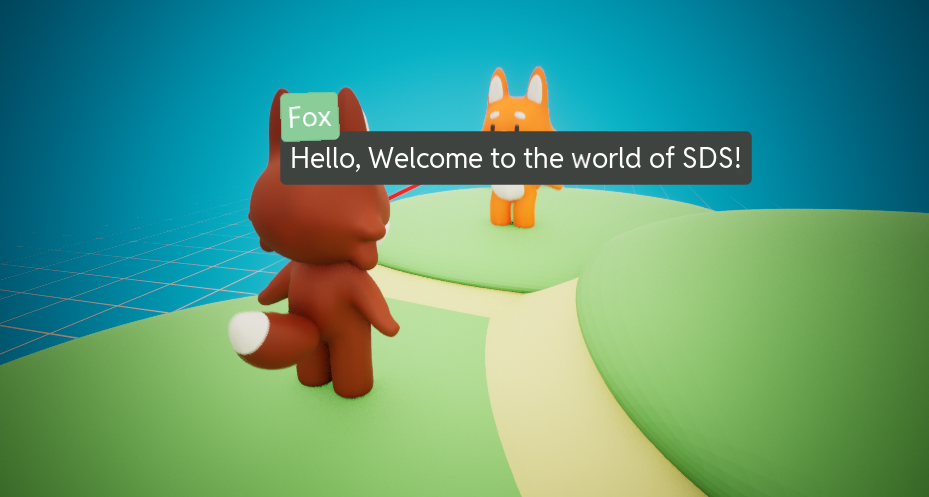
Now you will see the dialogue widget is being displayed well around the fox character, and also will see the name text "Fox" is being displayed and indicating the speaker of the node well.
The dialogue managers will automatically grab the references of the participant components when the dialogues is played, and use the reference of the participant component on displaying such texts or informations.
At this point, please note that the name of the character speaking the dialogue is Fox, the Display Name of the Speech Bubble Handle Component with the NPC_Fox IDName is displayed.
You can set multiple characters (participant component) with an identical Display name. This is useful when you have to set multiple characters have names like Enemy, ??? or etc.
Still, each character will have their own IDName, you can control it one-by-one by its IDName.
But IDName can be shared by multiple characters, and this is used for some unique purposes. refer to the ... document to see the advanced usages.
When the dialogue manager finds multiple characters with same IDName, then it will ignore all the other components and use the first one that it iterated through.
Fixing Some Default Visual Issue
But well, the widget seems being rendered way too low from the character. let's fix it.
Go to the participant component of the character, and change the widget offset value. In this tutorial, we will set the z value of it to 100.
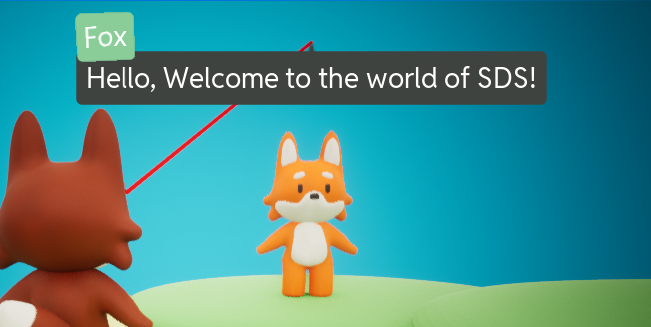
Then you can see that the widget is being rendered a bit higher then before.
Now let's change the location of the notch of the speech bubble a bit.
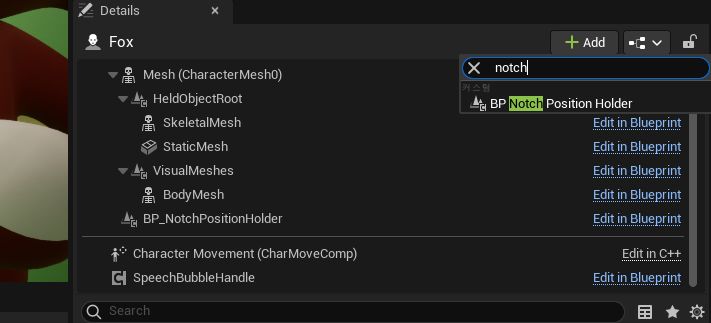
Attach BP Notch Position Holder Component to the character.
And set the Target Handle Component IDName property to have the IDName of the participant component we want, and adjust its location a little bit.
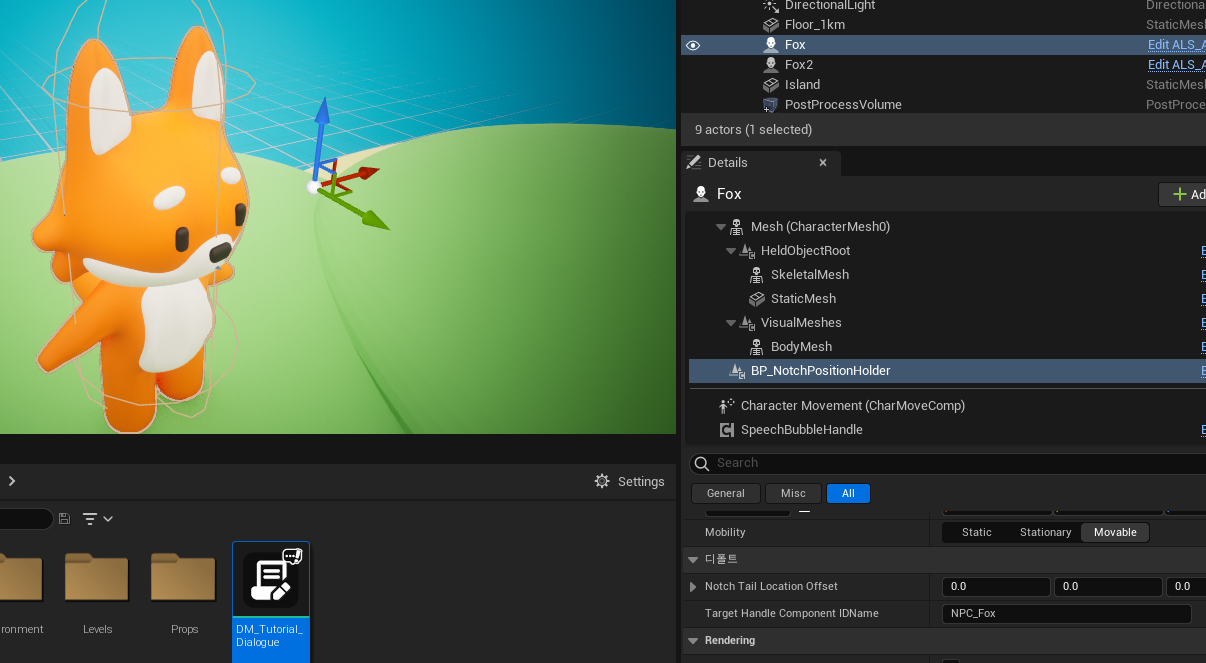
Then you will see the notch's tail is now being displayed on the location of the component!
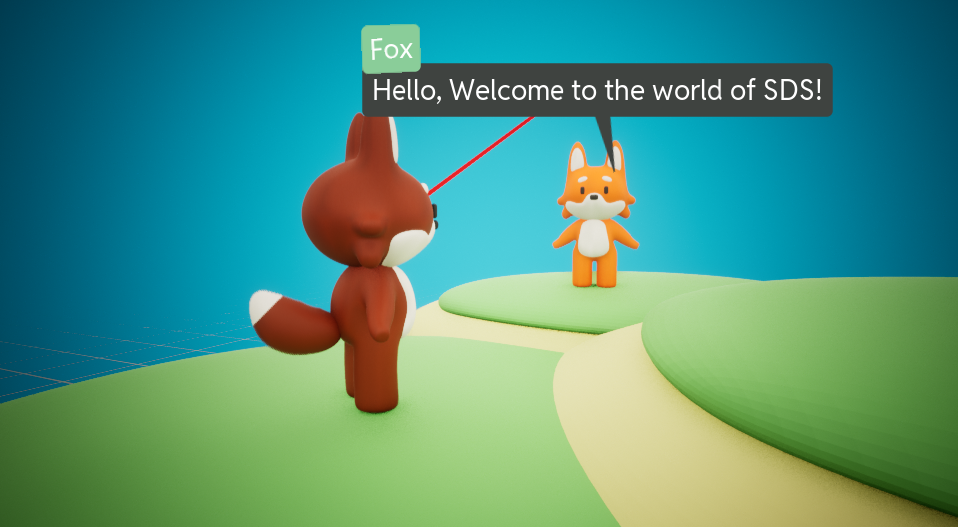
and Finally, Let's hide that debug red line.
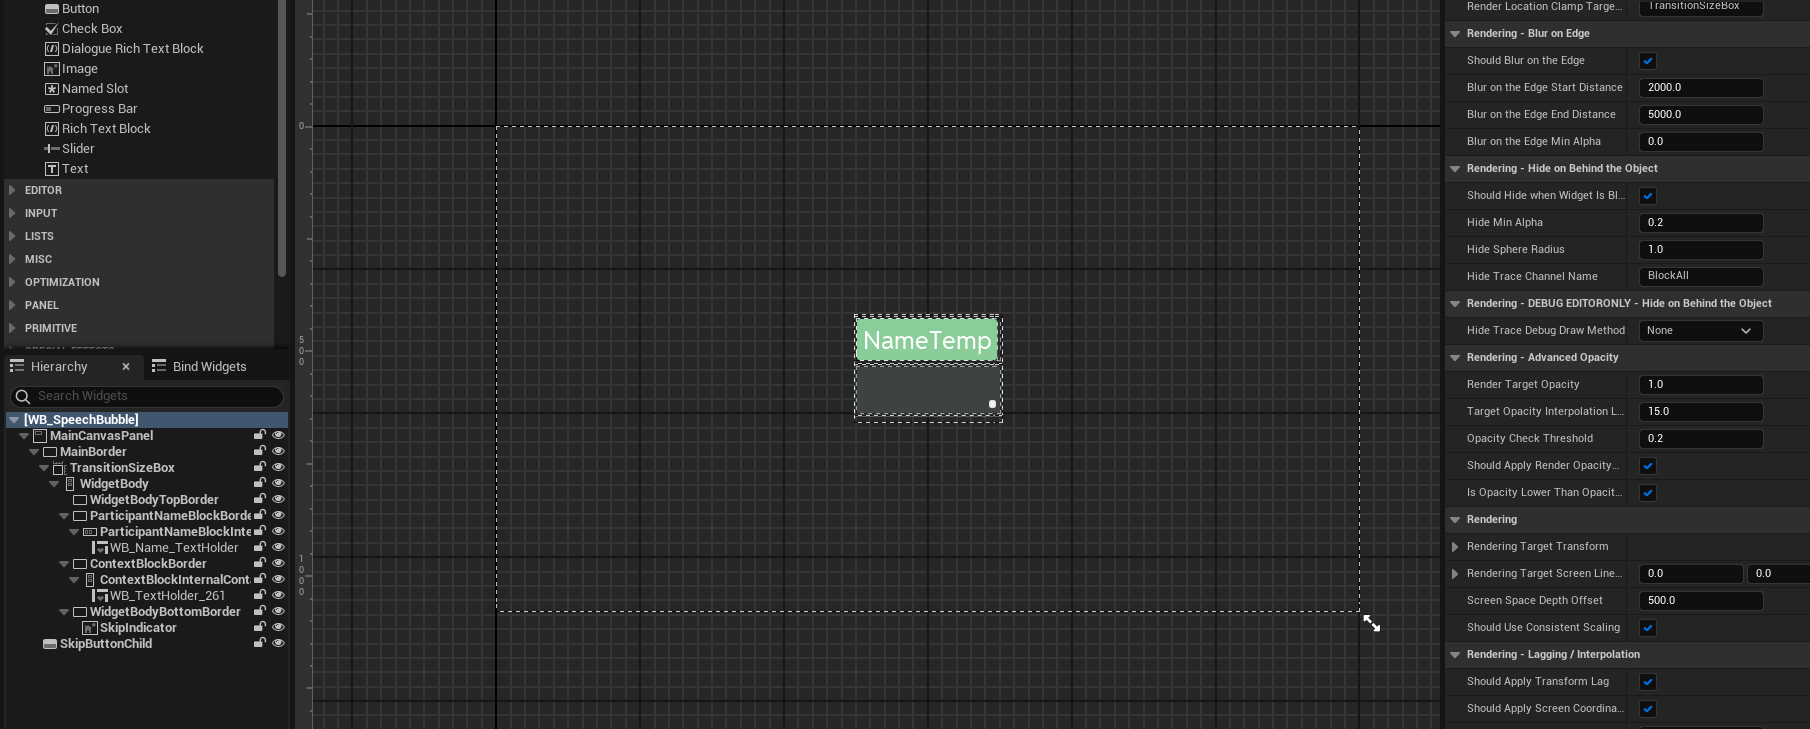
Go to the WB_SpeechBubble asset on the content browser, and open it.
If you have difficulty on finding the asset, make sure you made the plugin's asset visible on the content browser. Follow the final step of installation and setting up to do so.
You can either access it via browse button on the Start Dialogue funtion's Widget Class.
Click the root row on the hierarchy tab on the editor then you will see the properties related to the widget is displayed on the detail tab.
At there, search Hide Trace Debug Draw Method and change it to None.
If you run it again, you will see the red line is gone.
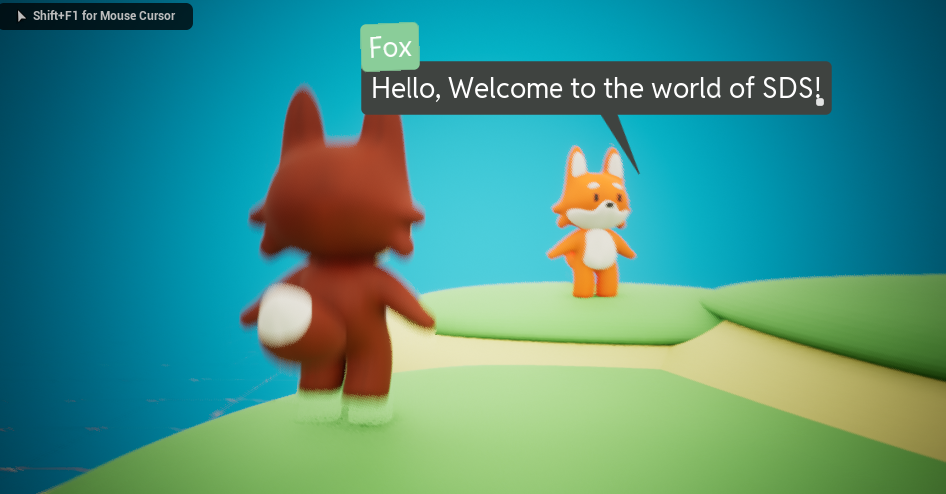
Congratulations! You've just taken your first step into the world of creating dialogues.
However, there's still a lot of cool, easy, and powerful features to show you.
The remaining tutorials are structured in the order that makes it easiest to learn the plugin, so don't stop here and try the next tutorial to learn more about the plugin's capabilities.