Trying Dialogue Events
Dialogue events are blueprint logics that can be invoked within a dialogue. From simple cosmetic logic to deep game-related logic, you can freely write and use the logic you need. In this document, we'll learn how to create and use such dialogue events.
Creating Dialogue Events
To use dialogue events, we need to create one first. Click on the Create Custom Event button in the toolbar of the Dialogue Manager editor.
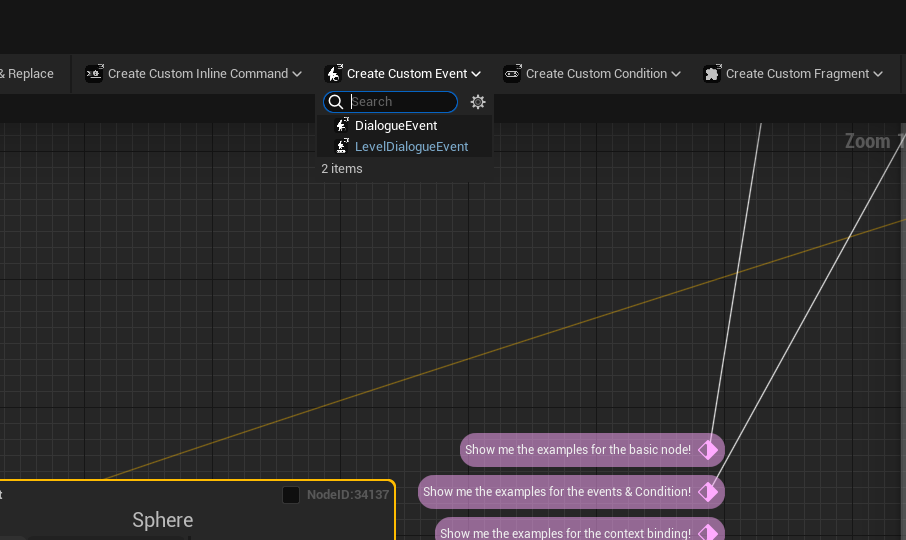
Now, choose the type of event you want from the options presented.
| Type | Description |
|---|---|
| Dialogue Event | often called as Instanced Dialogue Event is a type of Dialogue Event that can be instanced on the dialogue nodes and due to that only available to the specific dialogue manager |
| Level Dialogue Event | A type of Dialogue Event that derived from the AActor class and can be placed on a level. and due to this, it can be easily shared between multiple dialogue managers. |
In this example, let's choose Instanced Event to create an instance dialogue event.
And to make it easy to find, We'll rename it to "DE_Tutorial"
In the plugin, Dialogue Events usally use DE_ as their prefix.
After creating the dialogue event asset, writing the event logic for that asset begins by overriding the following function:
For C++ derived classes:
virtual void ReceiveEventTrigger(class UDialogueWidgetBase* Widget, const TMap<FName, UActorComponent*>& ConversationParticipants);
For Blueprint assets:
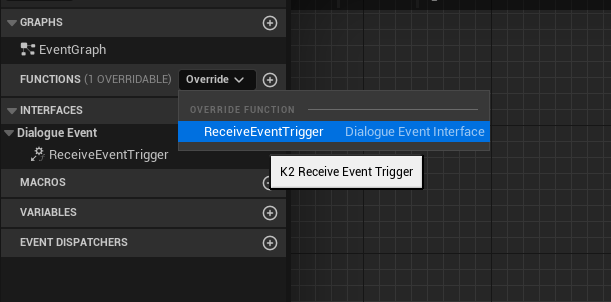
Insert the desired event logic here.
As we have created a Blueprint asset, let's follow the second method.
For a simple example, let's create logic to play a niagara effect at the location of a participant actor when triggered.
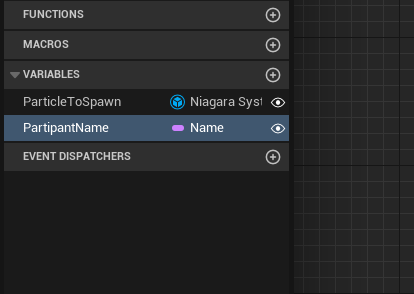
To do so, we'll add properties on the dialogue event that will be used at specifying the particle asset and participant's ID. So let's add a Niagara System property and name property on the event and make these properties public to display them in the Dialogue Manager editor.
And attach this logic to the overrided function ReceiveEventTrigger like this :

We find the reference to the dialogue handle component for the provided participant id, get the owner actor of the component and used the actor's transform on spawning the particle on the world.
Conversation Participants map has the reference of the dialogue handle components (Usually it will be SpeechBubbleHandleComponent Since the basic dialogue handle component is superseded by this class.) on the dialogue and it is paired with its matching Participant Name (IDName) on this dialogue.
For example, if you use a dialogue participant that has NPC_1 as its IDName, and include the character in the dialogue, then if you feed the NPC_1 on the find function and you will get the reference to the handle component of NPC_1 IDName.
Now, it's time to attach the created event to a node in the manager.
Click on the node, add a new element to the Events property in the Events section. Let's name the event key "HappyParticle."

Now, select our event in the Instanced Events section.
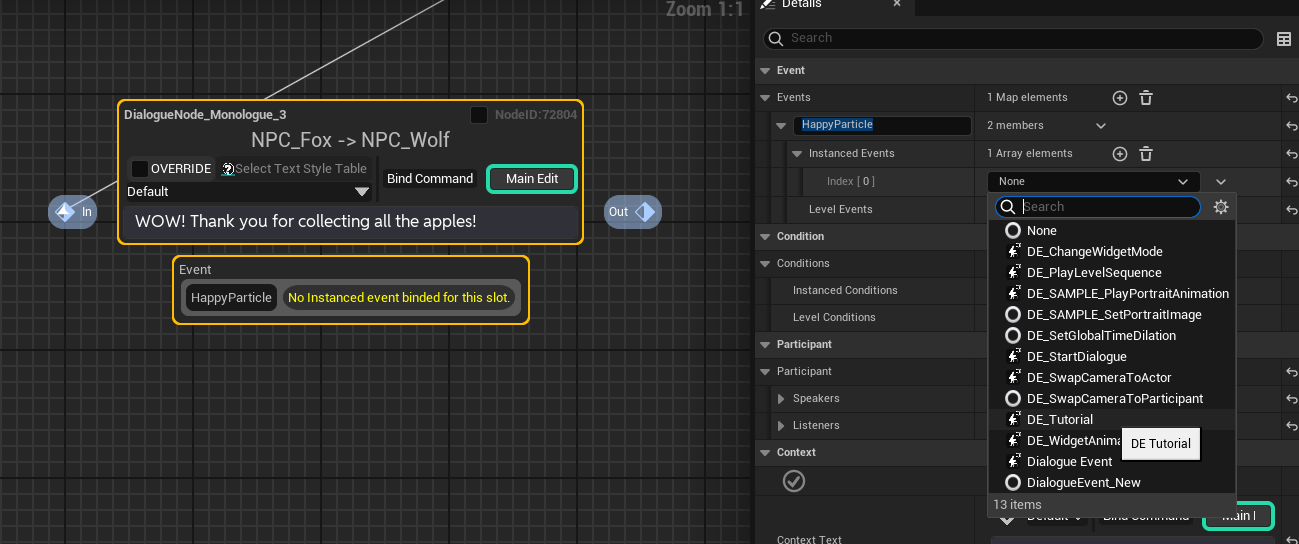
You can see that an event instance is attached to the node instance in this way. Now, set the desired particle and participant name for this event.

Triggering Dialogue Events with a Dialogue Inline Command
But we're not done yet. Dialogue nodes do not automatically call the events attached to them.
To call the attached event, we need some method. There are various ways to do this: you can use fragments or inline commands to call the event, or design one event to call another. Alternatively, you can access the event externally (another actor receiving the widget reference and accessing the node) or modify the node's operation to make the event run automatically (or using Execute Node provided by the plugin).
Here, let's explore the most common and frequently used method: using an inline command. We'll use the inline command to call the event when the text reaches a specific point. This method is accomplished using the DI_Event command provided by the plugin.
Don't panic! We are going to look into the Dialogue Inline Command in the next tutorial. Just for now, follow the step, and come back to this document when you finish learning the Dialogue Inline Command.
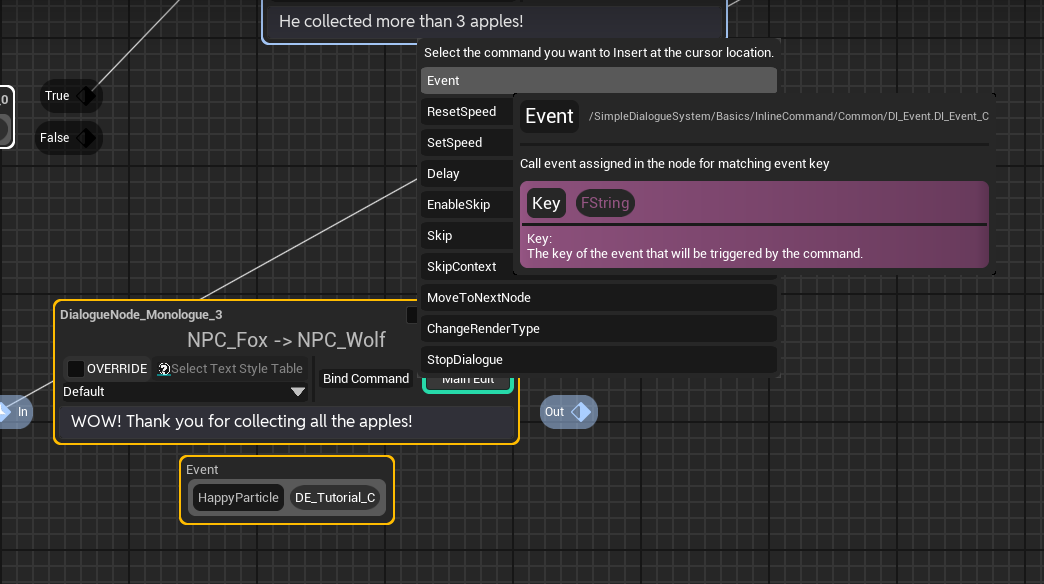
Click on the desired point in the text where you want to call the event, press the Bind Command button, and select Event.
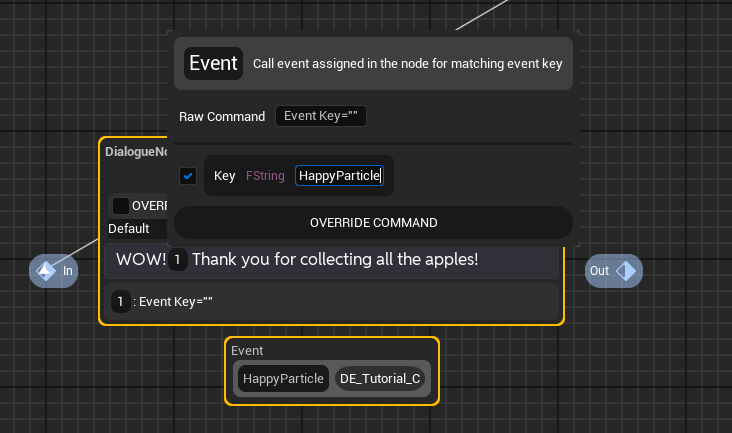
Once the inline command is inserted, click on it and check the check box on the "Key" row, enter the event key we attached to this node, HappyParticle.
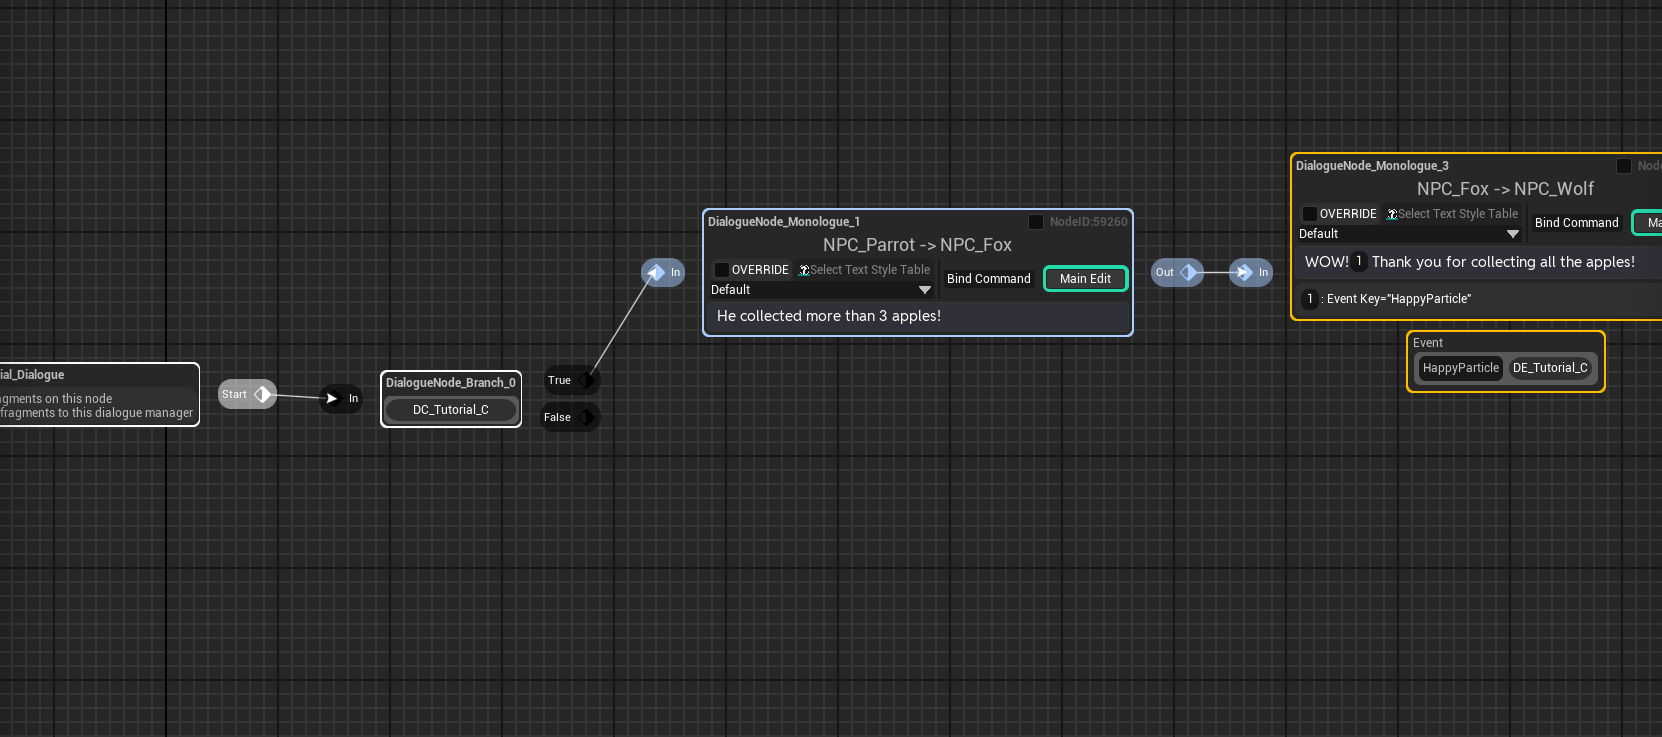
So, This is the final result of the Dialogue Manager. I recycled the Dialogue Manager we made on the previous tutorial to make it sound more convincing.
Let's test it on the PIE.
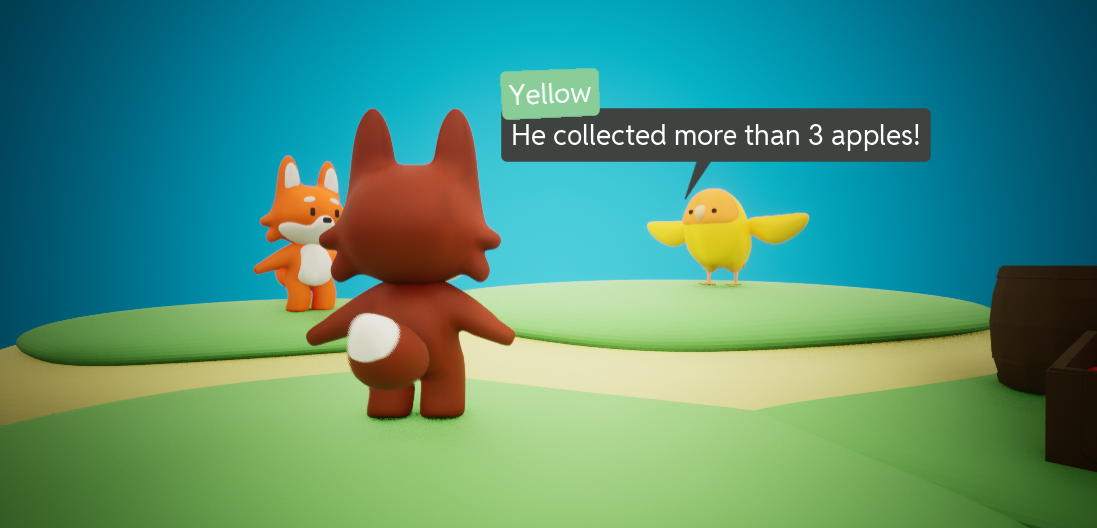
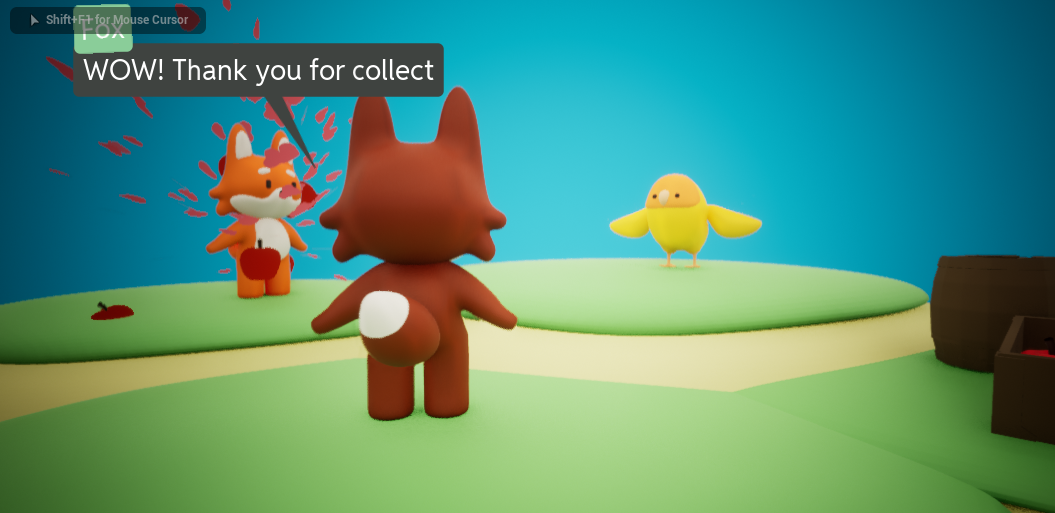
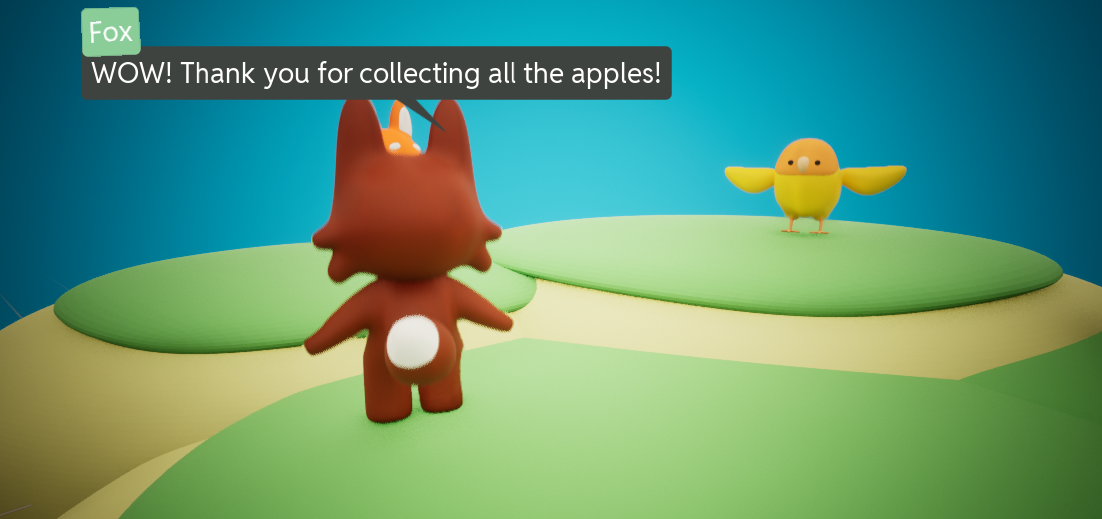
You note that the event is properly triggered when the text update meets the part of the text with our event runs.
Triggering Dialogue Events with a Execute Node
The most convienient way to trigger dialogue events is using the Execute node.
Find and place a Execute Node on the graph on the new node context menu of the graph.
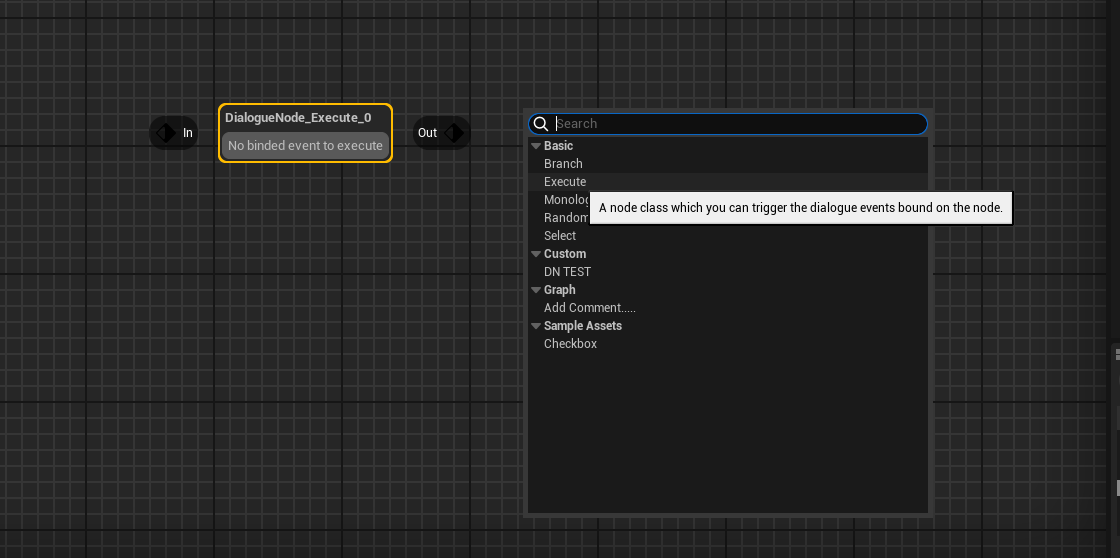
Click the Execute Node and attach the events you want to trigger.
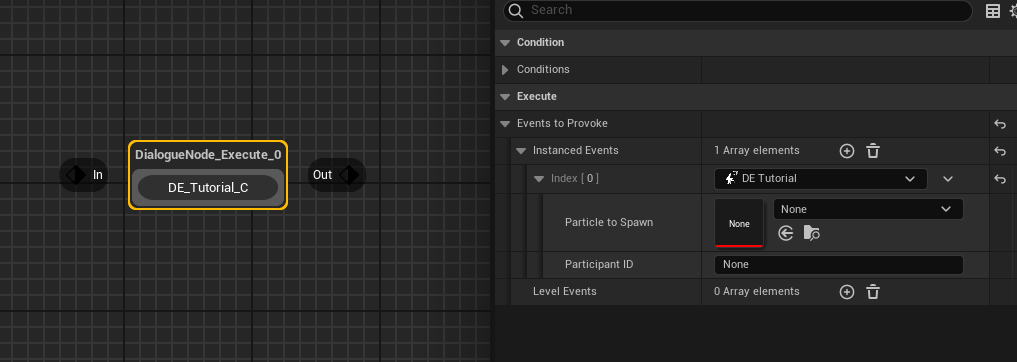
then if the dialogue meets this execute node on the playback, It will trigger the events on the node automatically.
It will execute the events by the order of the elements on the array.